10 Tips on how to Create an Eye-catching Dessert Table
July 2, 2020
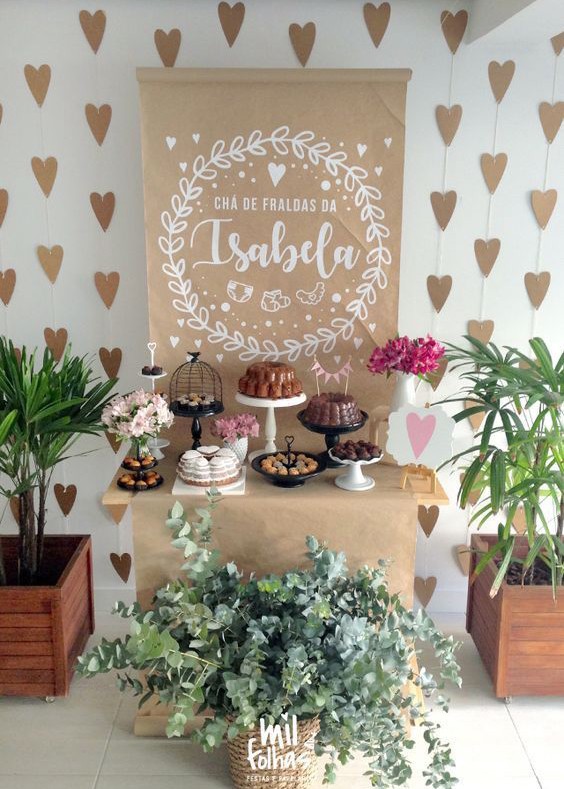
Olive Studio takes great pride in creating an eye-catching dessert table. But it is not for everyone. Some people are completely over-whelmed by the idea of creating both something that dazzles your eyes and delights your taste-buds. From huge dessert table spreads, to simple and narrowed down theme's we have you covered. Check out our 10 tips on how to create a beautiful and delicious dessert table.
1. Choose a Theme: How to create a dessert table
Your event design should have a theme. If it is not overly cohesive, it should at least have a colour scheme. This will be your dessert table starting point. Once your theme is decided upon, stick with it. Pick no more than 5 colours and jot down your favourite "must have" elements that you definitely want to showcase.
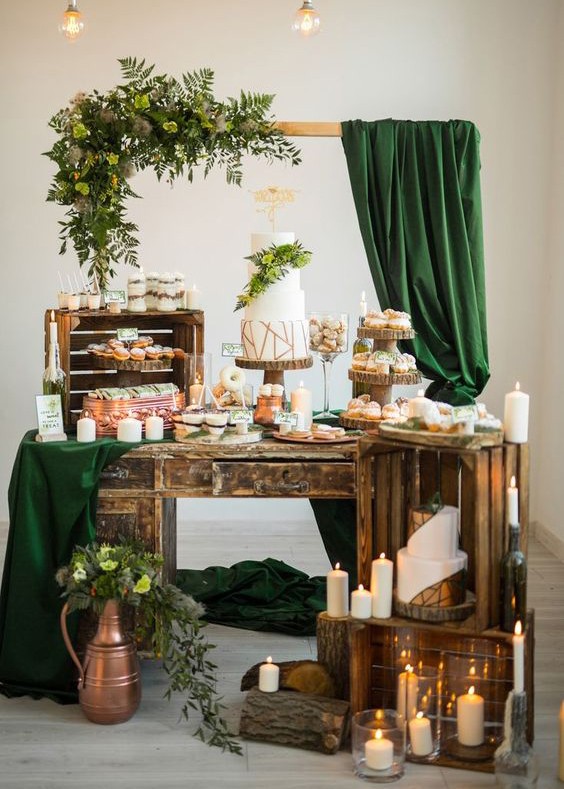
For example: Let's say you are having a 1st birthday party backyard bbq for your son. The theme is "Woodland." You have chosen colours in pale tones: beige, sky blue, white, sage green and pale yellow. Your main "must have" elements is a large cake for guests and a mini cake for your son.
2. Determine your guest count + serving quantities
Depending on how many guests you expect to come to your event, you can now assess how many desserts you will need. Remember not everyone will eat a dessert, but some might have more than 1. You must also consider if your guests are eating a meal beforehand or not. In our example party, they are having a lunch bbq. In this case I would plan on each guest having 1 slice of cake, and 2 other dessert servings. Remember a serving is 1 cookie, or 1 brownie, or 1 mini-cup of mousse. This isn't a dinner party serving size.
If a meal will not be served beforehand, and your party is focused on sweet treats, I would plan on each guest having 4-6 servings of dessert. If you want to ensure that no one will miss out, take your final number of servings and add an additional 20%. This will help feed those extra hungry guests and likely give you left-overs instead of empty platters. In this case, you can buy take-away containers and let guests bring some home.
3. How to Create a Dessert Table
Catering a party doesn't have to break the bank, but it certainly can! Entertaining adds up quickly! There are a few cost effective ways to help. The first way is to ask people to bring things. Whether it be for the mains, or for desserts, don't be shy! And don't be shy to ask them to stick to the theme. If you really want to control the menu without being too particular, ask friends to make the easy things like mini cookies, brownies or fruit platters. The second way to help with saving on cost, is to select desserts that don't have a ton of expensive ingredients. Read recipes before going crazy with your menu! If you want to keep it even more cost effective, narrow down your menu to 2-5 desserts and stop!
4. Designing a Dessert Table Display
Taste is obviously a crucial factor when making desserts. They cannot just look pretty. Try to appeal to a wide range of palettes and offer a variety of textures, flavours and colours. If you are serving chocolate, also offer something fruity. Consider a vegan or gluten free option too.
5. Size Matters
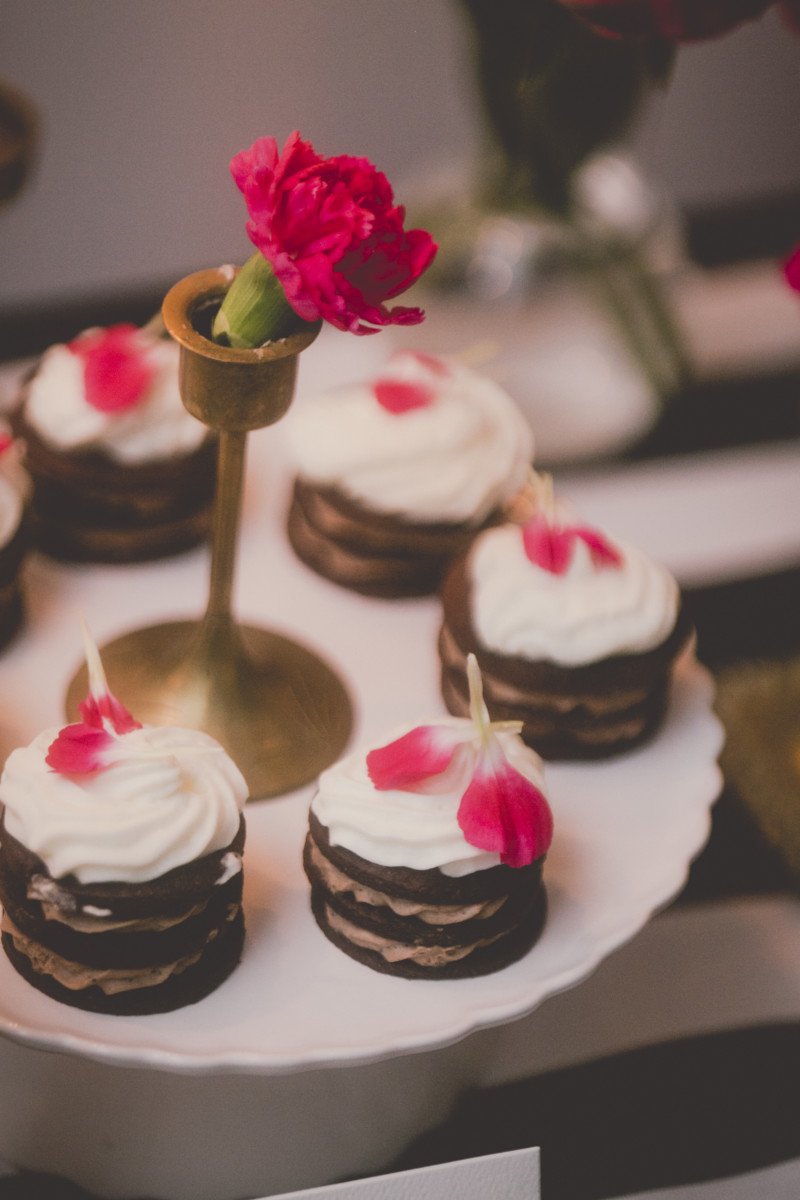
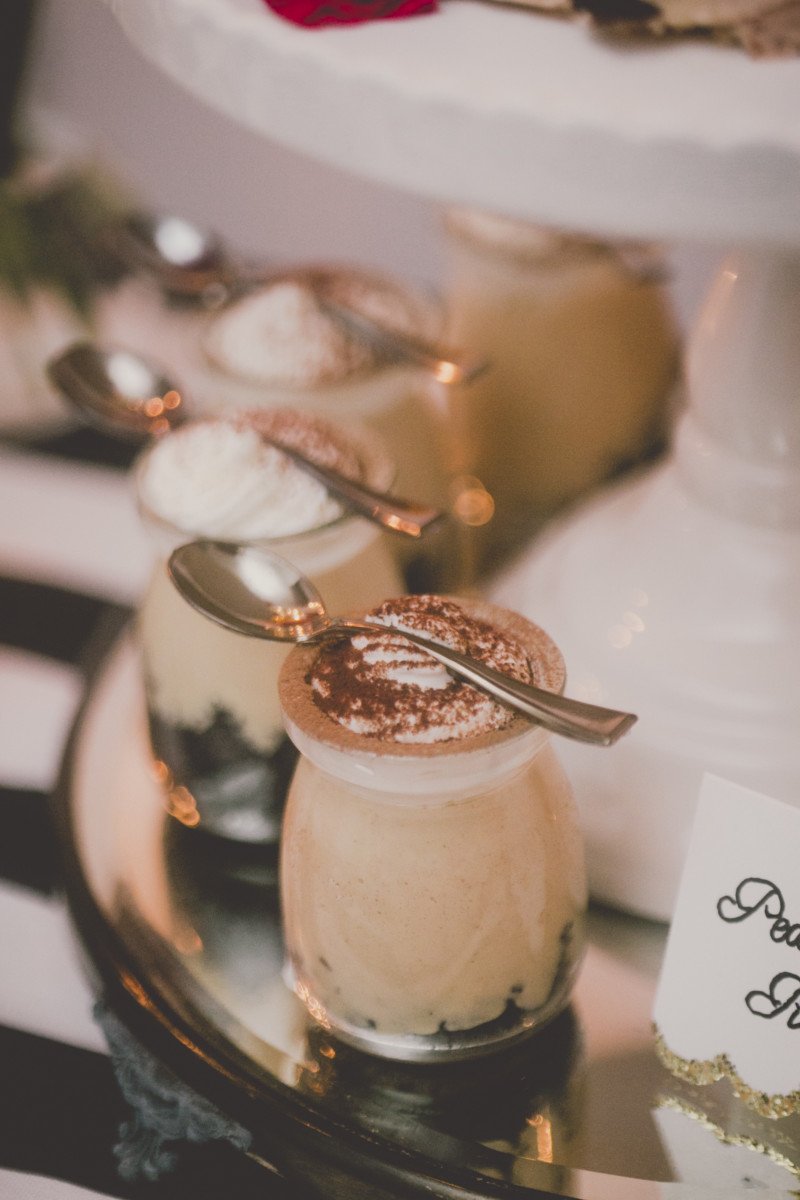
Serving food to a large group of people, doesn't mean you need to break the bank to fill bellies. Slow down consumption by making portions small and bite sized. In the case that someone doesn't like your dessert, it won't hurt so much if they throw it away. And of course, guests can always have more. If you are baking cookies, make them mini. If you are serving mousse or pudding, offer them in shot glasses. This technique also allows you to control your display in a more beautiful way.
6. The Hero
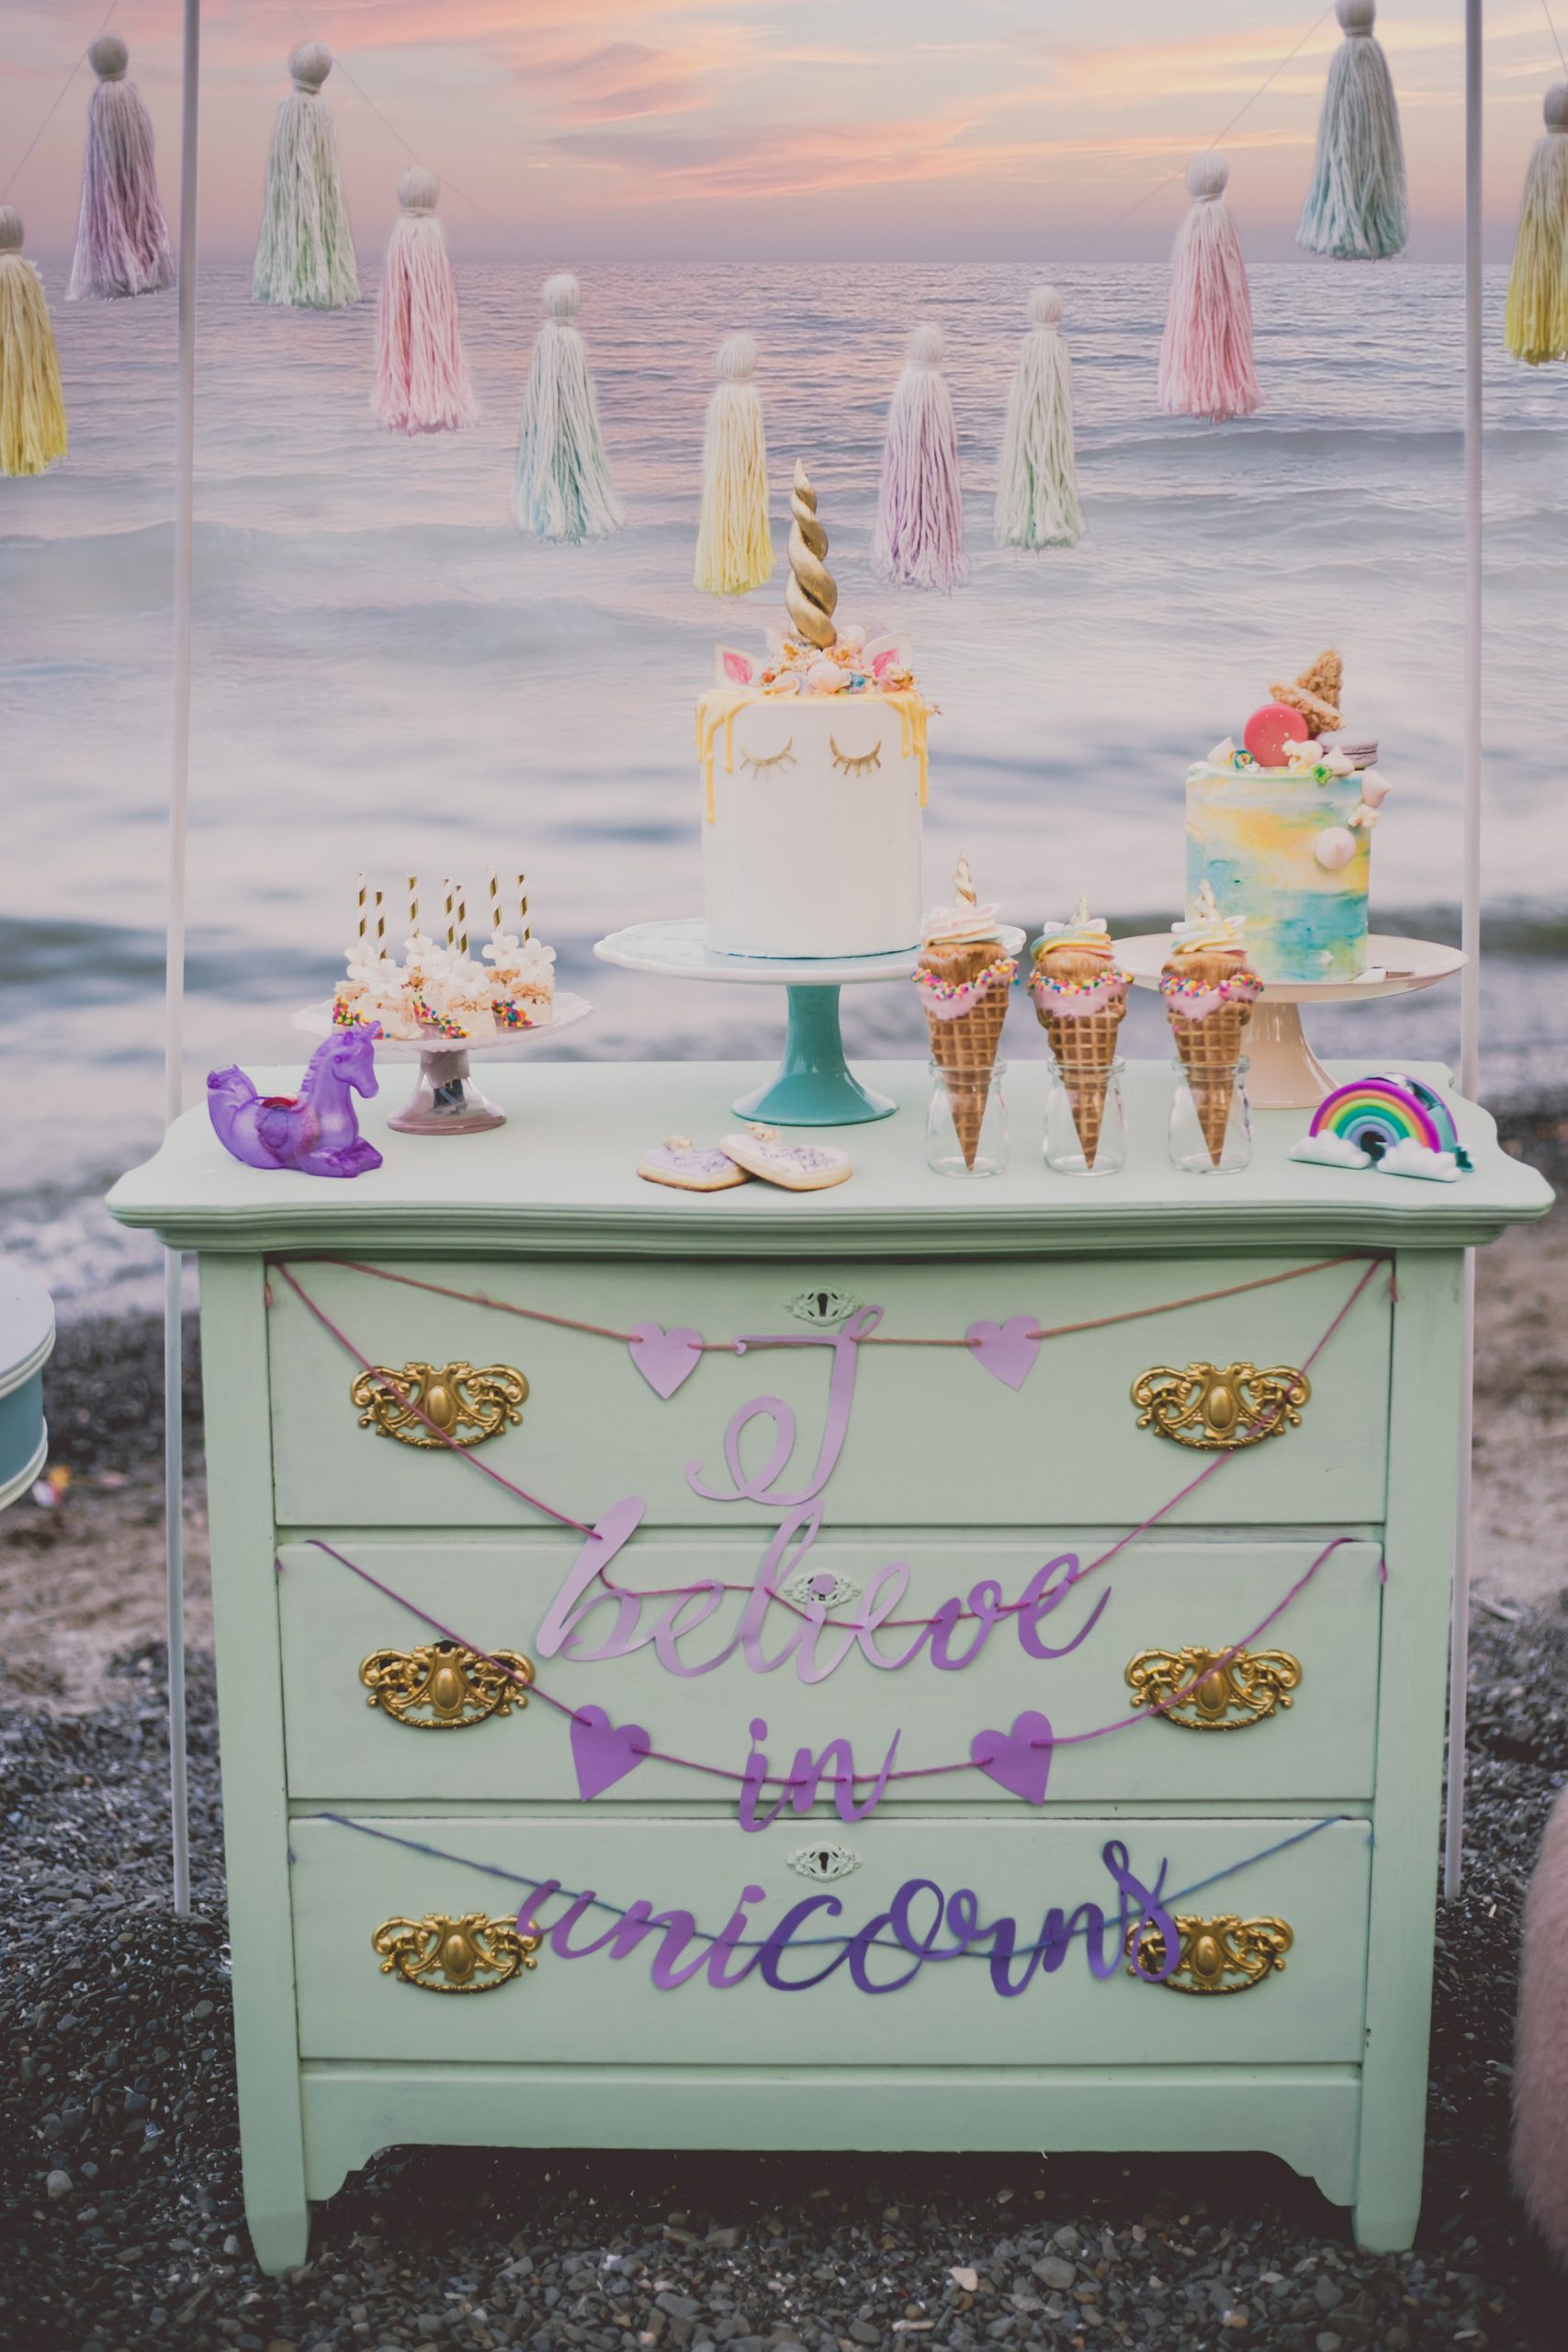
"The hero" is the name we give to the product that is to receive the most attention in advertising or the photography world. The "must have" element that you have thought up is likely your feature dessert. For our example, it is most certainly the birthday cake! Therefore, these two cakes will take center stage in our display.
7. The Display
Displaying your desserts is where many people get overwhelmed or just don't even consider making it pretty. Would you be excited to eat at a restaurant if it tasted amazing but just looked like a messy bowl of slop? NO!
Displaying your hard work and efforts to make your food look even more enticing is just as important! When creating a display there are some major factors to consider.
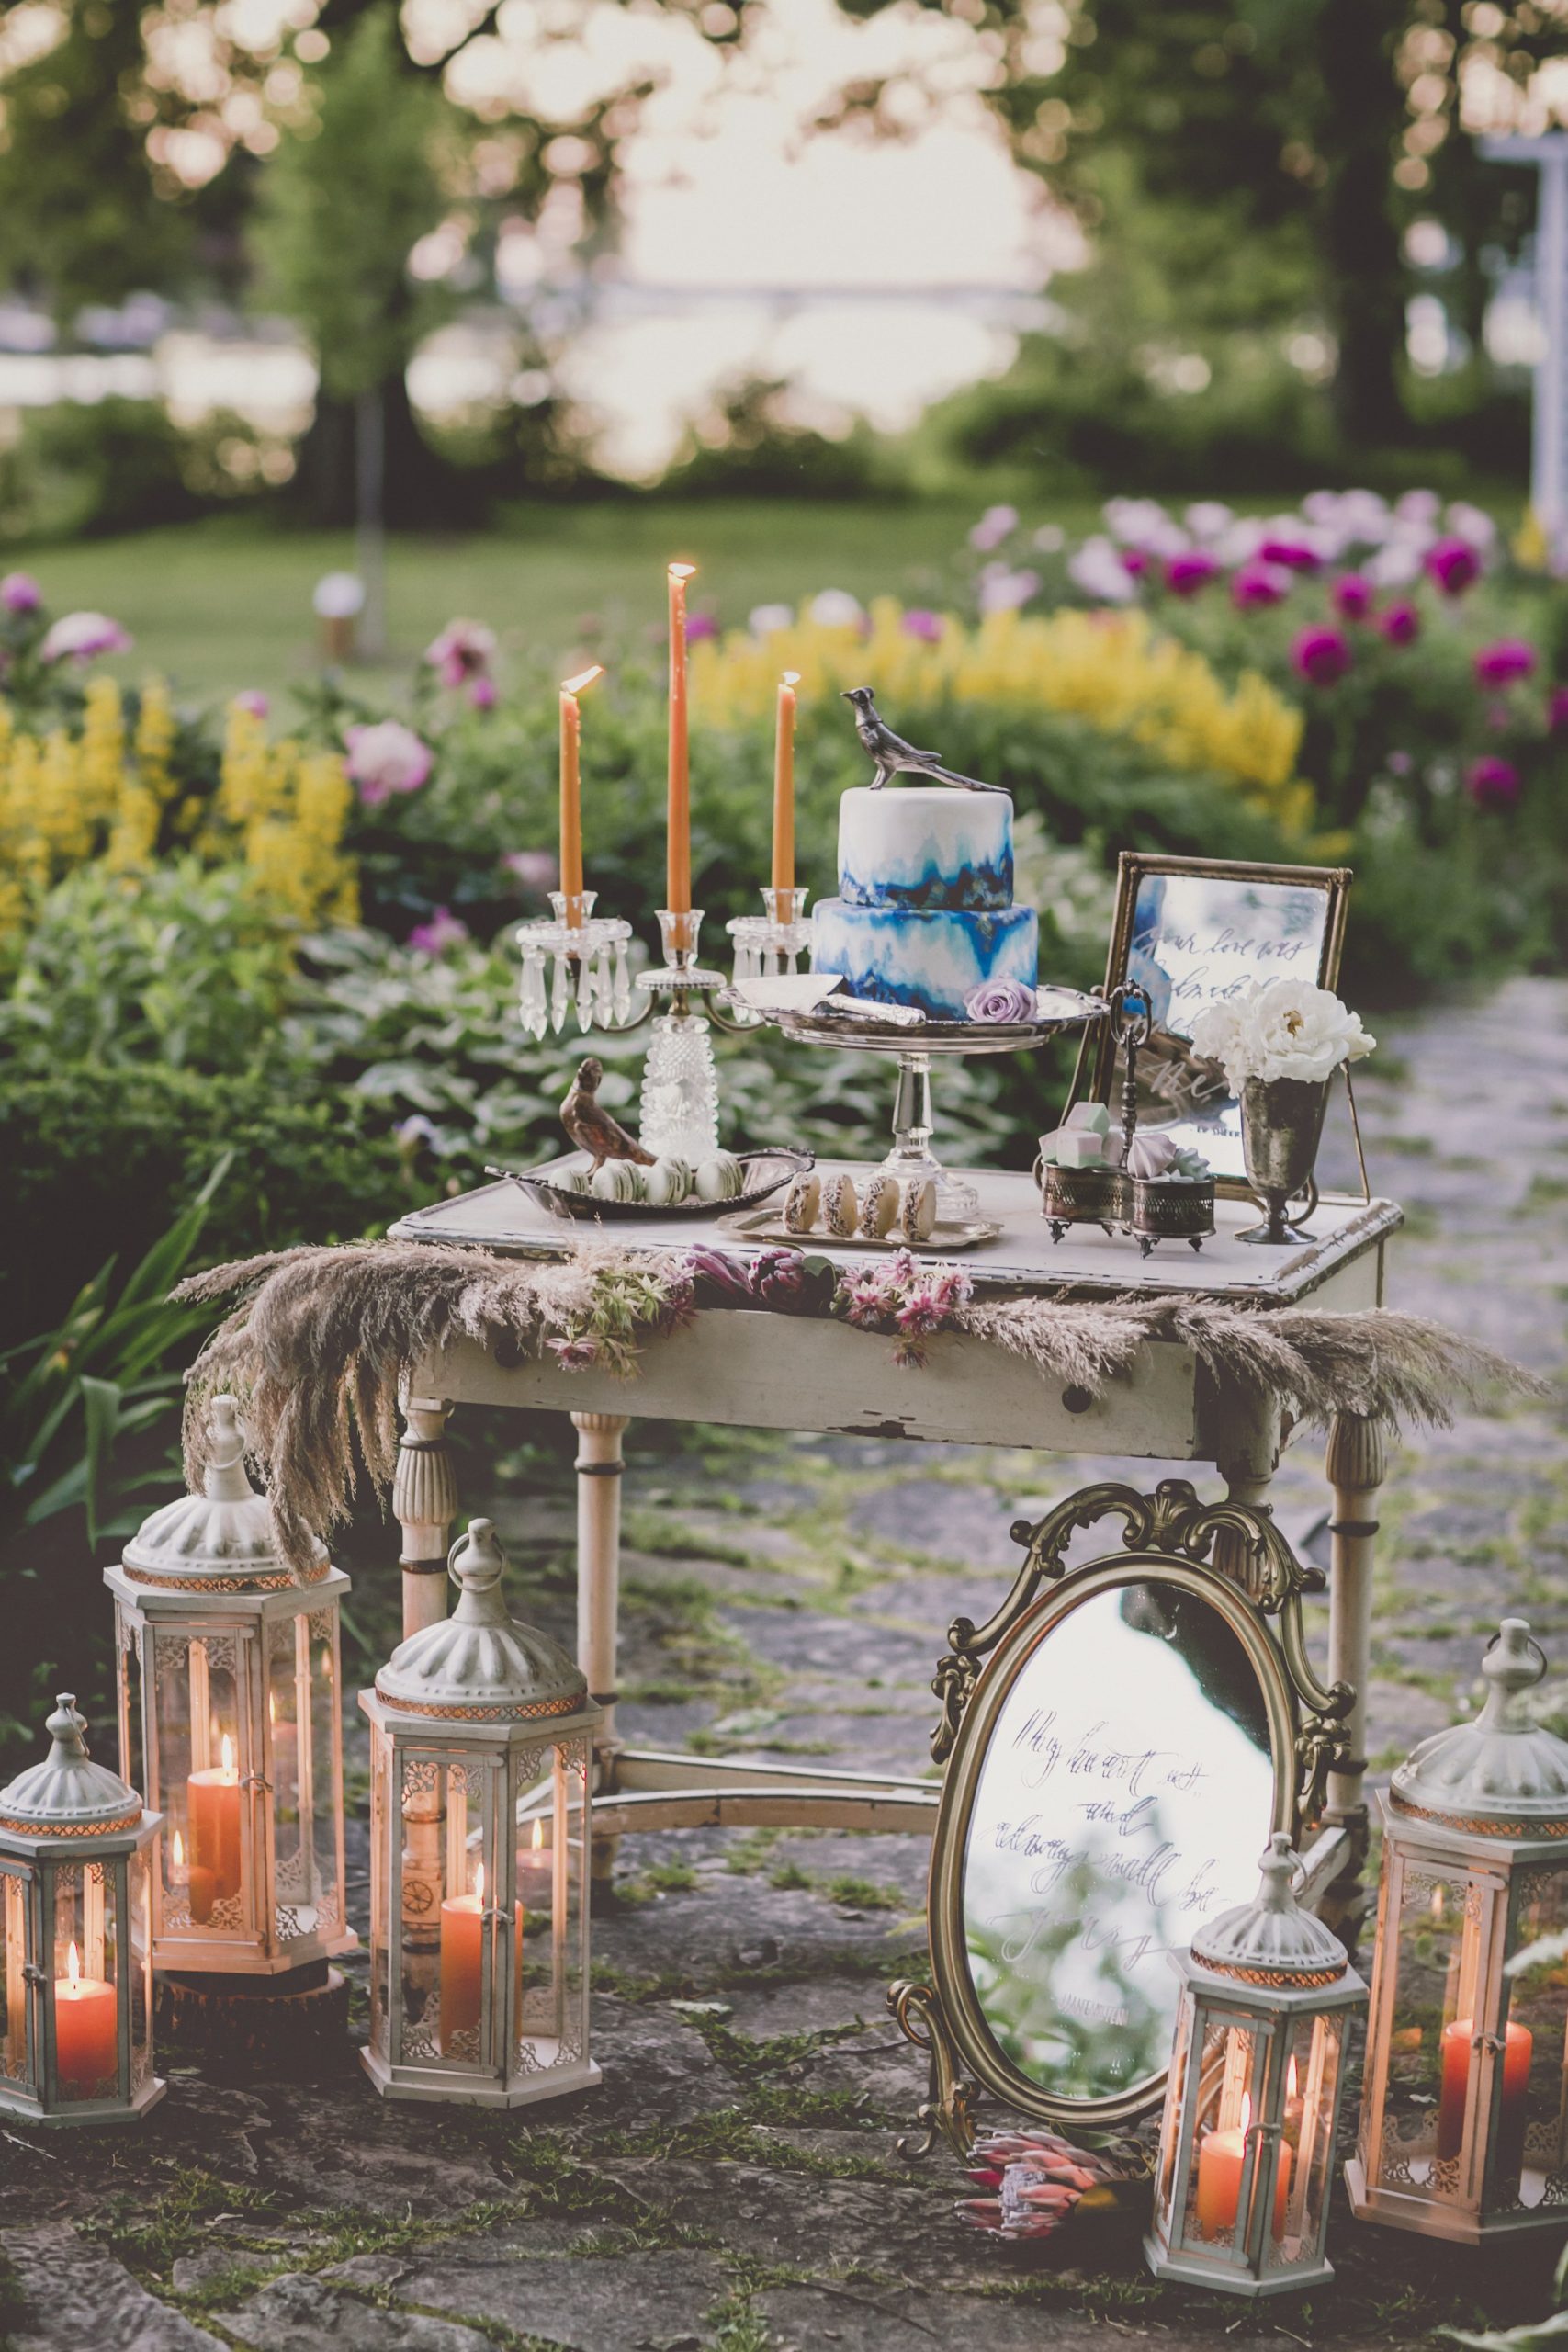
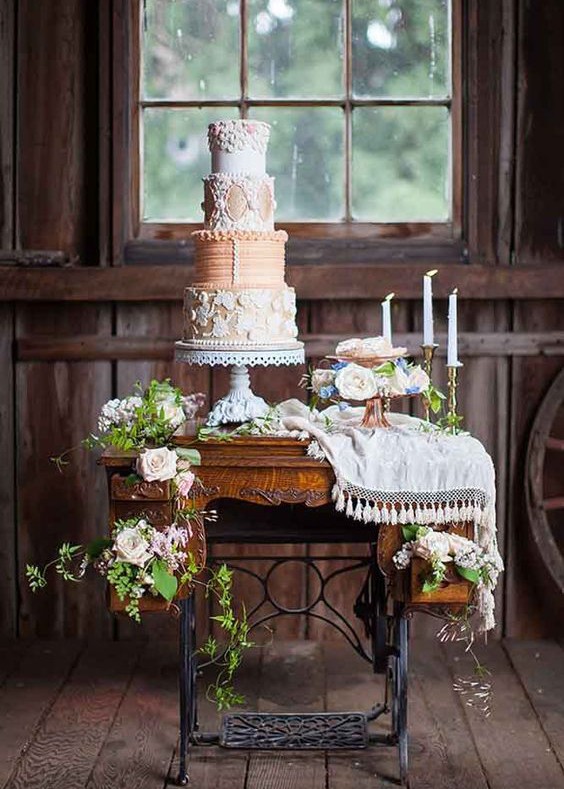
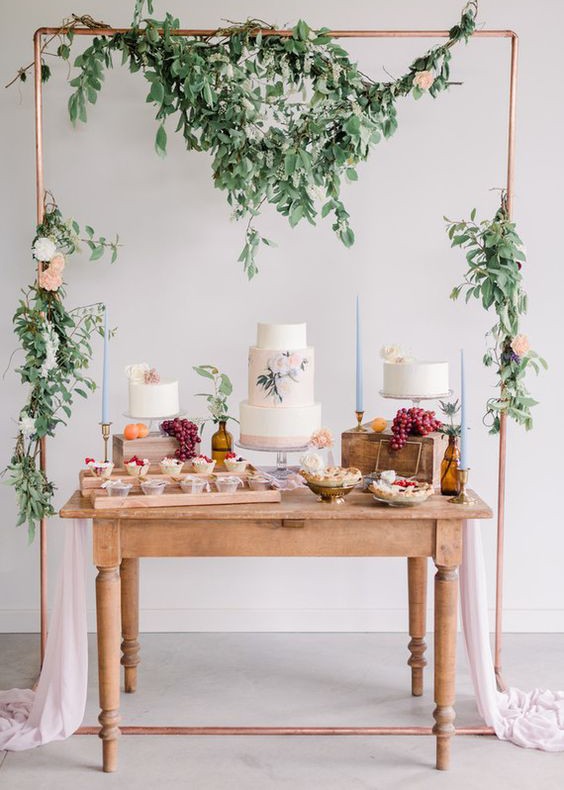
What surface will you use to display your desserts? Will it be a table? a mantle? a bar? a vintage piece of furniture?
Will it be in the elements or in a controlled area? Don't forget to think about the sun potentially melting your desserts.
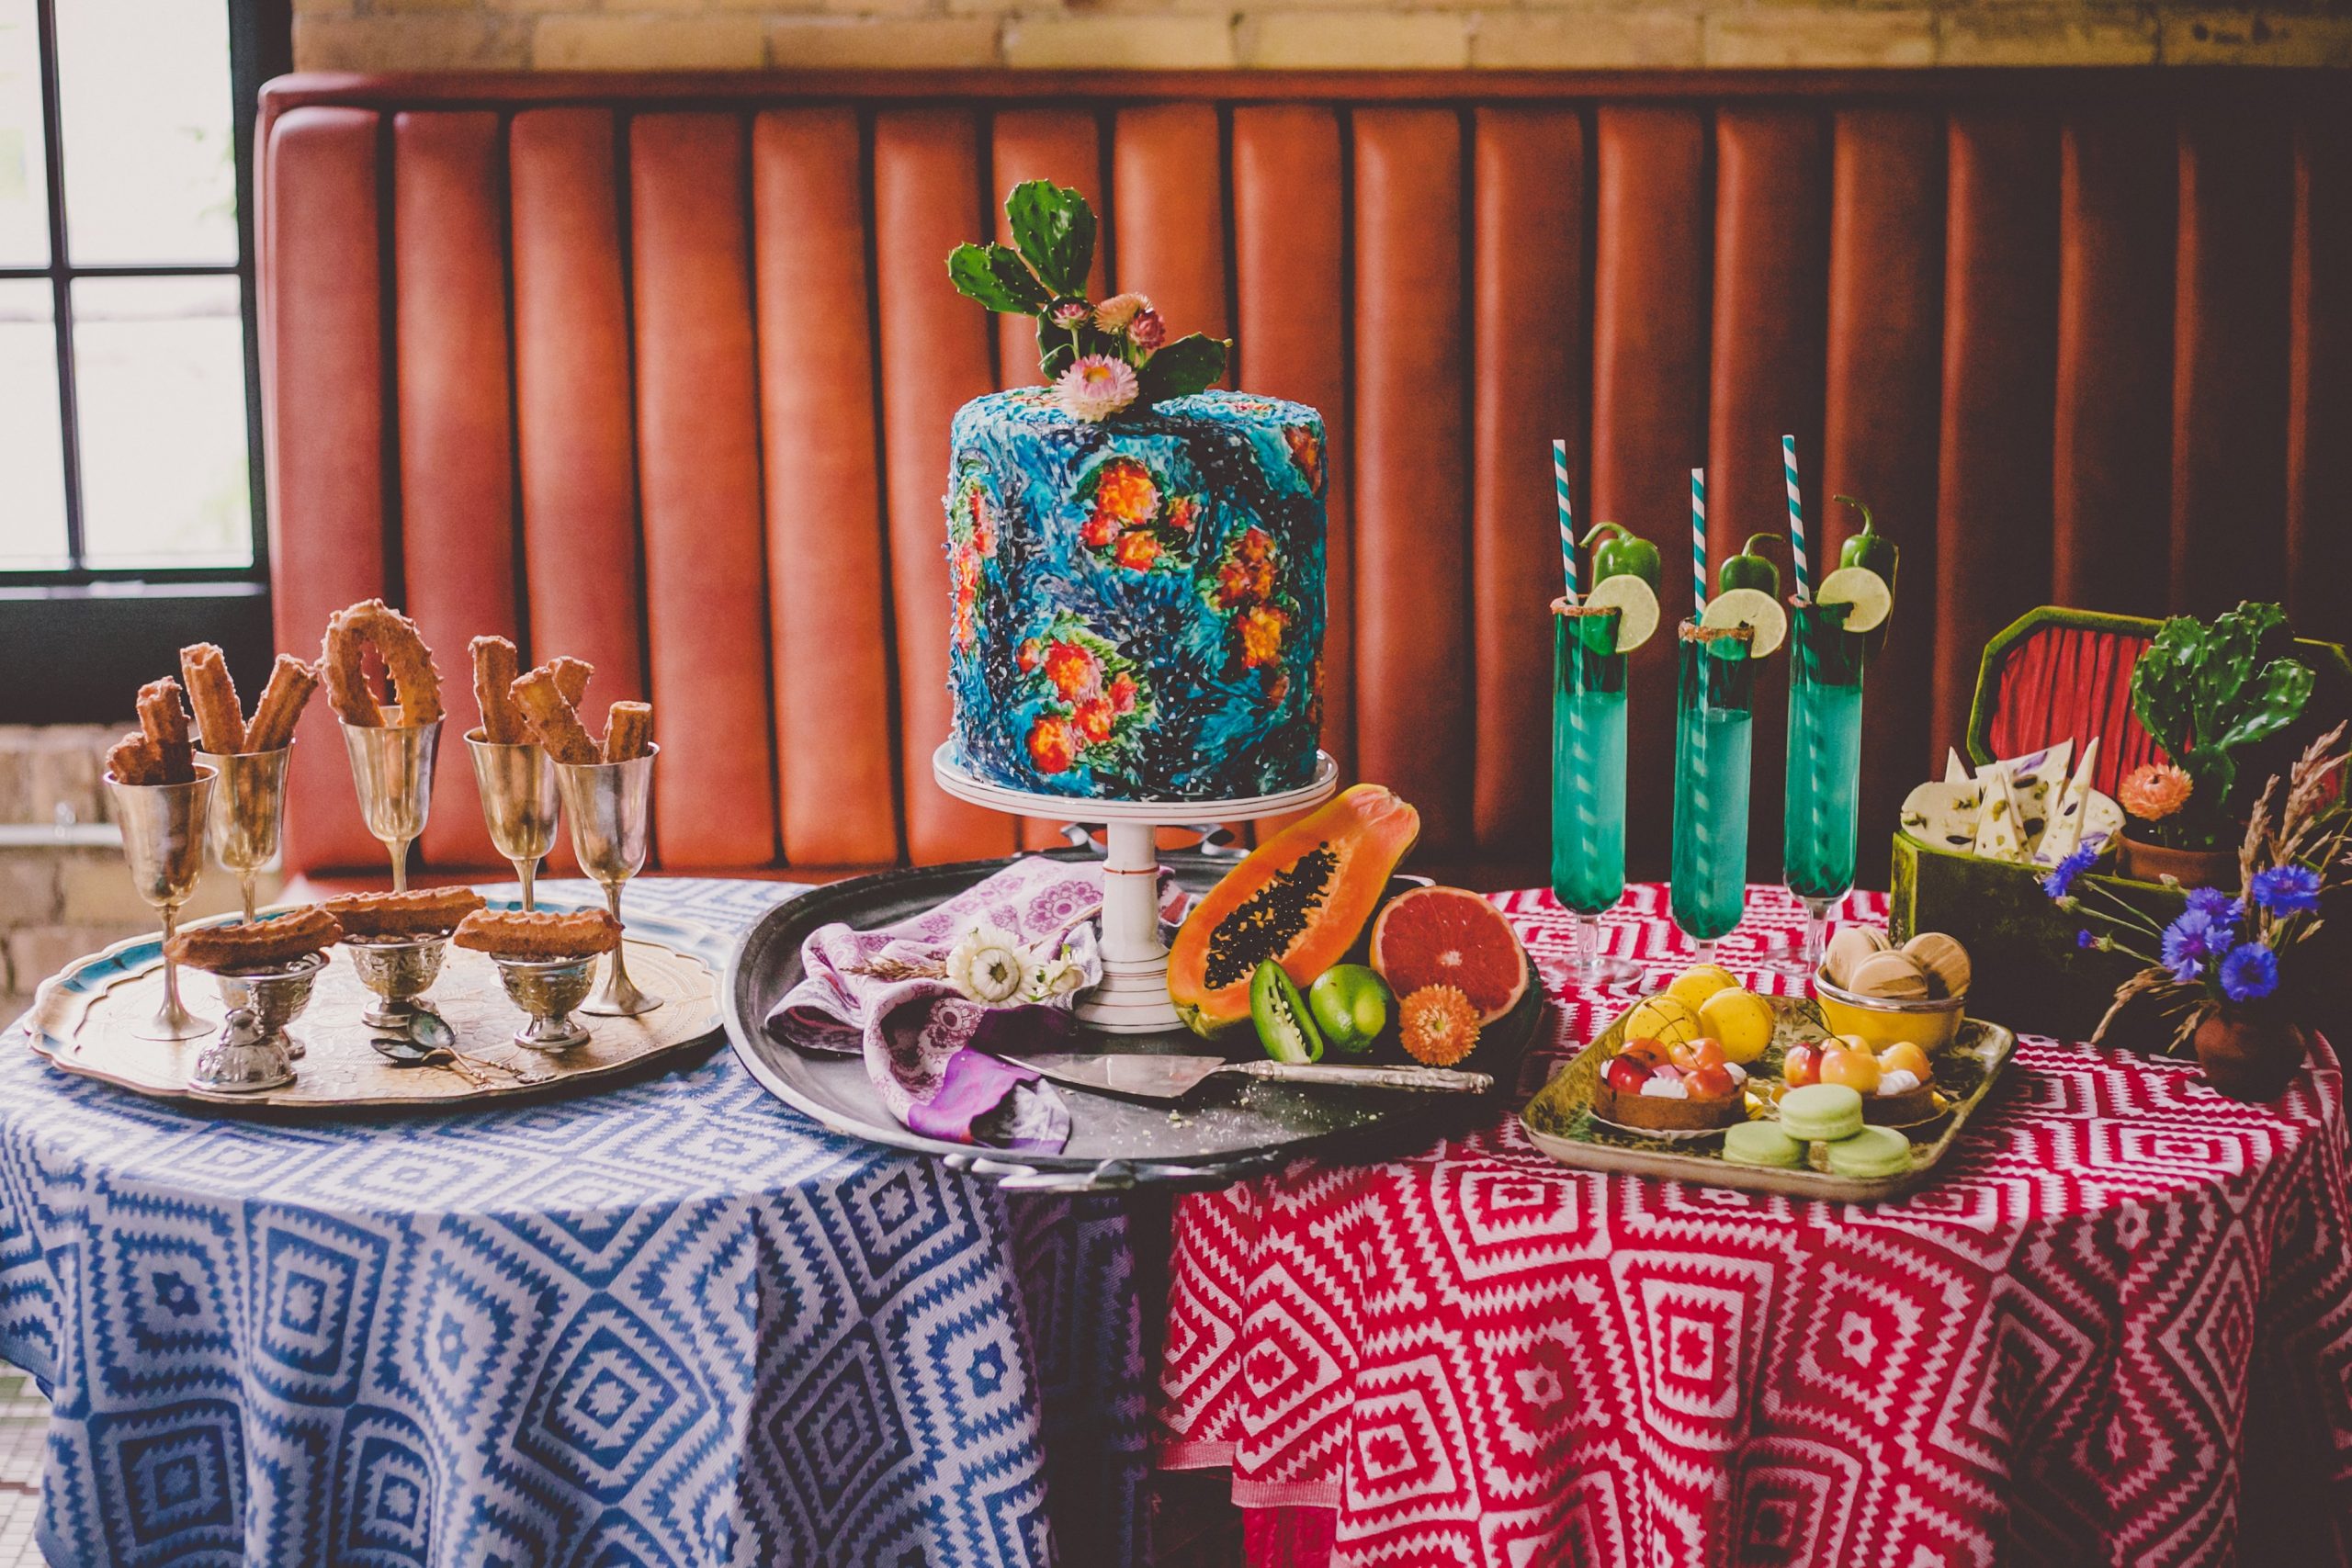
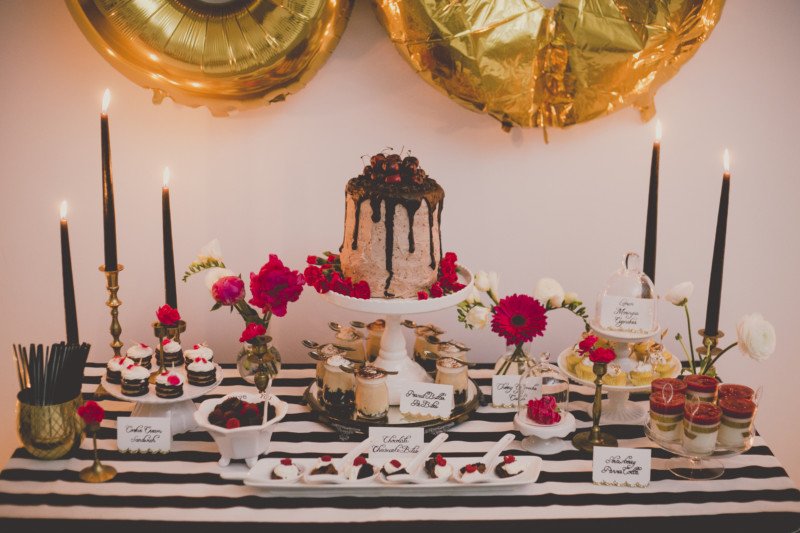
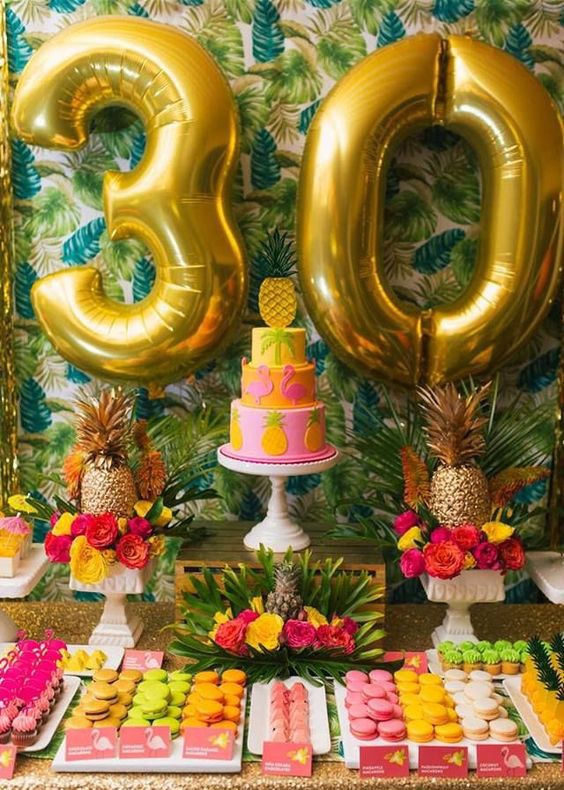
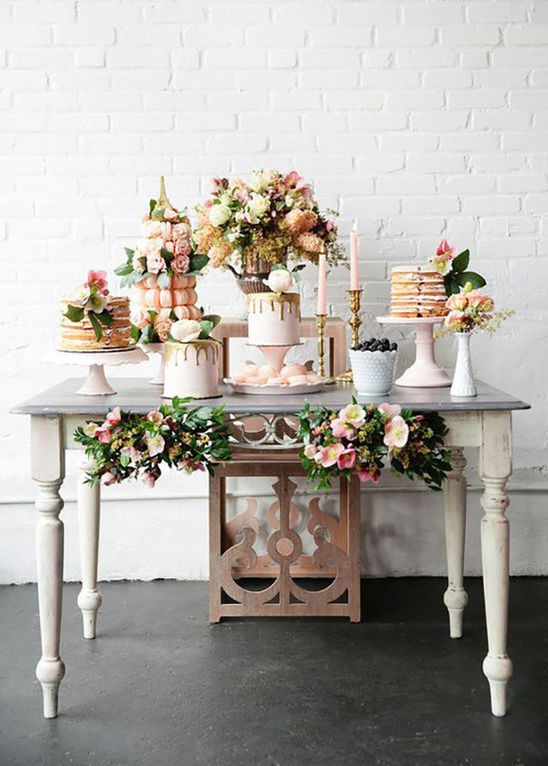
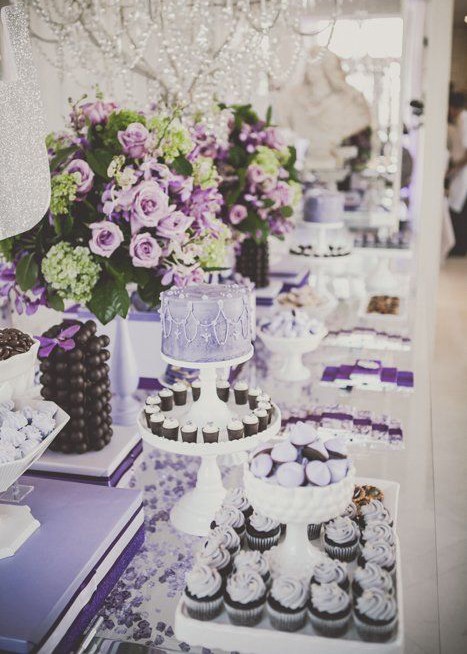
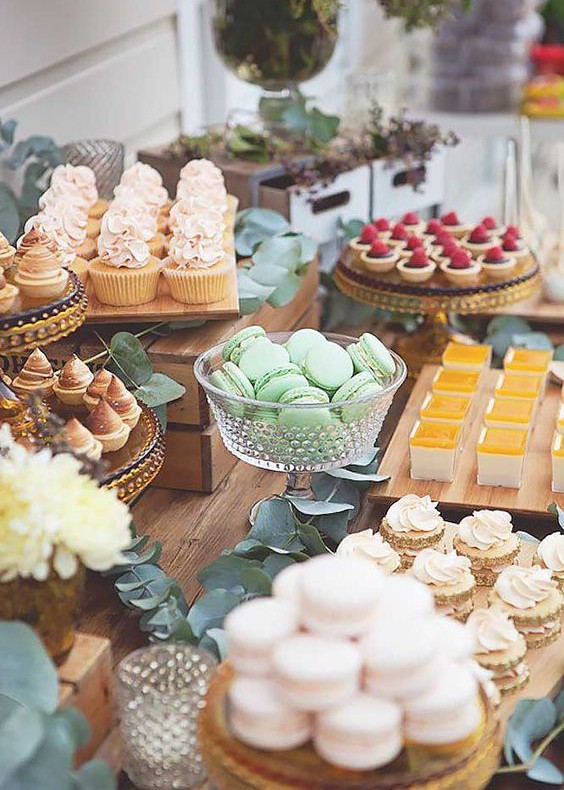
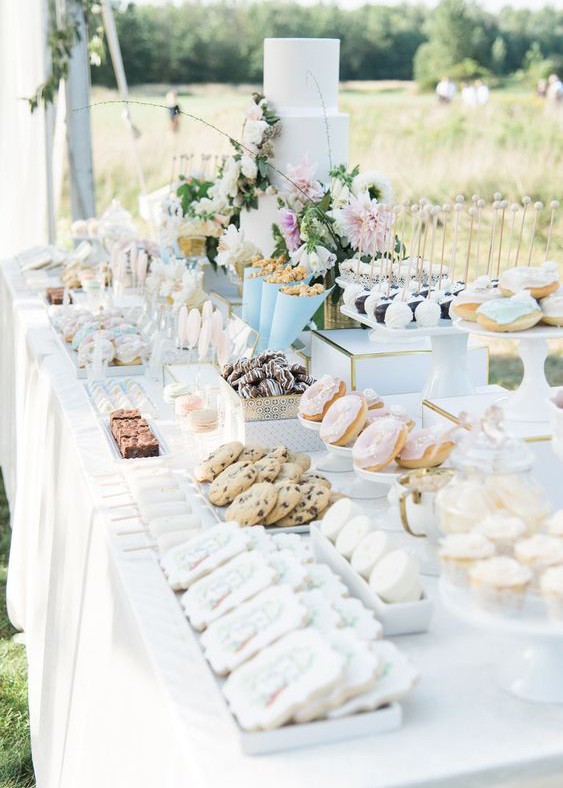
Ensure that your display will keep the viewers eye flowing from side to side and up and down. Height is key. Items should adopt a "high-low-high" or "low-high-low" design.
Do not overwhelm the viewer with too much food. If you have made 40 pudding cups, display 15 at a time and keep the others cool and replenish as they are eaten. Less is more when it comes to display.
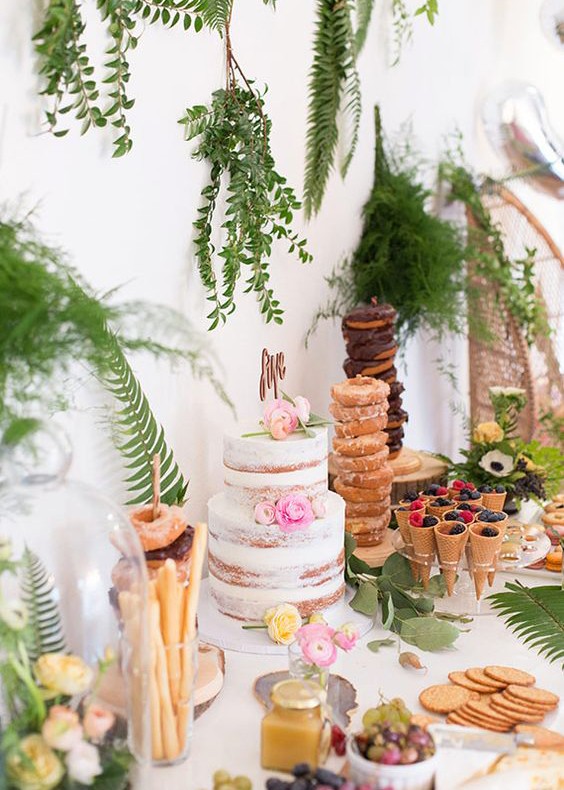
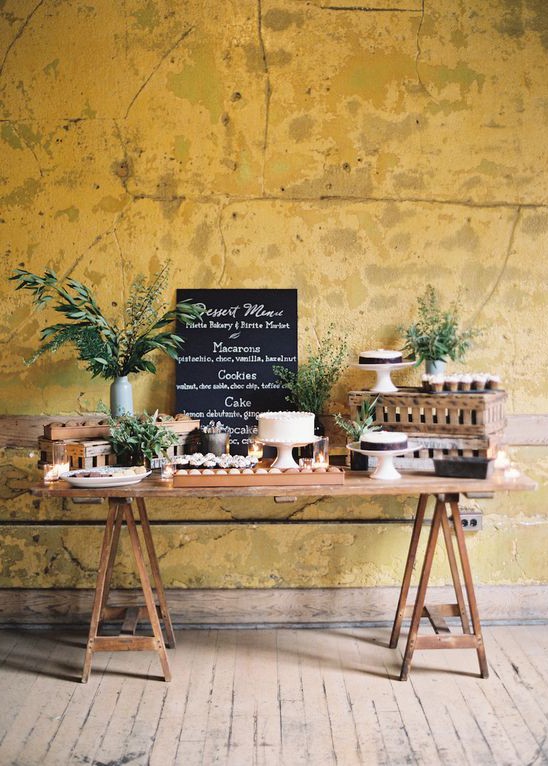
Add interest to your display with decor items that fit the theme or colour vision. Flowers, foliage, props, etc can be great ways to do this.
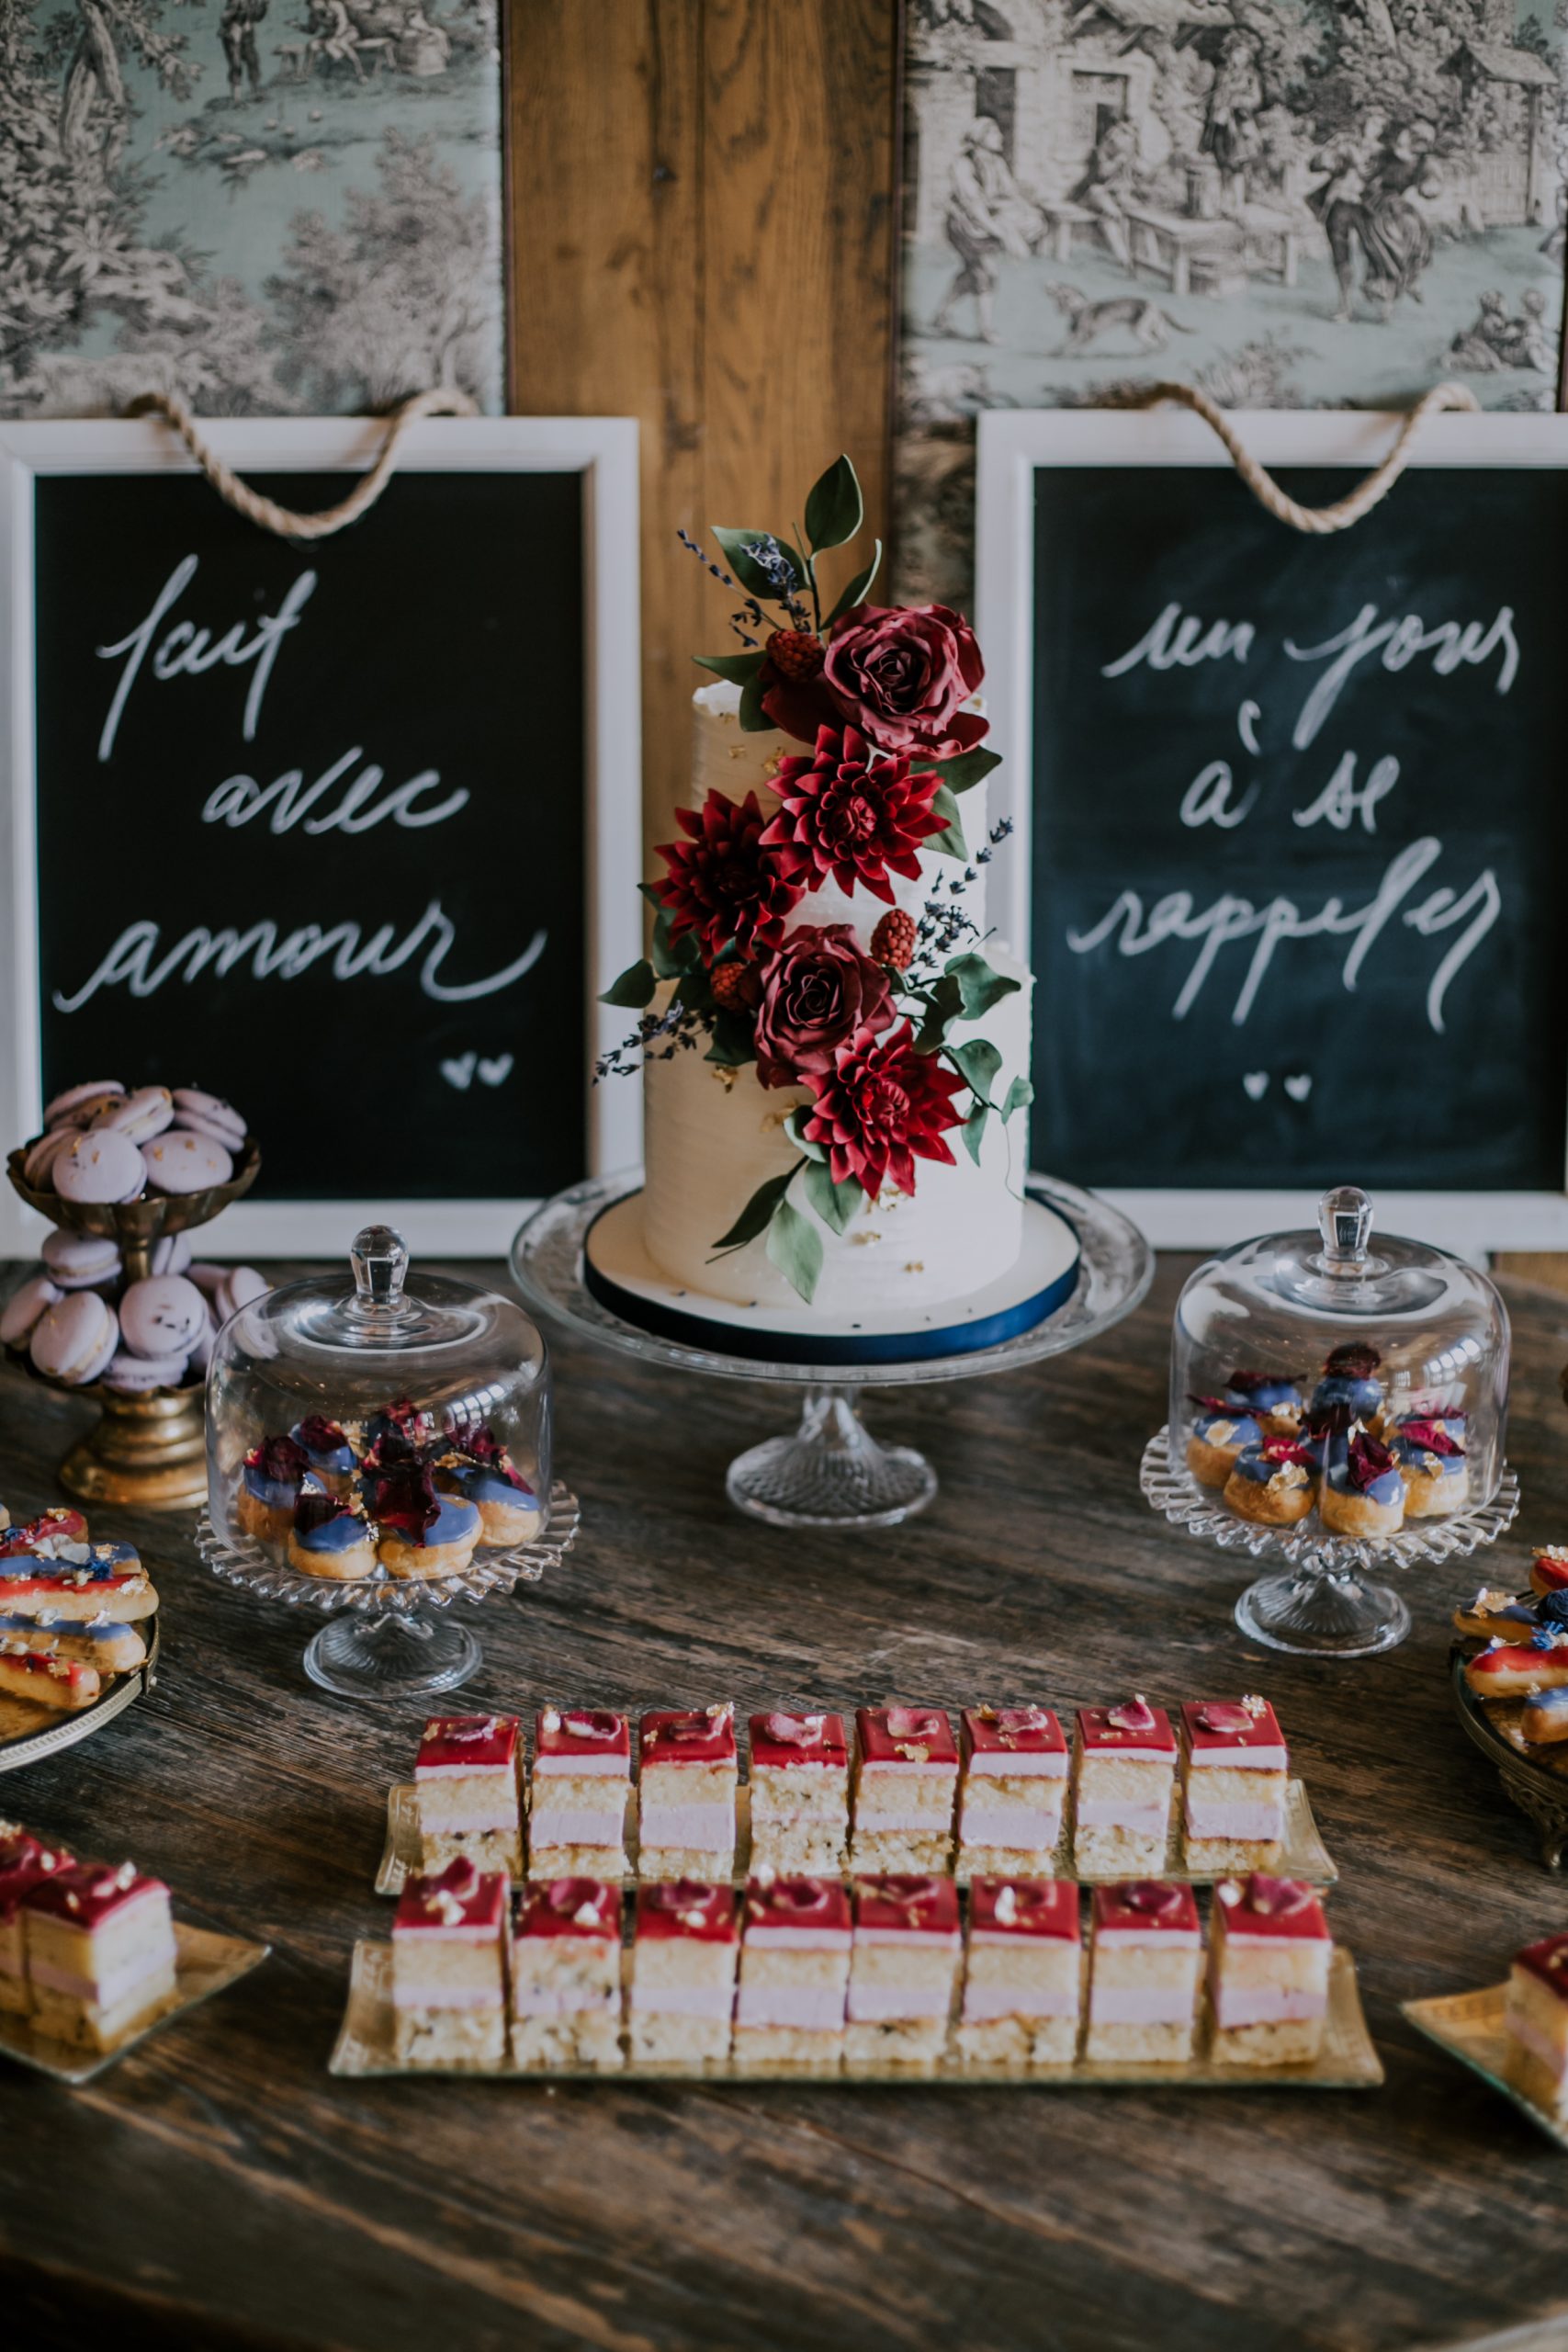
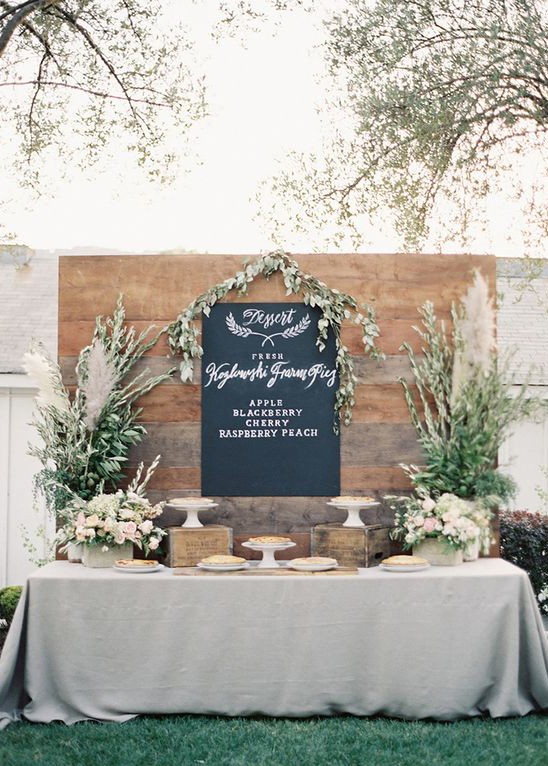
Label your desserts. Tell people what they are eating. This is especially important for large parties where allergies and food restrictions are likely.
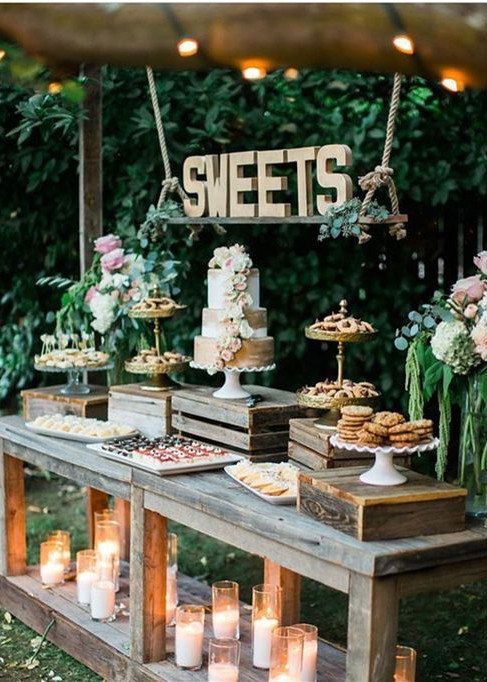
Frame your dessert table with a backdrop or background that adds to the design. If you do not want to make one, then find a wall or area that is not distracting from the desserts.
If your design is looking sparse, bring the design in tighter. Fill up any pockets with florals or candy.
8. What kind of dish-wares, cakestands or vessels will you use?
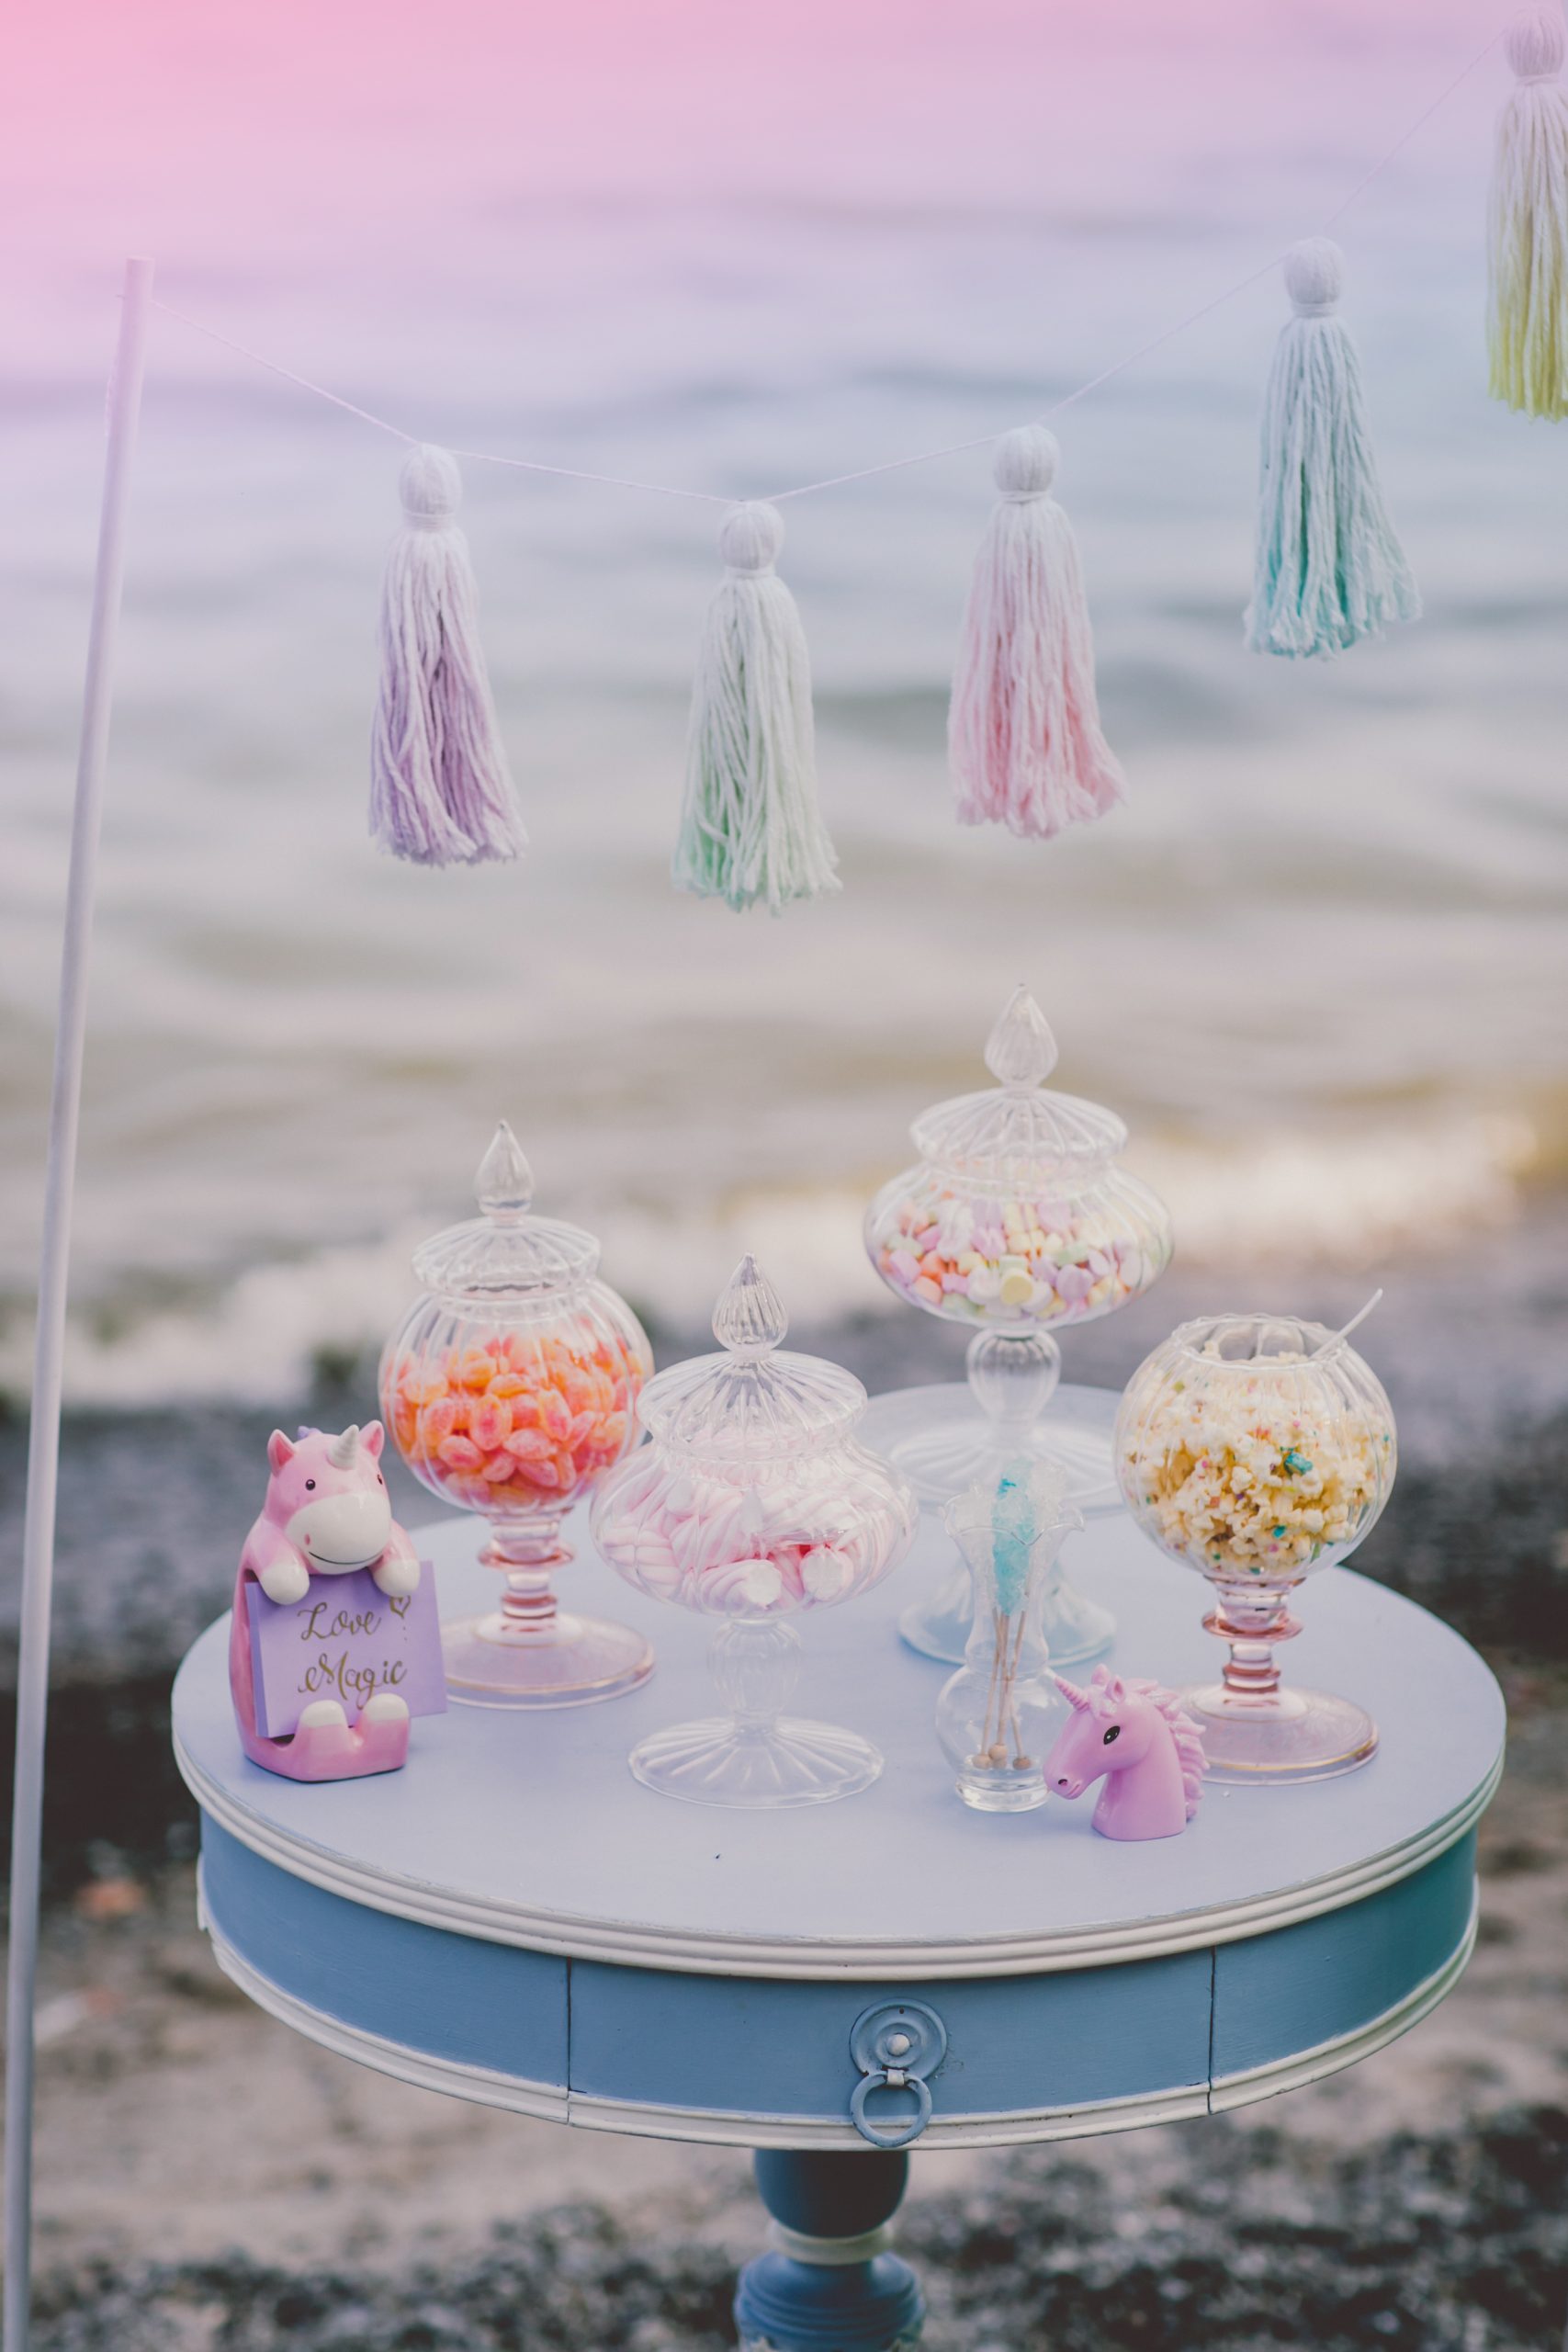
Using all of the above display factors from tip #7, you must select appropriate display vessels to showcase your desserts. Again, remember to use vessels that stick to your colour-scheme. There are many options here like mixing and matching metals, going all white, or choosing only glass vessels. To make things easier I might recommend sticking with 1 or 2 colours as your vessels and let the colour be in the desserts themselves. Going all white or all glass or mixing both is a no fail. Mixing and matching colours or material can get a bit more tricky.
Do not forget to use vessels with different heights. You can always tower cake stands on top of one another or even use wooden log rounds, crates or boxes. Whatever theme you go for, stick with it and make sure to offer a variation of heights. Did I mention that Olive Studio rents out all kinds of dessert stands, props and decor items too?
9. What to do with Grandma's slab cake you kinda didn't want?
Okay so let's get real. You have spent countless hours baking and selecting the perfect dish-wares and grandma brings a huge vanilla slab cake with rainbow sprinkles. The point is albeit the gesture is very sweet, but it will throw off the look of your display. You have a few options here. One option, is to politely say thank you and do not add it to your display but offer it along with some other desserts in a different location. The other option, is to scoop this slab cake into martini glasses or cocktail glasses like a deconstructed cake. Top it off with some left over whipping cream or strawberry sauce and voila! You don't have to put a huge baking pan of cake on your carefully orchestrated dessert table. Serve 5-10 glasses of grandma's cake like it was intended to be apart of the display all along!
10. Lay out your design ahead of time
No great artist created something beautiful on a whim. Or at least most of us anyways. Take time to lay out your design a day or two before the party. Lay out your cake stands and vessels and determine what will go where. Make sure to create levels to add interest for the eye and see where you can fill in any gaps with extra decor or a duplicate display of the same dessert, just on another part of the table. Trust me. You will be happy on the day of the event, that you know where everything is to go. Set out your desserts an hour before the party if you can (pending weather and temperatures) so that you are not stressed while guests are arriving. Of course, don't forget to enjoy your own party too!
Olive Studio takes great pride in creating an eye-catching dessert table. But it is not for everyone. Some people are completely over-whelmed by the idea of creating both something that dazzles your eyes and delights your taste-buds. From huge dessert table spreads, to simple and narrowed down theme’s we have you covered. Check out our 10 tips on how to create a beautiful and delicious dessert table.
1. Choose a Theme
Your event design should have a theme. If it is not overly cohesive, it should at least have a colour scheme. This will be your dessert table starting point. Once your theme is decided upon, stick with it. Pick no more than 5 colours and jot down your favourite “must have” elements that you definitely want to showcase.
For example: Let’s say you are having a 1st birthday party backyard bbq for your son. The theme is “Woodland.” You have chosen colours in pale tones: beige, sky blue, white, sage green and pale yellow. Your “must have” element is a large cake for guests and a mini cake for your son. Easy, right?
2. Determine your guest count + serving quantities
Depending on how many guests you expect to come to your event, you can now assess how many desserts you will need. Remember not everyone will eat a dessert, but some might have more than 1. You must also consider if your guests are eating a meal beforehand or not. In our example party, they are having a lunch bbq. In this case I would plan on each guest having 1 slice of cake, and 2 other dessert servings. Remember a serving is 1 cookie, or 1 brownie, or 1 mini-cup of mousse. This isn’t a dinner party serving size.
If a meal will not be served beforehand, and your party is focused on sweet treats, I would plan on each guest having 4-6 servings of dessert. If you want to ensure that no one will miss out, take your final number of servings and add an additional 20%. This will help feed those extra hungry guests and likely give you left-overs instead of empty platters. In this case, you can buy take-away containers and let guests bring some home.
3. The Budget
Catering a party doesn’t have to break the bank, but it certainly can! Entertaining adds up quickly! There are a few cost effective ways to help. The first way is to ask people to bring things. Whether it be for the mains, or for desserts, don’t be shy! And don’t be shy to ask them to stick to the theme. If you really want to control the menu without being too particular, ask friends to make the easy things like mini cookies, brownies or fruit platters. The second way to help with saving on cost, is to select desserts that don’t have a ton of expensive ingredients. Read recipes before going crazy with your menu! If you want to keep it even more cost effective, narrow down your menu to 2-5 desserts and stop! There is nothing wrong with a focus on a cake and then offering some fruit and cookies too. You don’t have to be grand to make a lasting impression.
4. The Dessert Menu
Taste is obviously a crucial factor when making desserts. They cannot just look pretty. Try to appeal to a wide range of palettes and offer a variety of textures, flavours and colours. If you are serving chocolate, also offer something fruity. Consider a vegan or gluten free option too.
If your menu seems too simple, consider presenting these items in a fancier way, like serving fruit in a waffle cone, or presenting donuts in a tower.
5. Size Matters
Serving food to a large group of people, doesn’t mean you need to break the bank to fill bellies. Slow down consumption by making portions small and bite sized. In the case that someone doesn’t like your dessert, it won’t hurt so much if they throw it away. And of course, guests can always have more. If you are baking cookies, make them mini. If you are serving mousse or pudding, offer them in shot glasses. This technique also allows you to control your display in a more beautiful way.
6. The Hero
“The hero” is the name we give to the product that is to receive the most attention in advertising or the photography world. The “must have” element that you have thought up is likely your feature dessert. For our example, it is most certainly the birthday cake! Therefore, these two cakes will take center stage in our display.
7. The Display
Displaying your desserts is where many people get overwhelmed or just don’t even consider making it pretty. Would you be excited to eat at a restaurant if it tasted amazing but just looked like a messy bowl of slop? NO! Displaying your hard work and efforts to make your food look even more enticing is just as important! When creating a display there are some major factors to consider.
What surface will you use to display your desserts? Will it be a table? a mantle? a bar? a vintage piece of furniture?
Will the desserts be sitting in the elements or in a controlled area? Don’t forget to think about the sun potentially melting your desserts.
Ensure that your display will keep the viewers eye flowing from side to side and up and down. Height is key. Items should adopt a “high-low-high” or “low-high-low” design.
Do not overwhelm the viewer with too much food. If you have made 40 pudding cups, display 15 at a time and keep the others cool and replenish as they are eaten. Less is more when it comes to display.
Add interest to your display with decor items that fit the theme or colour vision. Flowers, foliage, props, etc can be great ways to do this.
Label your desserts. Tell people what they are eating. This is especially important for large parties where allergies and food restrictions are likely.
Frame your dessert table with a backdrop or background that adds to the design. If you do not want to make one, then find a wall or area that is not distracting from the desserts.
If your design is looking sparse, bring the design in tighter. Fill up any pockets with florals or candy.
Use symmetry and patterns to display your desserts where you can.
8. What kind of dish-wares, cakestands or vessels will you use?
Using all of the above display factors from tip #7, you must select appropriate display vessels to showcase your desserts. Again, remember to use vessels that stick to your colour-scheme. There are many options here like mixing and matching metals, going all white, or choosing only glass vessels. To make things easier I might recommend sticking with 1 or 2 colours as your vessels and let the colour be in the desserts themselves. Going all white or all glass or mixing both is a no fail. Mixing and matching colours or material can get a bit more tricky.
Do not forget to use vessels with different heights. You can always tower cake stands on top of one another or even use wooden log rounds, crates or boxes. Whatever theme you go for, stick with it and make sure to offer a variation of heights. Did I mention that Olive Studio rents out all kinds of dessert stands, props and decor items too?
9. What to do with Grandma’s slab cake you kinda didn’t want?
Okay so let’s get real. You have spent countless hours baking and selecting the perfect dish-wares and grandma brings a huge vanilla slab cake with rainbow sprinkles. The point is albeit the gesture is very sweet, but it will throw off the look of your display. You have a few options here. One option, is to politely say thank you and do not add it to your display but offer it along with some other desserts in a different location. The other option, is to scoop this slab cake into martini glasses or cocktail glasses like a deconstructed cake. Top it off with some left over whipping cream or strawberry sauce and voila! You don’t have to put a huge baking pan of cake on your carefully orchestrated dessert table. Serve 5-10 glasses of grandma’s cake like it was intended to be apart of the display all along!
10. Lay out your design ahead of time
No great artist created something beautiful on a whim. Or at least most of us anyways. Take time to lay out your design a day or two before the party. Lay out your cake stands and vessels and determine what will go where. Make sure to create levels to add interest for the eye and see where you can fill in any gaps with extra decor or a duplicate display of the same dessert, just on another part of the table. Trust me. You will be happy on the day of the event, knowing where everything is to go. Set out your desserts an hour before the party if you can (pending weather and temperatures) so that you are not stressed while guests are arriving. Of course, don’t forget to enjoy your own party too!
Olive Studio is a documentary based photography studio, specializing in unique, intimate and off-the-beaten track weddings. Our candid shooting style allows for couples to...
Olive Studio takes great pride in creating an eye-catching dessert table. But it is not for everyone. Some people are completely over-whelmed by the idea of creating both something that dazzles your eyes and delights your taste-buds. From huge dessert table spreads, to simple and narrowed down theme’s we have you covered. Check out our 10 tips on how to create a beautiful and delicious dessert table.
1. Choose a Theme: How to create a dessert table
Your event design should have a theme. If it is not overly cohesive, it should at least have a colour scheme. This will be your dessert table starting point. Once your theme is decided upon, stick with it. Pick no more than 5 colours and jot down your favourite “must have” elements that you definitely want to showcase.
For example: Let’s say you are having a 1st birthday party backyard bbq for your son. The theme is “Woodland.” You have chosen colours in pale tones: beige, sky blue, white, sage green and pale yellow. Your main “must have” elements is a large cake for guests and a mini cake for your son.
2. Determine your guest count + serving quantities
Depending on how many guests you expect to come to your event, you can now assess how many desserts you will need. Remember not everyone will eat a dessert, but some might have more than 1. You must also consider if your guests are eating a meal beforehand or not. In our example party, they are having a lunch bbq. In this case I would plan on each guest having 1 slice of cake, and 2 other dessert servings. Remember a serving is 1 cookie, or 1 brownie, or 1 mini-cup of mousse. This isn’t a dinner party serving size.
If a meal will not be served beforehand, and your party is focused on sweet treats, I would plan on each guest having 4-6 servings of dessert. If you want to ensure that no one will miss out, take your final number of servings and add an additional 20%. This will help feed those extra hungry guests and likely give you left-overs instead of empty platters. In this case, you can buy take-away containers and let guests bring some home.
3. How to Create a Dessert Table
Catering a party doesn’t have to break the bank, but it certainly can! Entertaining adds up quickly! There are a few cost effective ways to help. The first way is to ask people to bring things. Whether it be for the mains, or for desserts, don’t be shy! And don’t be shy to ask them to stick to the theme. If you really want to control the menu without being too particular, ask friends to make the easy things like mini cookies, brownies or fruit platters. The second way to help with saving on cost, is to select desserts that don’t have a ton of expensive ingredients. Read recipes before going crazy with your menu! If you want to keep it even more cost effective, narrow down your menu to 2-5 desserts and stop!
4. Designing a Dessert Table Display
Taste is obviously a crucial factor when making desserts. They cannot just look pretty. Try to appeal to a wide range of palettes and offer a variety of textures, flavours and colours. If you are serving chocolate, also offer something fruity. Consider a vegan or gluten free option too.
5. Size Matters
Serving food to a large group of people, doesn’t mean you need to break the bank to fill bellies. Slow down consumption by making portions small and bite sized. In the case that someone doesn’t like your dessert, it won’t hurt so much if they throw it away. And of course, guests can always have more. If you are baking cookies, make them mini. If you are serving mousse or pudding, offer them in shot glasses. This technique also allows you to control your display in a more beautiful way.
6. The Hero
“The hero” is the name we give to the product that is to receive the most attention in advertising or the photography world. The “must have” element that you have thought up is likely your feature dessert. For our example, it is most certainly the birthday cake! Therefore, these two cakes will take center stage in our display.
7. The Display
Displaying your desserts is where many people get overwhelmed or just don’t even consider making it pretty. Would you be excited to eat at a restaurant if it tasted amazing but just looked like a messy bowl of slop? NO!
Displaying your hard work and efforts to make your food look even more enticing is just as important! When creating a display there are some major factors to consider.
What surface will you use to display your desserts? Will it be a table? a mantle? a bar? a vintage piece of furniture?
Will it be in the elements or in a controlled area? Don’t forget to think about the sun potentially melting your desserts.
Ensure that your display will keep the viewers eye flowing from side to side and up and down. Height is key. Items should adopt a “high-low-high” or “low-high-low” design.
Do not overwhelm the viewer with too much food. If you have made 40 pudding cups, display 15 at a time and keep the others cool and replenish as they are eaten. Less is more when it comes to display.
Add interest to your display with decor items that fit the theme or colour vision. Flowers, foliage, props, etc can be great ways to do this.
Label your desserts. Tell people what they are eating. This is especially important for large parties where allergies and food restrictions are likely.
Frame your dessert table with a backdrop or background that adds to the design. If you do not want to make one, then find a wall or area that is not distracting from the desserts.
If your design is looking sparse, bring the design in tighter. Fill up any pockets with florals or candy.
8. What kind of dish-wares, cakestands or vessels will you use?
Using all of the above display factors from tip #7, you must select appropriate display vessels to showcase your desserts. Again, remember to use vessels that stick to your colour-scheme. There are many options here like mixing and matching metals, going all white, or choosing only glass vessels. To make things easier I might recommend sticking with 1 or 2 colours as your vessels and let the colour be in the desserts themselves. Going all white or all glass or mixing both is a no fail. Mixing and matching colours or material can get a bit more tricky.
Do not forget to use vessels with different heights. You can always tower cake stands on top of one another or even use wooden log rounds, crates or boxes. Whatever theme you go for, stick with it and make sure to offer a variation of heights. Did I mention that Olive Studio rents out all kinds of dessert stands, props and decor items too?
9. What to do with Grandma’s slab cake you kinda didn’t want?
Okay so let’s get real. You have spent countless hours baking and selecting the perfect dish-wares and grandma brings a huge vanilla slab cake with rainbow sprinkles. The point is albeit the gesture is very sweet, but it will throw off the look of your display. You have a few options here. One option, is to politely say thank you and do not add it to your display but offer it along with some other desserts in a different location. The other option, is to scoop this slab cake into martini glasses or cocktail glasses like a deconstructed cake. Top it off with some left over whipping cream or strawberry sauce and voila! You don’t have to put a huge baking pan of cake on your carefully orchestrated dessert table. Serve 5-10 glasses of grandma’s cake like it was intended to be apart of the display all along!
10. Lay out your design ahead of time
No great artist created something beautiful on a whim. Or at least most of us anyways. Take time to lay out your design a day or two before the party. Lay out your cake stands and vessels and determine what will go where. Make sure to create levels to add interest for the eye and see where you can fill in any gaps with extra decor or a duplicate display of the same dessert, just on another part of the table. Trust me. You will be happy on the day of the event, that you know where everything is to go. Set out your desserts an hour before the party if you can (pending weather and temperatures) so that you are not stressed while guests are arriving. Of course, don’t forget to enjoy your own party too!