Naturally, I planned to host a huge "Where the Wild Things Are" smash the cake bash for my son's 1st birthday party. Due to Covid restrictions however, our huge bash promptly became immediate family members only. Of course, I was disappointed but that wasn't going to stop my decor and dessert table plans.
SELECTING A PARTY THEME
A quick Pinterest search of "smash the cake birthday themes" will send you down a rabbit hole of elaborate and endless creative ideas. For some, it might send you into creative overload or for others, shame and guilt that you just don't have the time or energy to create such elaborate wonders. Trust me. Even the most creative people feel these waves of emotion. At some moments, I thought "To hell with it. I'll do it another year." But, I just couldn't let his birthday come and go without making it a big deal. Admittedly, for me more than him. hahaha. The first year of your child's life is a big deal! Even more than that, the first year of surviving parenthood, is even bigger! I wanted to celebrate for the both of us!
MEANING
A strong theme is usually one that has some kind of meaning to you or your child. That meaning can be surface or hidden. Regardless, choosing one that is meaningful helps you stay focused on curating something notable.
"Khari" is a Swahili name that means "Kingly" and "Wilder" is Khari's middle name. It seemed fitting to me, that "Where the Wild Things Are" would be a perfect theme for his party.
VERIFY YOUR THEME FEASIBILITY
Once you select your theme, and before you buy anything, check the feasability of it first. Ensure that your ideas are attainable and within budget. If you choose a theme that is out of your league or capabilities, you will catch yourself scrambling to keep up, or diverting from your plan. This can result in decor that is not cohesive, and leaves you feeling like something is amiss.
For example, if you envision a dessert table that has all black cake stands, check to see if you can find them first. Are they in stock or rentable? Can you do a DIY within budget to ensure you have them? If this simple element seems daunting or like a wild goose chase, consider changing up your design or changing your theme altogether. Becoming obsessed with a certain look and then realizing once you are already deeply committed, is both frustrating, discouraging and likely expensive.
CHOOSE A FOCUS
Choosing a focus for your party is a great way to start planning your decor. Identify how many people are coming of course, and what time the party starts. I started early as Khari was napping around 1pm and so I wanted people to be able to engage with him before he went to bed. My focus of the decor grounded to the dessert table. Since the party revolves around Khari's first cake, it seemed obvious to make desserts based on the theme. I chose easy lunch items and eliminated my initial plan of a huge charcuterie table. Instead, I put my efforts into the desserts; still offering a handful of flavours but less in quantity.
DESSERT TABLE
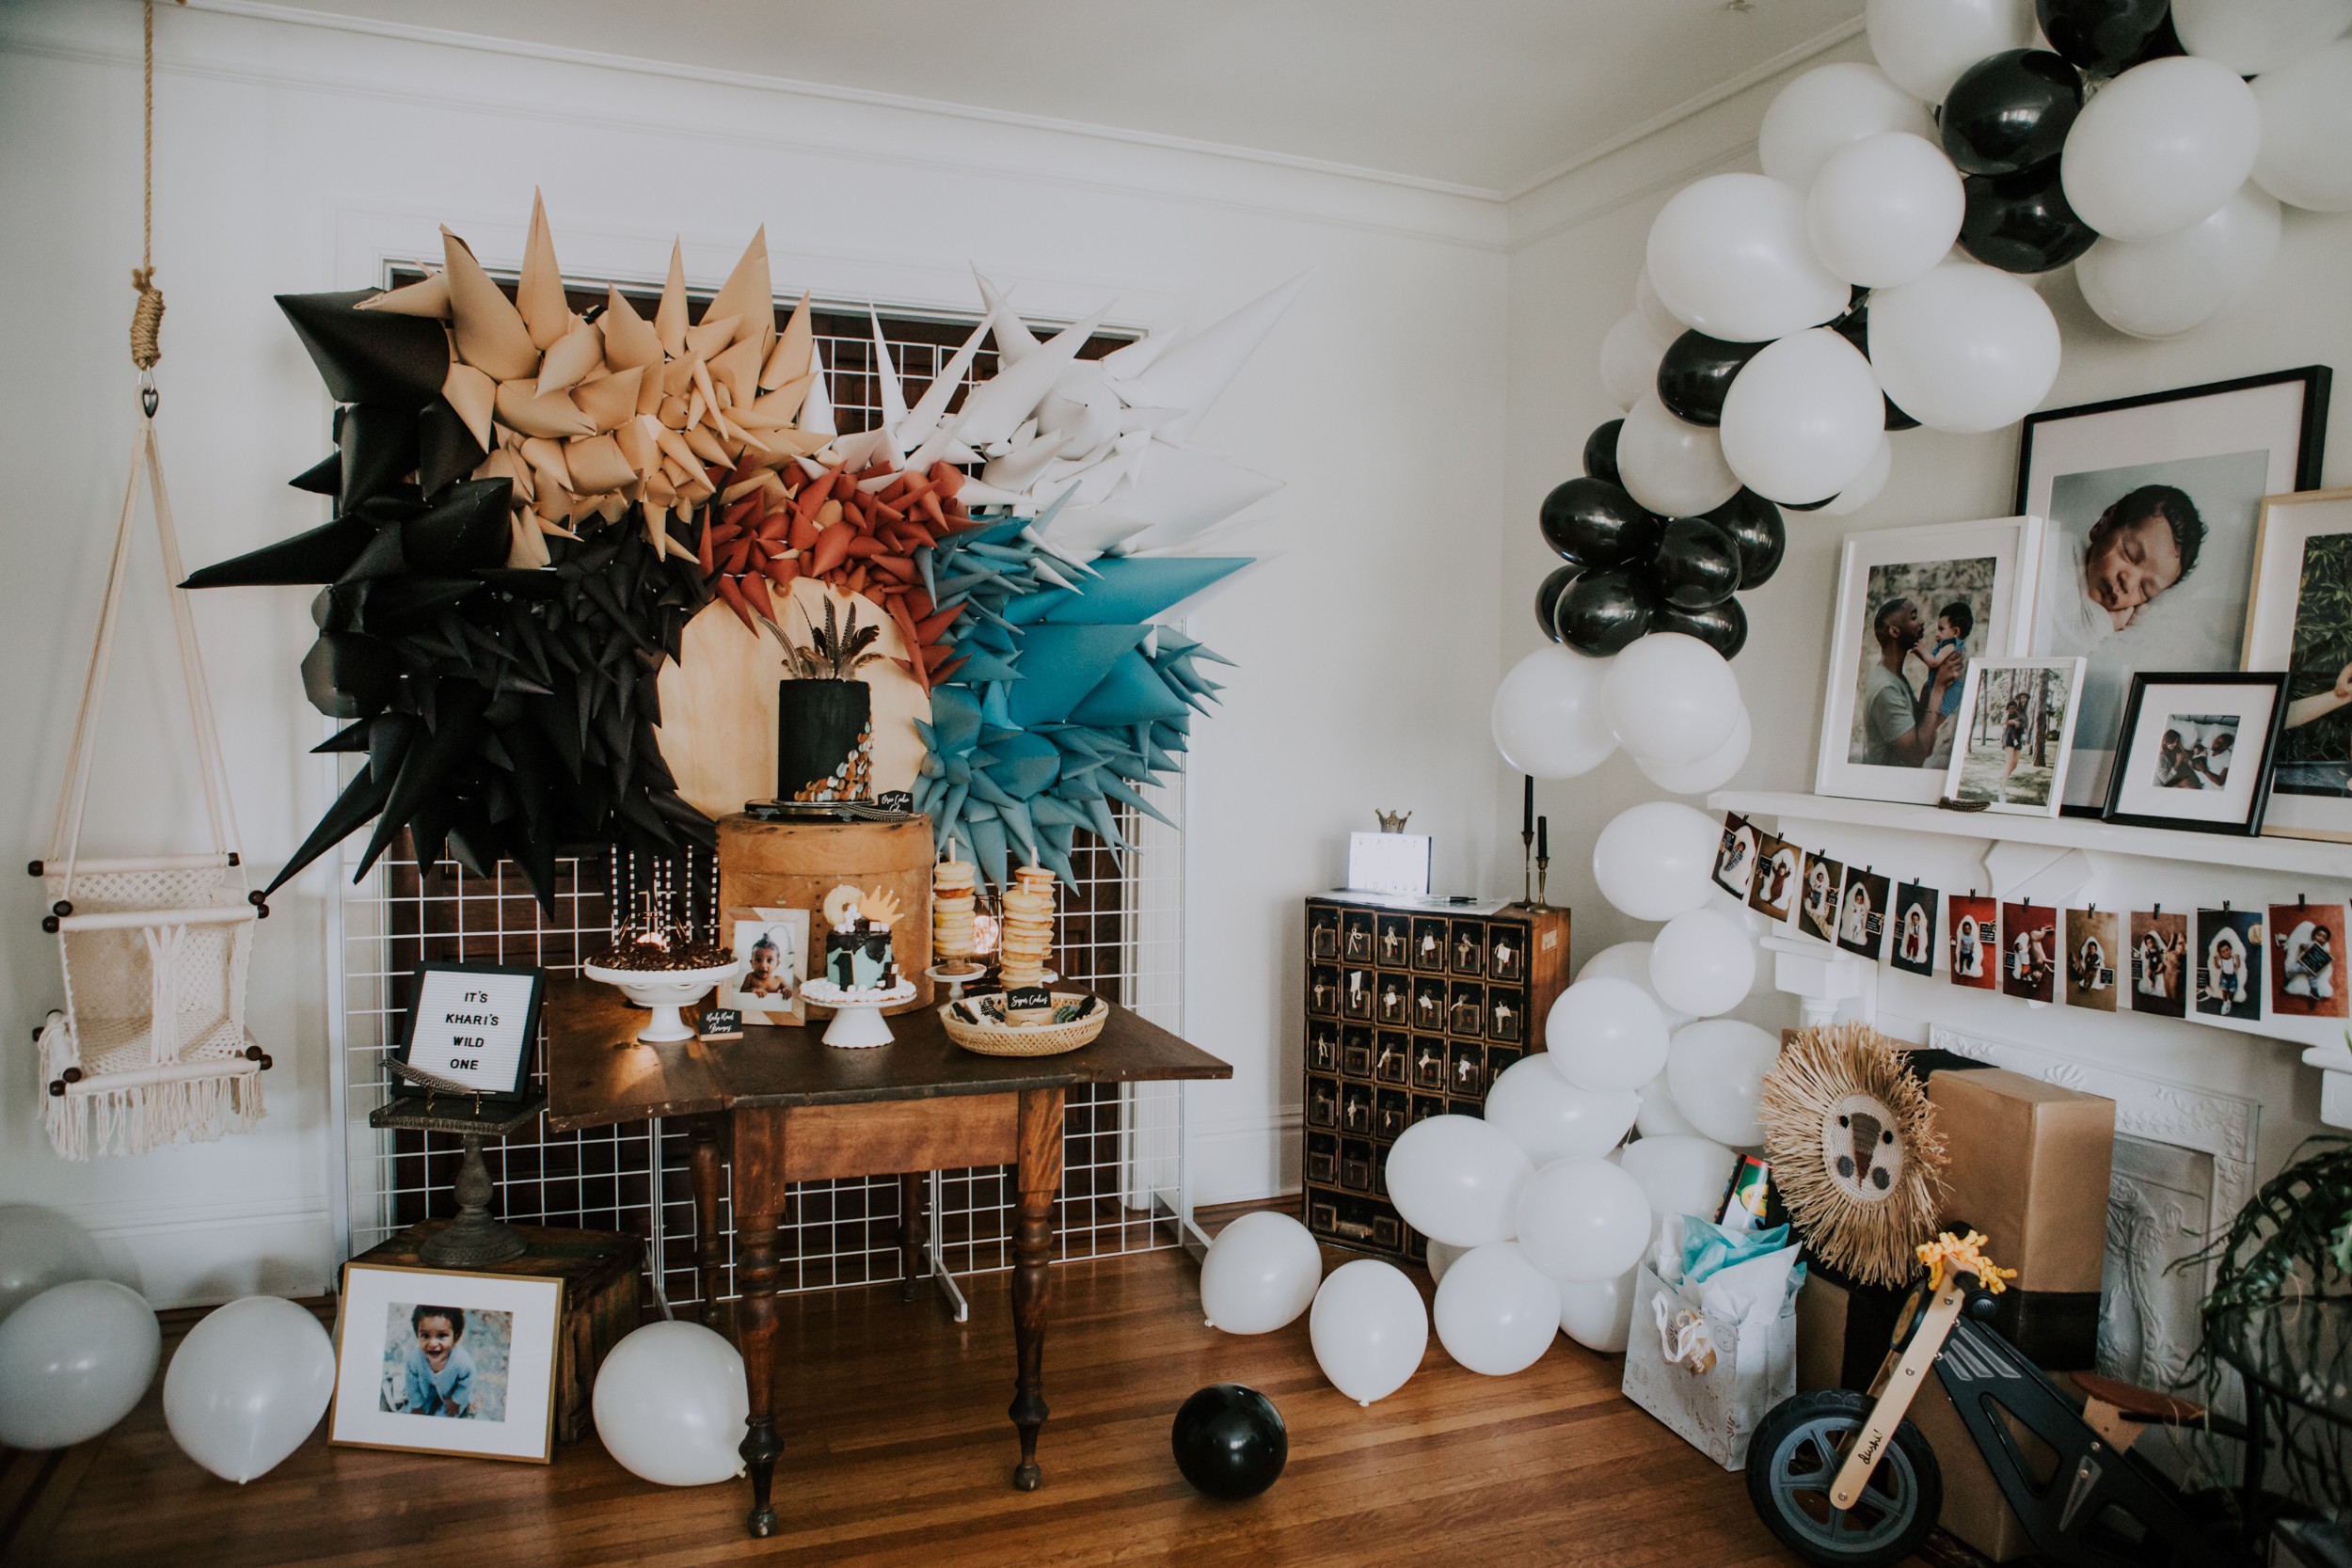
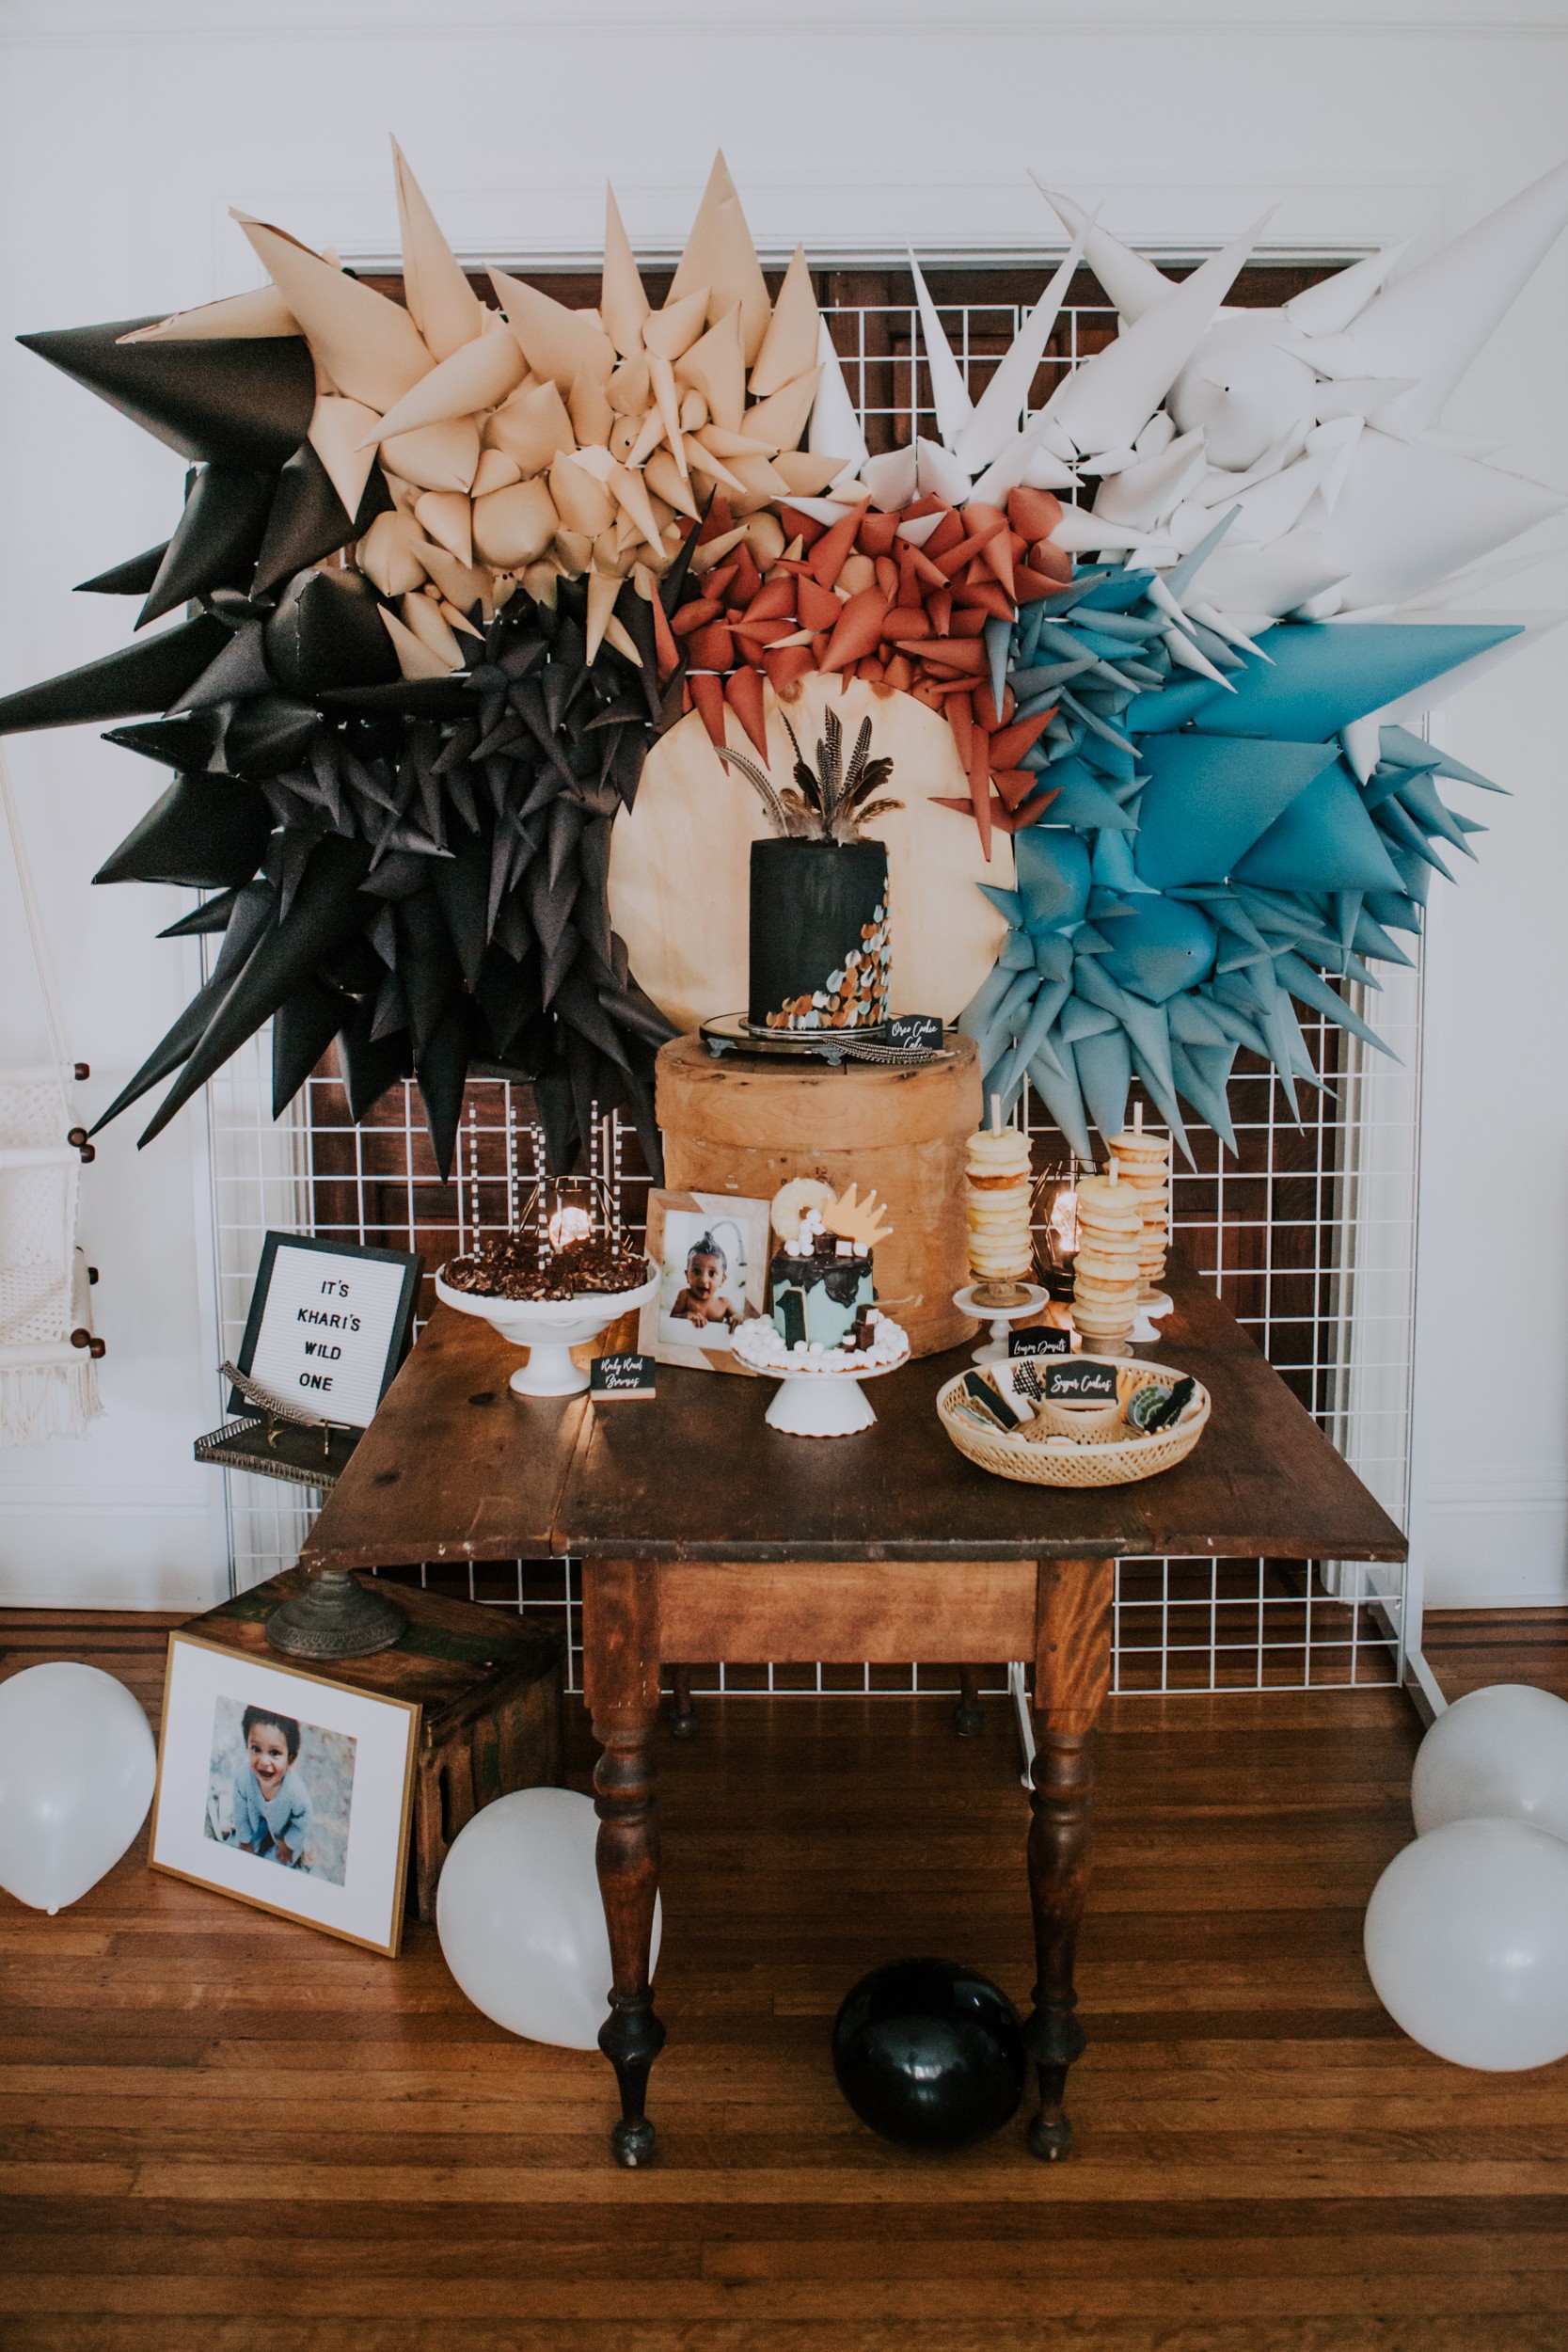
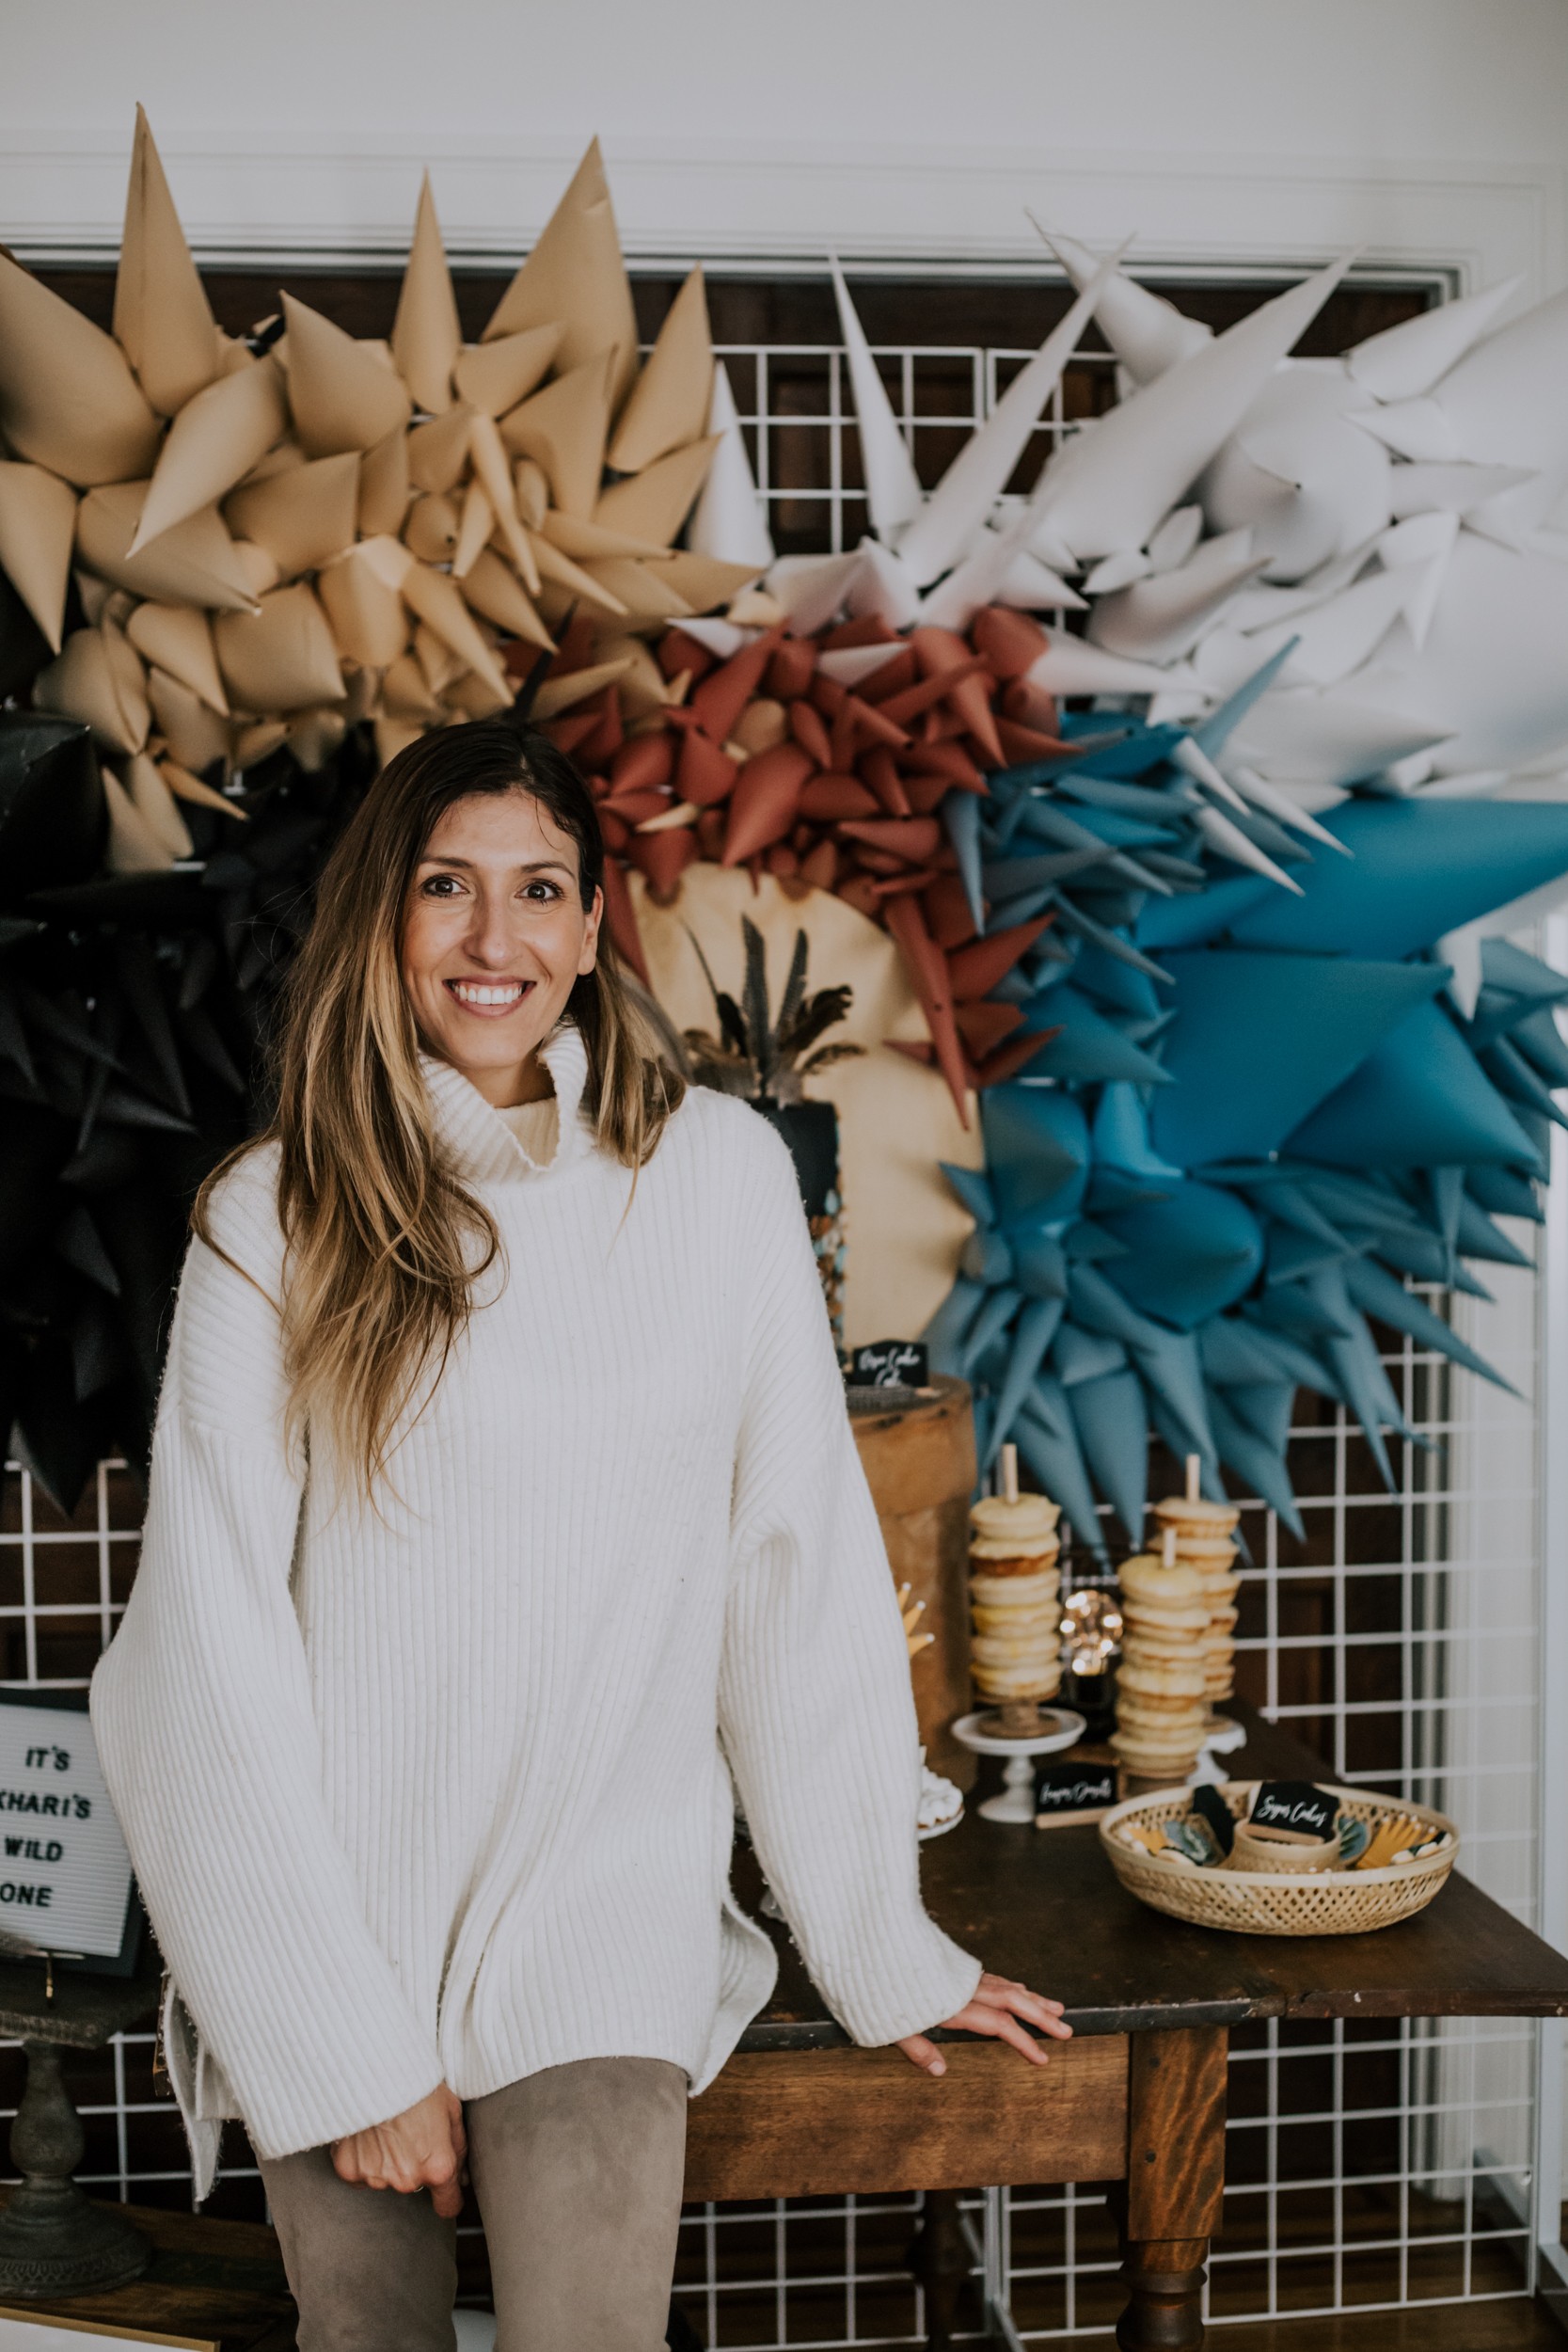
"Where the Wild Things Are" is a beautifully illustrated book that has sketch-like strokes that help emphasize the texture of the hair of the wild things. I was inspired by Edhv and Wendy Plomp's giant paper cone interactive installation I saw online. As a result, I decided to make a paper cone backdrop for my dessert table as the anchor. Choosing colours from the book, and of course attainable colours at the store, I started making paper cones in various sizes. This backdrop took me a lot longer than I expected, especially with a toddler running around, "helping" me.
Once I finished the cones, I started attaching them to my grid panel background. These can be rented or purchased however they are expensive. alternatively, you could choose rigging chicken wire or plastic caging and attaching the cones to that.
I positioned my vintage wooden table in the center of the grid system to visualize where the cake would sit as the feature. I needed to raise the cake, so played with some props around the house to find the perfect item.
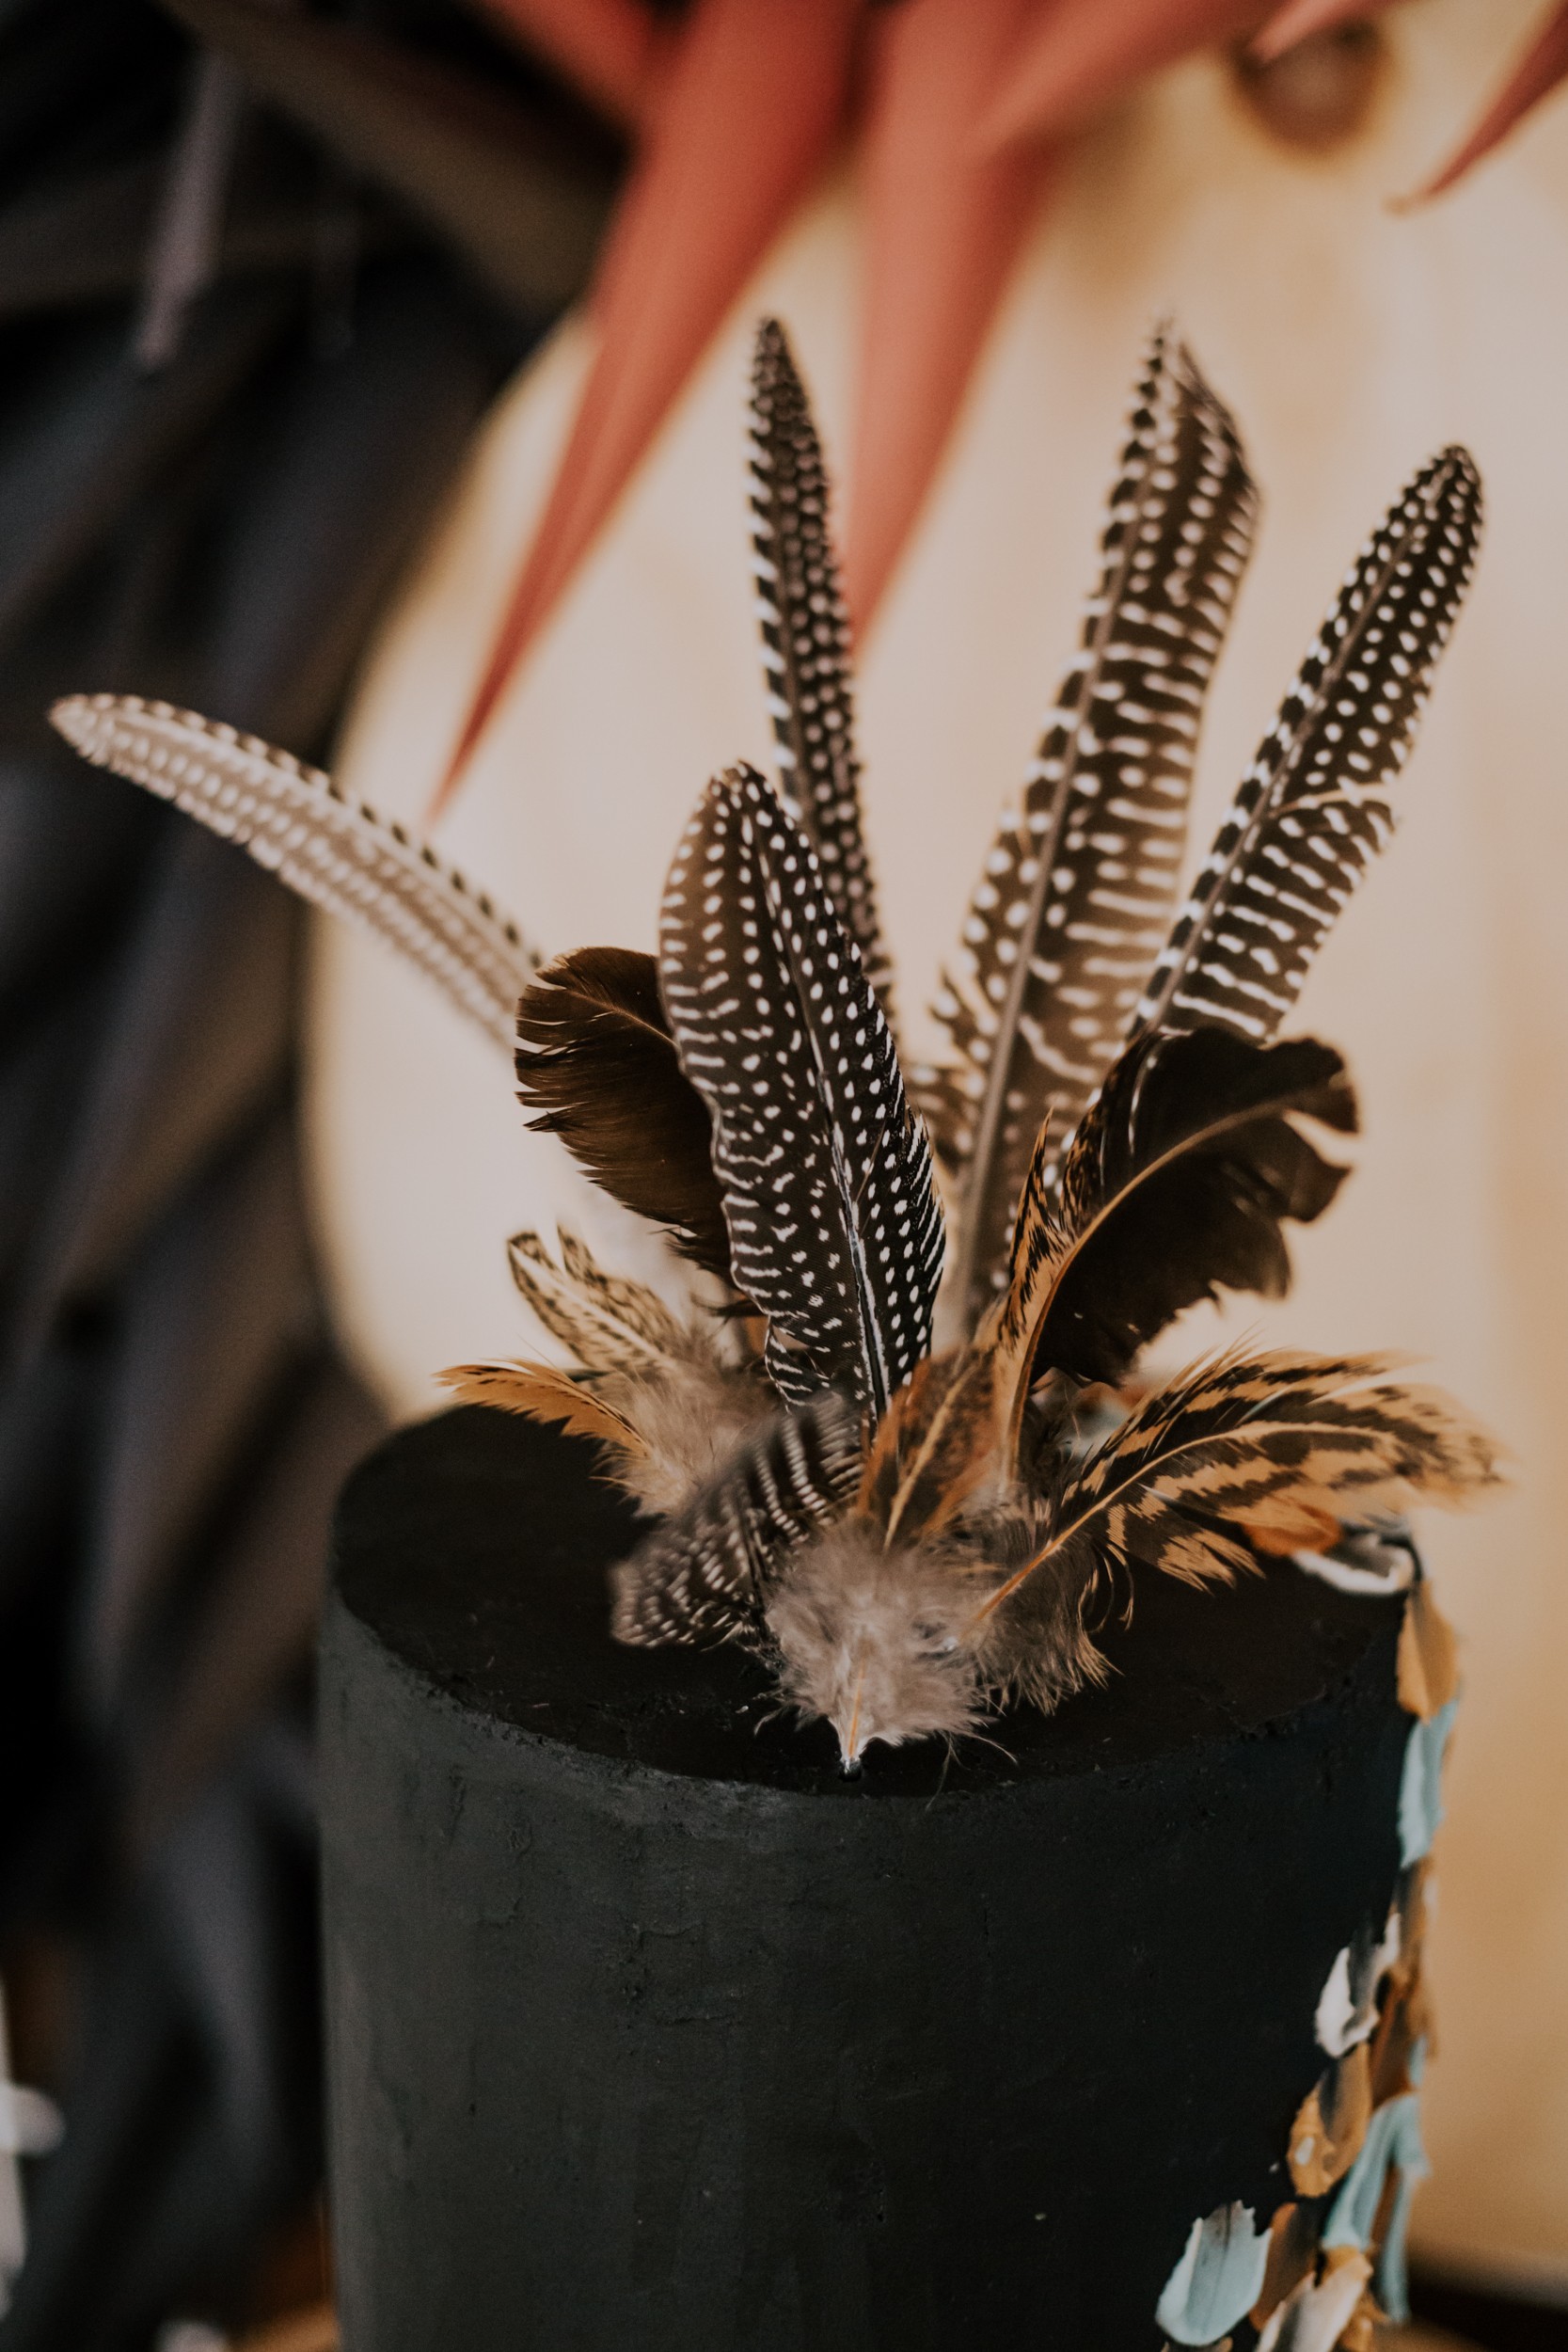
In order to isolate the cake from the backdrop, I hung my wooden plywood circle from Khari's room decor behind where the cake would go. I knew that my cake was black, and wanted it to stand out against the backdrop. Using a natural texture with the wood, yet light in colour was the perfect choice. The cone "hairs" would then flow around the circle. I played with the cones mixing in colour, but to be it looked too busy. In my case, I thought that the visual of colour blocking the cones would be an interesting effect instead.
DESSERT MENU
At least a month prior to the party, I sketched out a plan of how the dessert table would loosely look. I researched online desserts I thought complimented one another and also gave a variety of flavours and textures. Mostly, I selected desserts that I could pre-make, without the hassle of having to prepare anything last minute.
My menu choices are as follows: I have also rated the recipe out of 5 for taste and difficulty in case you are interested in making it. (1 as lowest or easiest)
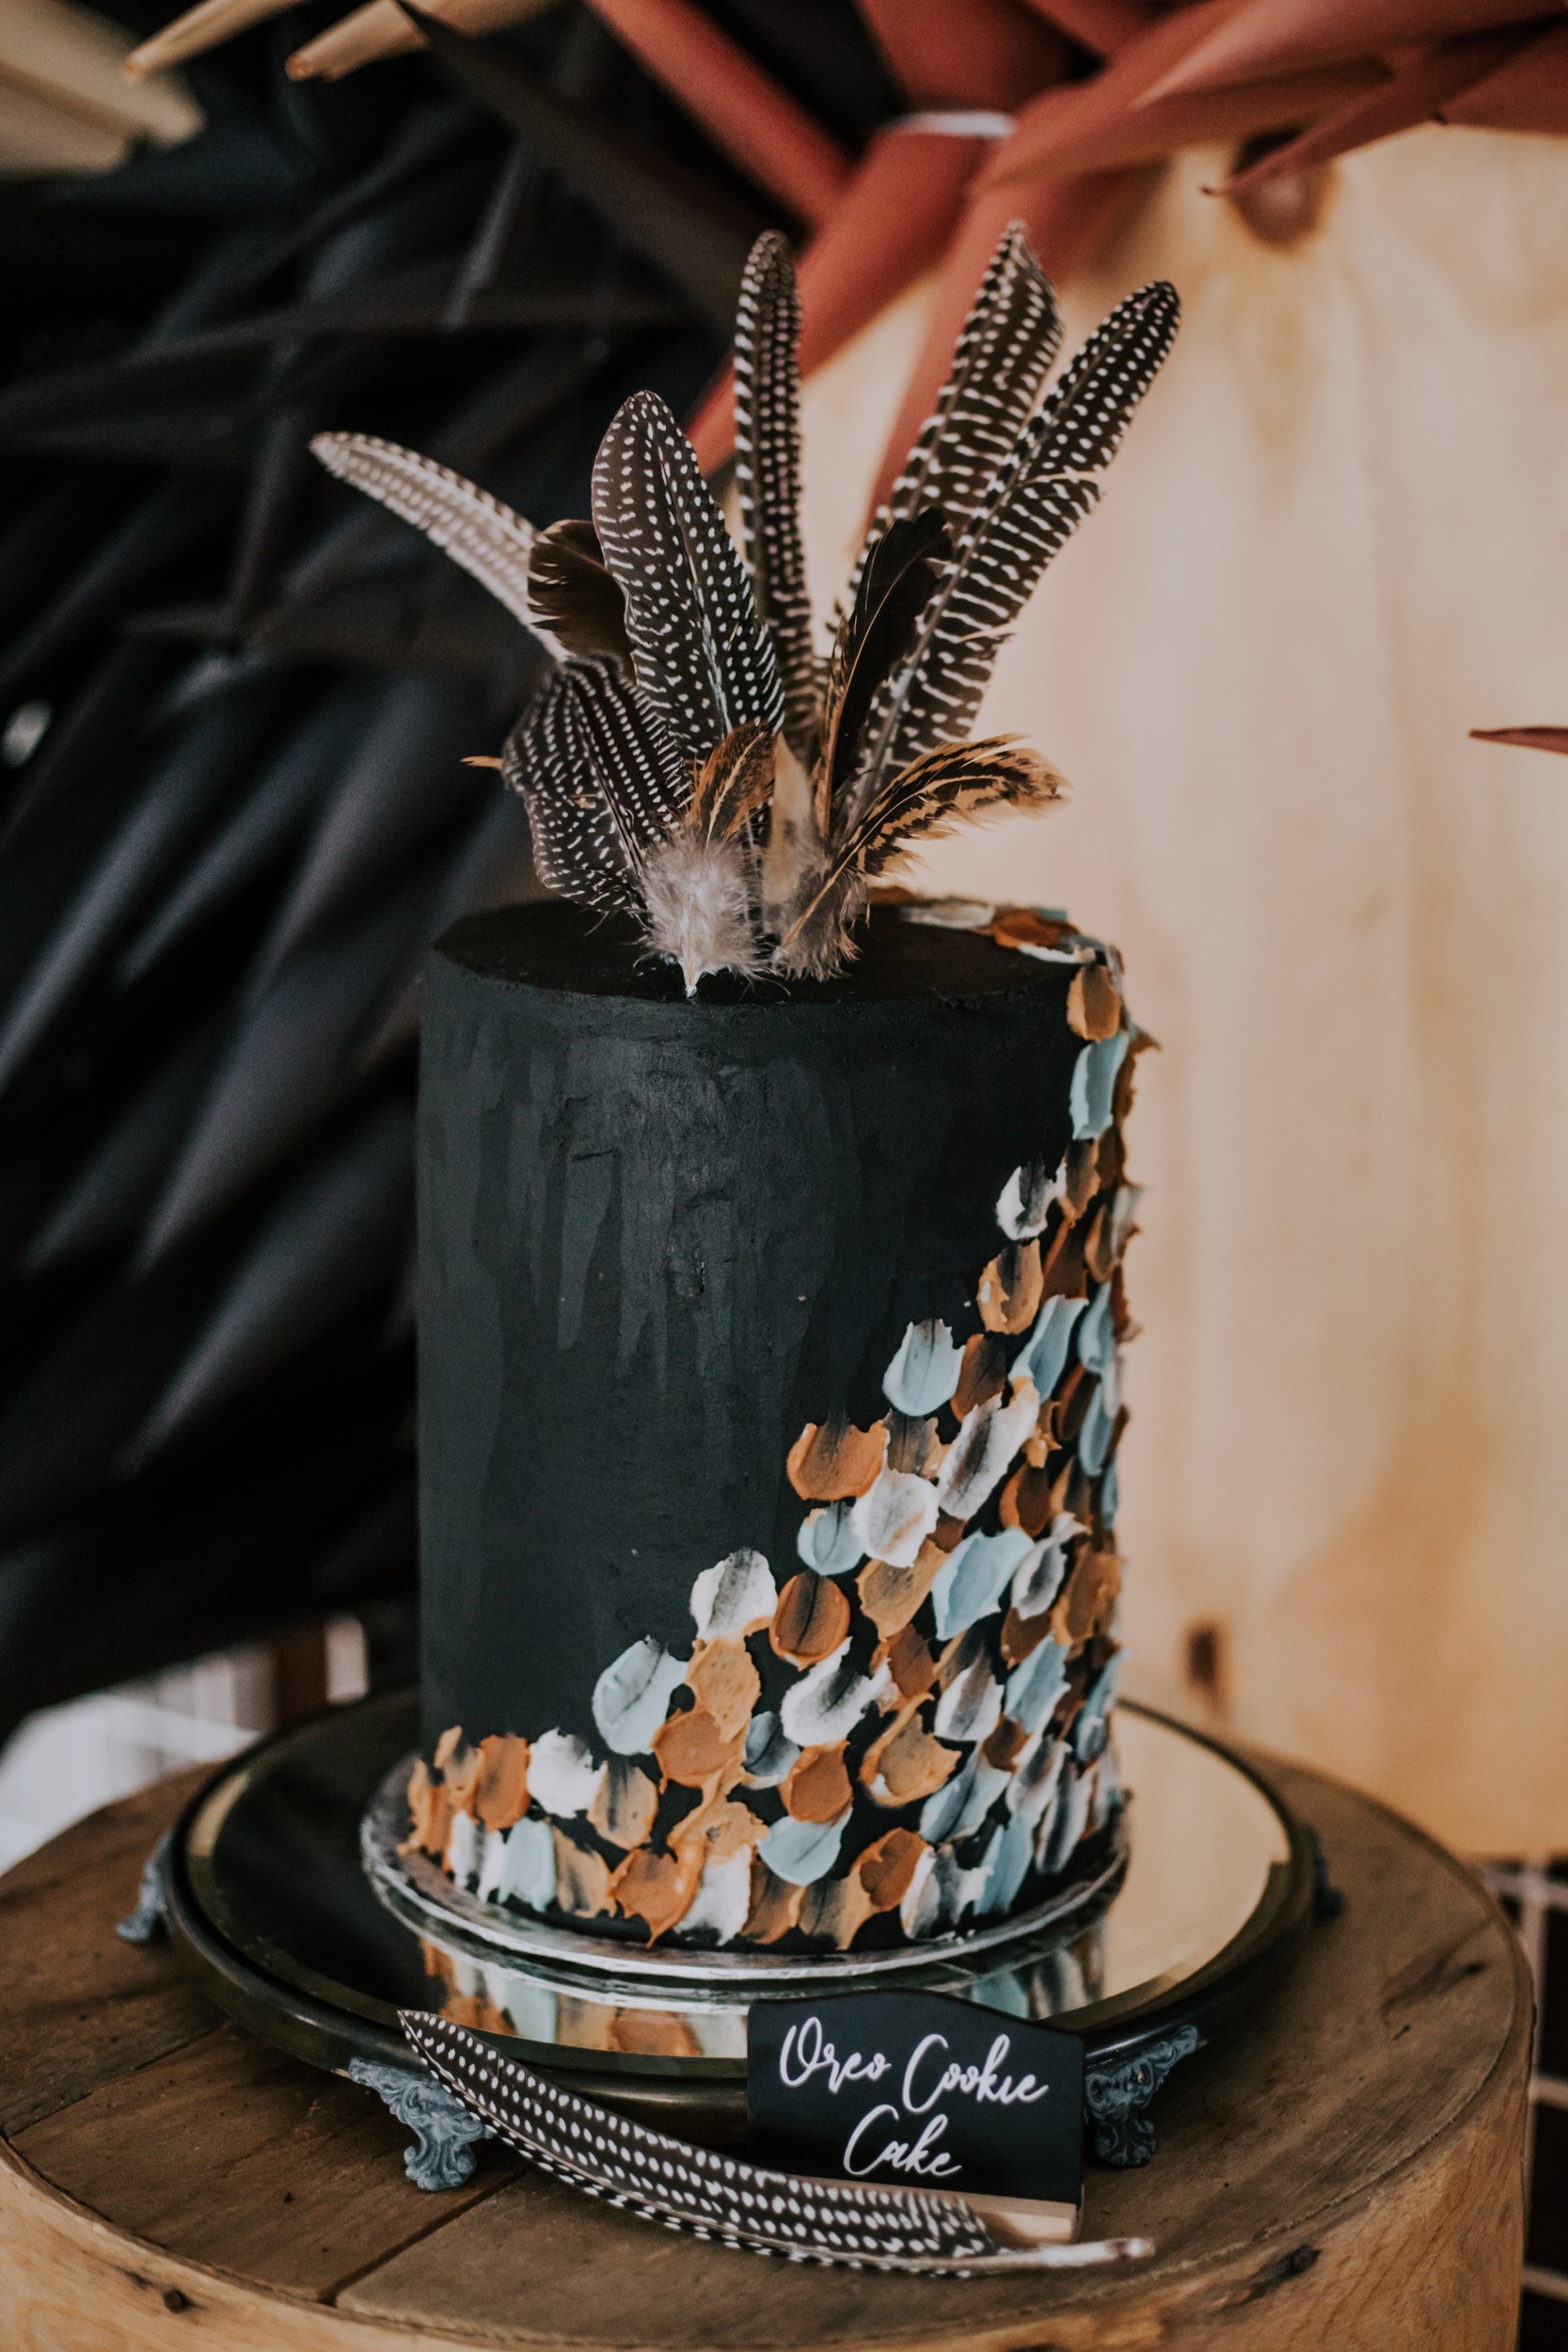
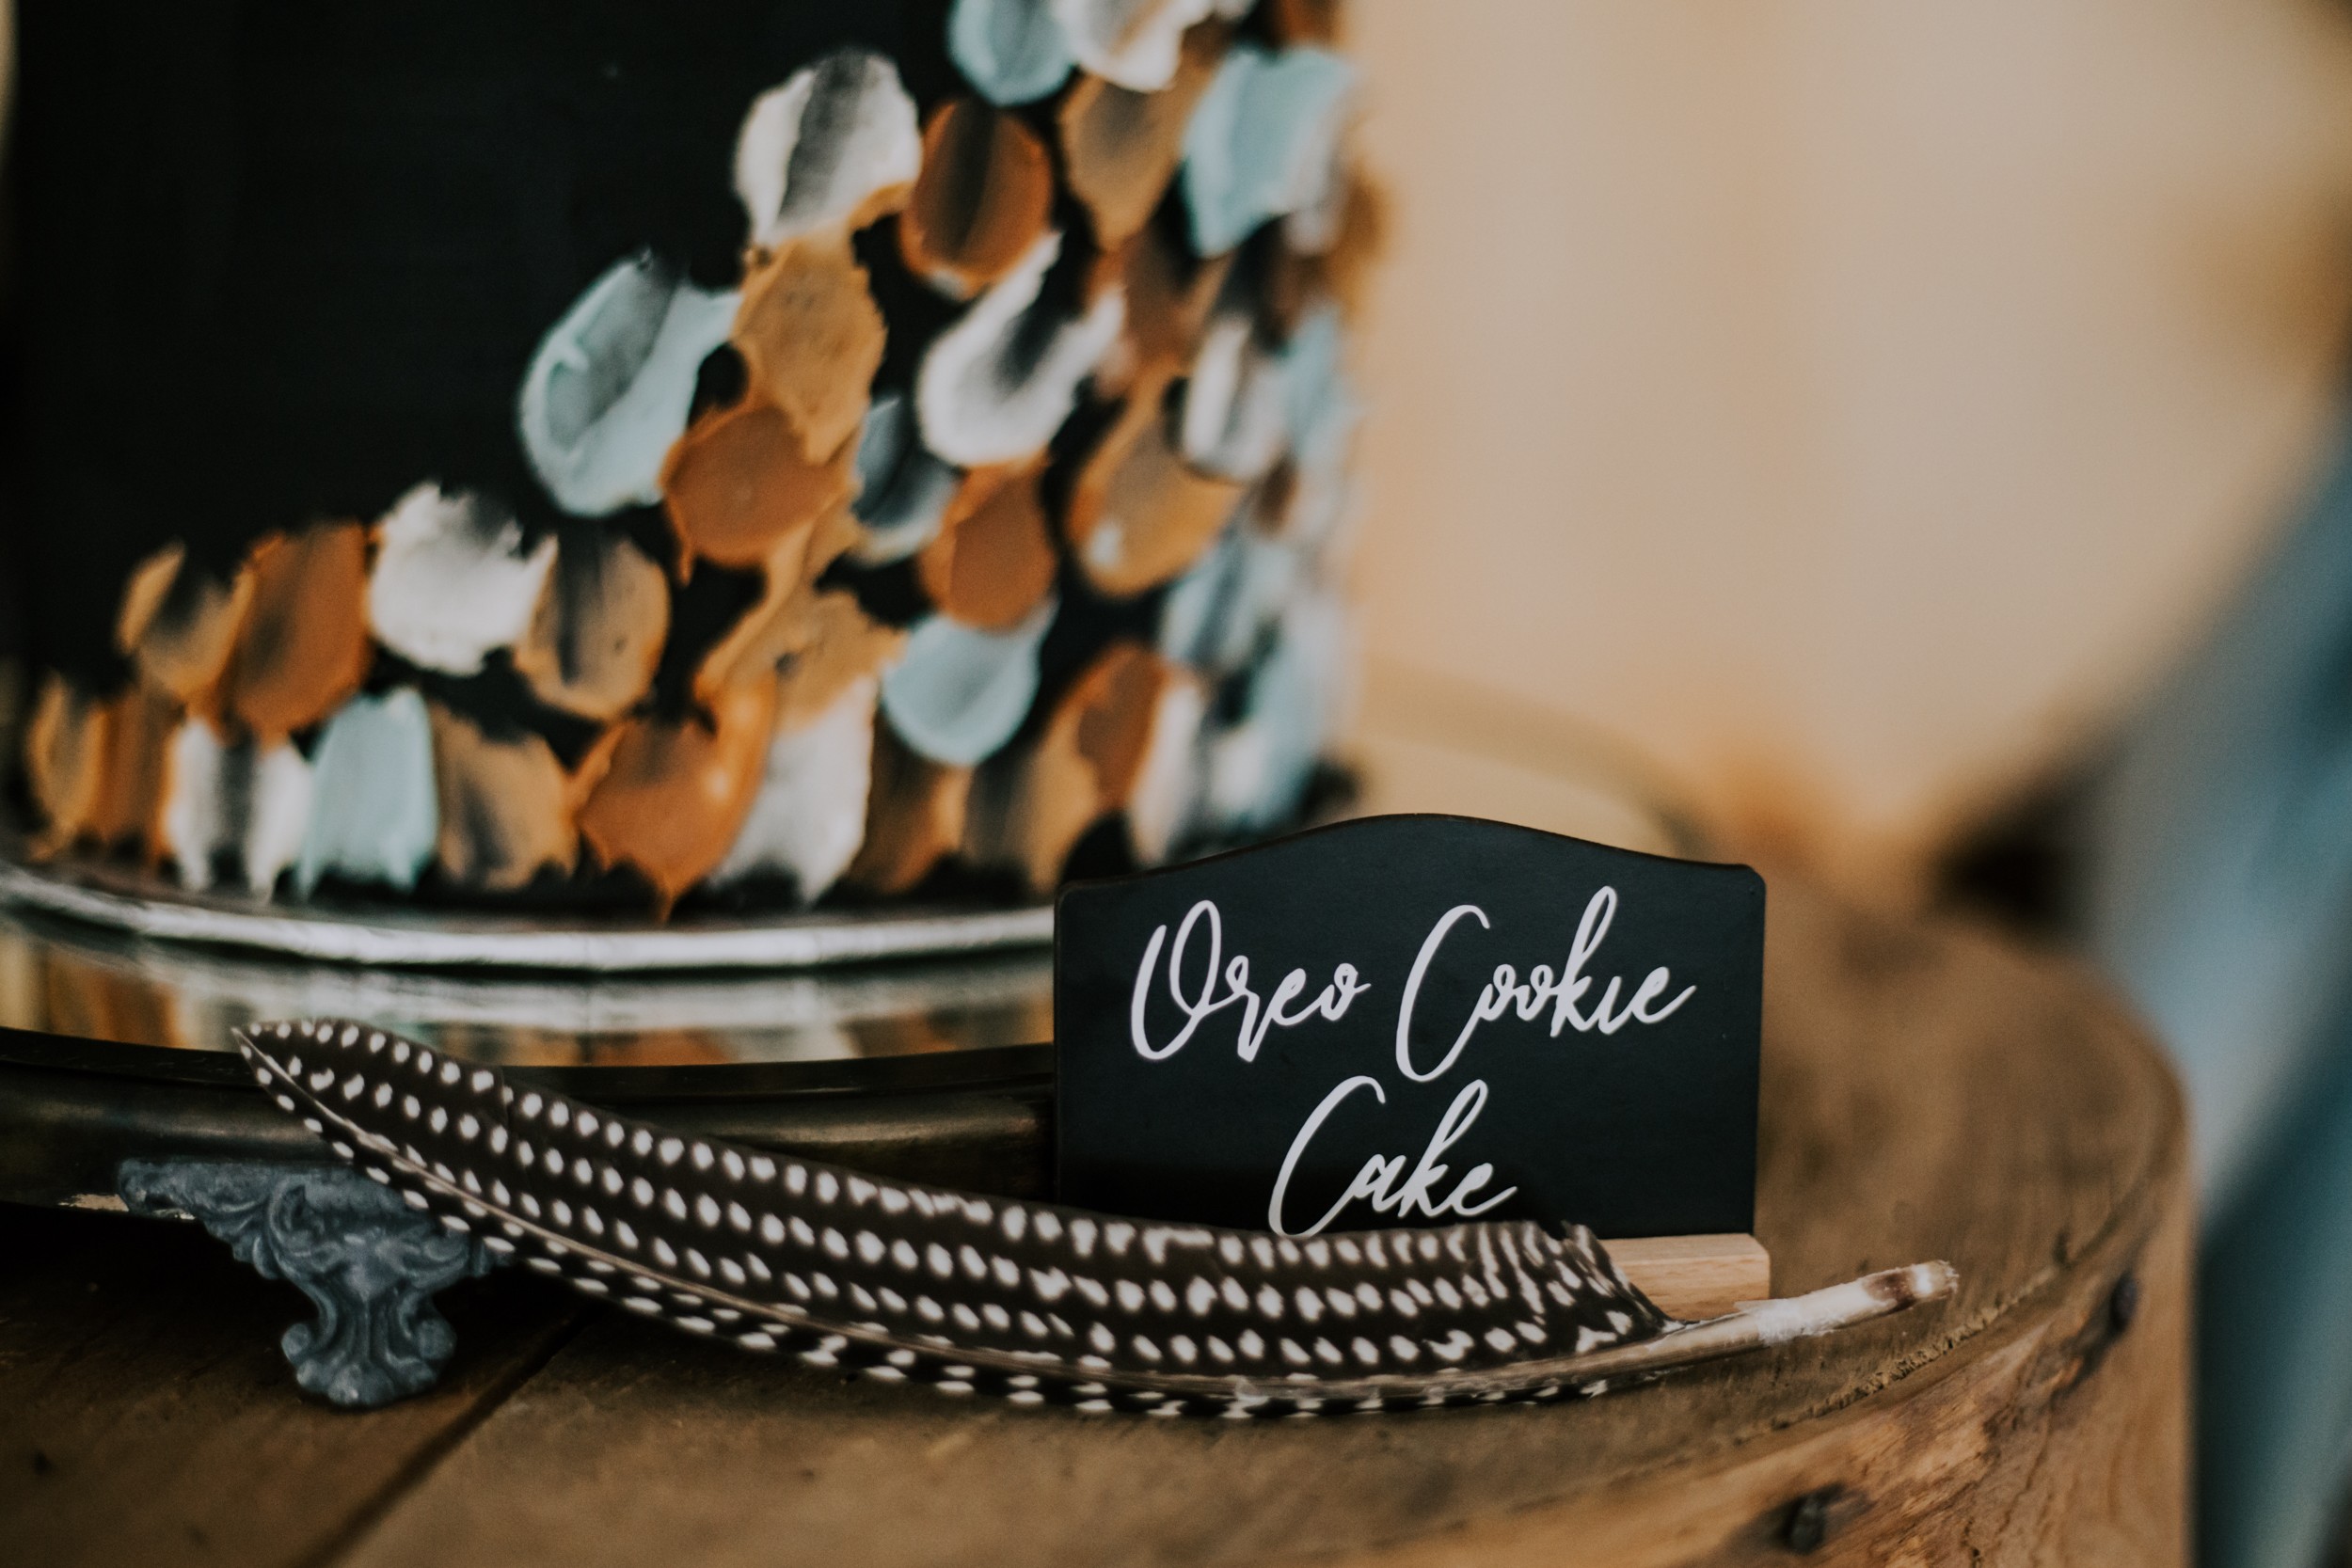
Feature Cake: Oreo Cookie Cake(black chocolate butter cream with oreo buttercream layers. Topped this with candy and everything exciting) You can pre-bake the layers and pre make the icing over 2 days, allowing you to decorate and ice the day before the party
TASTE: 4/5 DIFFICULTY: 3/5
Khari's Cake: Carrot Pineapple Cake (cream cheese layers with buttercream frosting) You can pre-bake the layers and pre make the icing over 2 days, allowing you to decorate and ice the day before the party
TASTE: 5/5 DIFFICULTY: 2/5
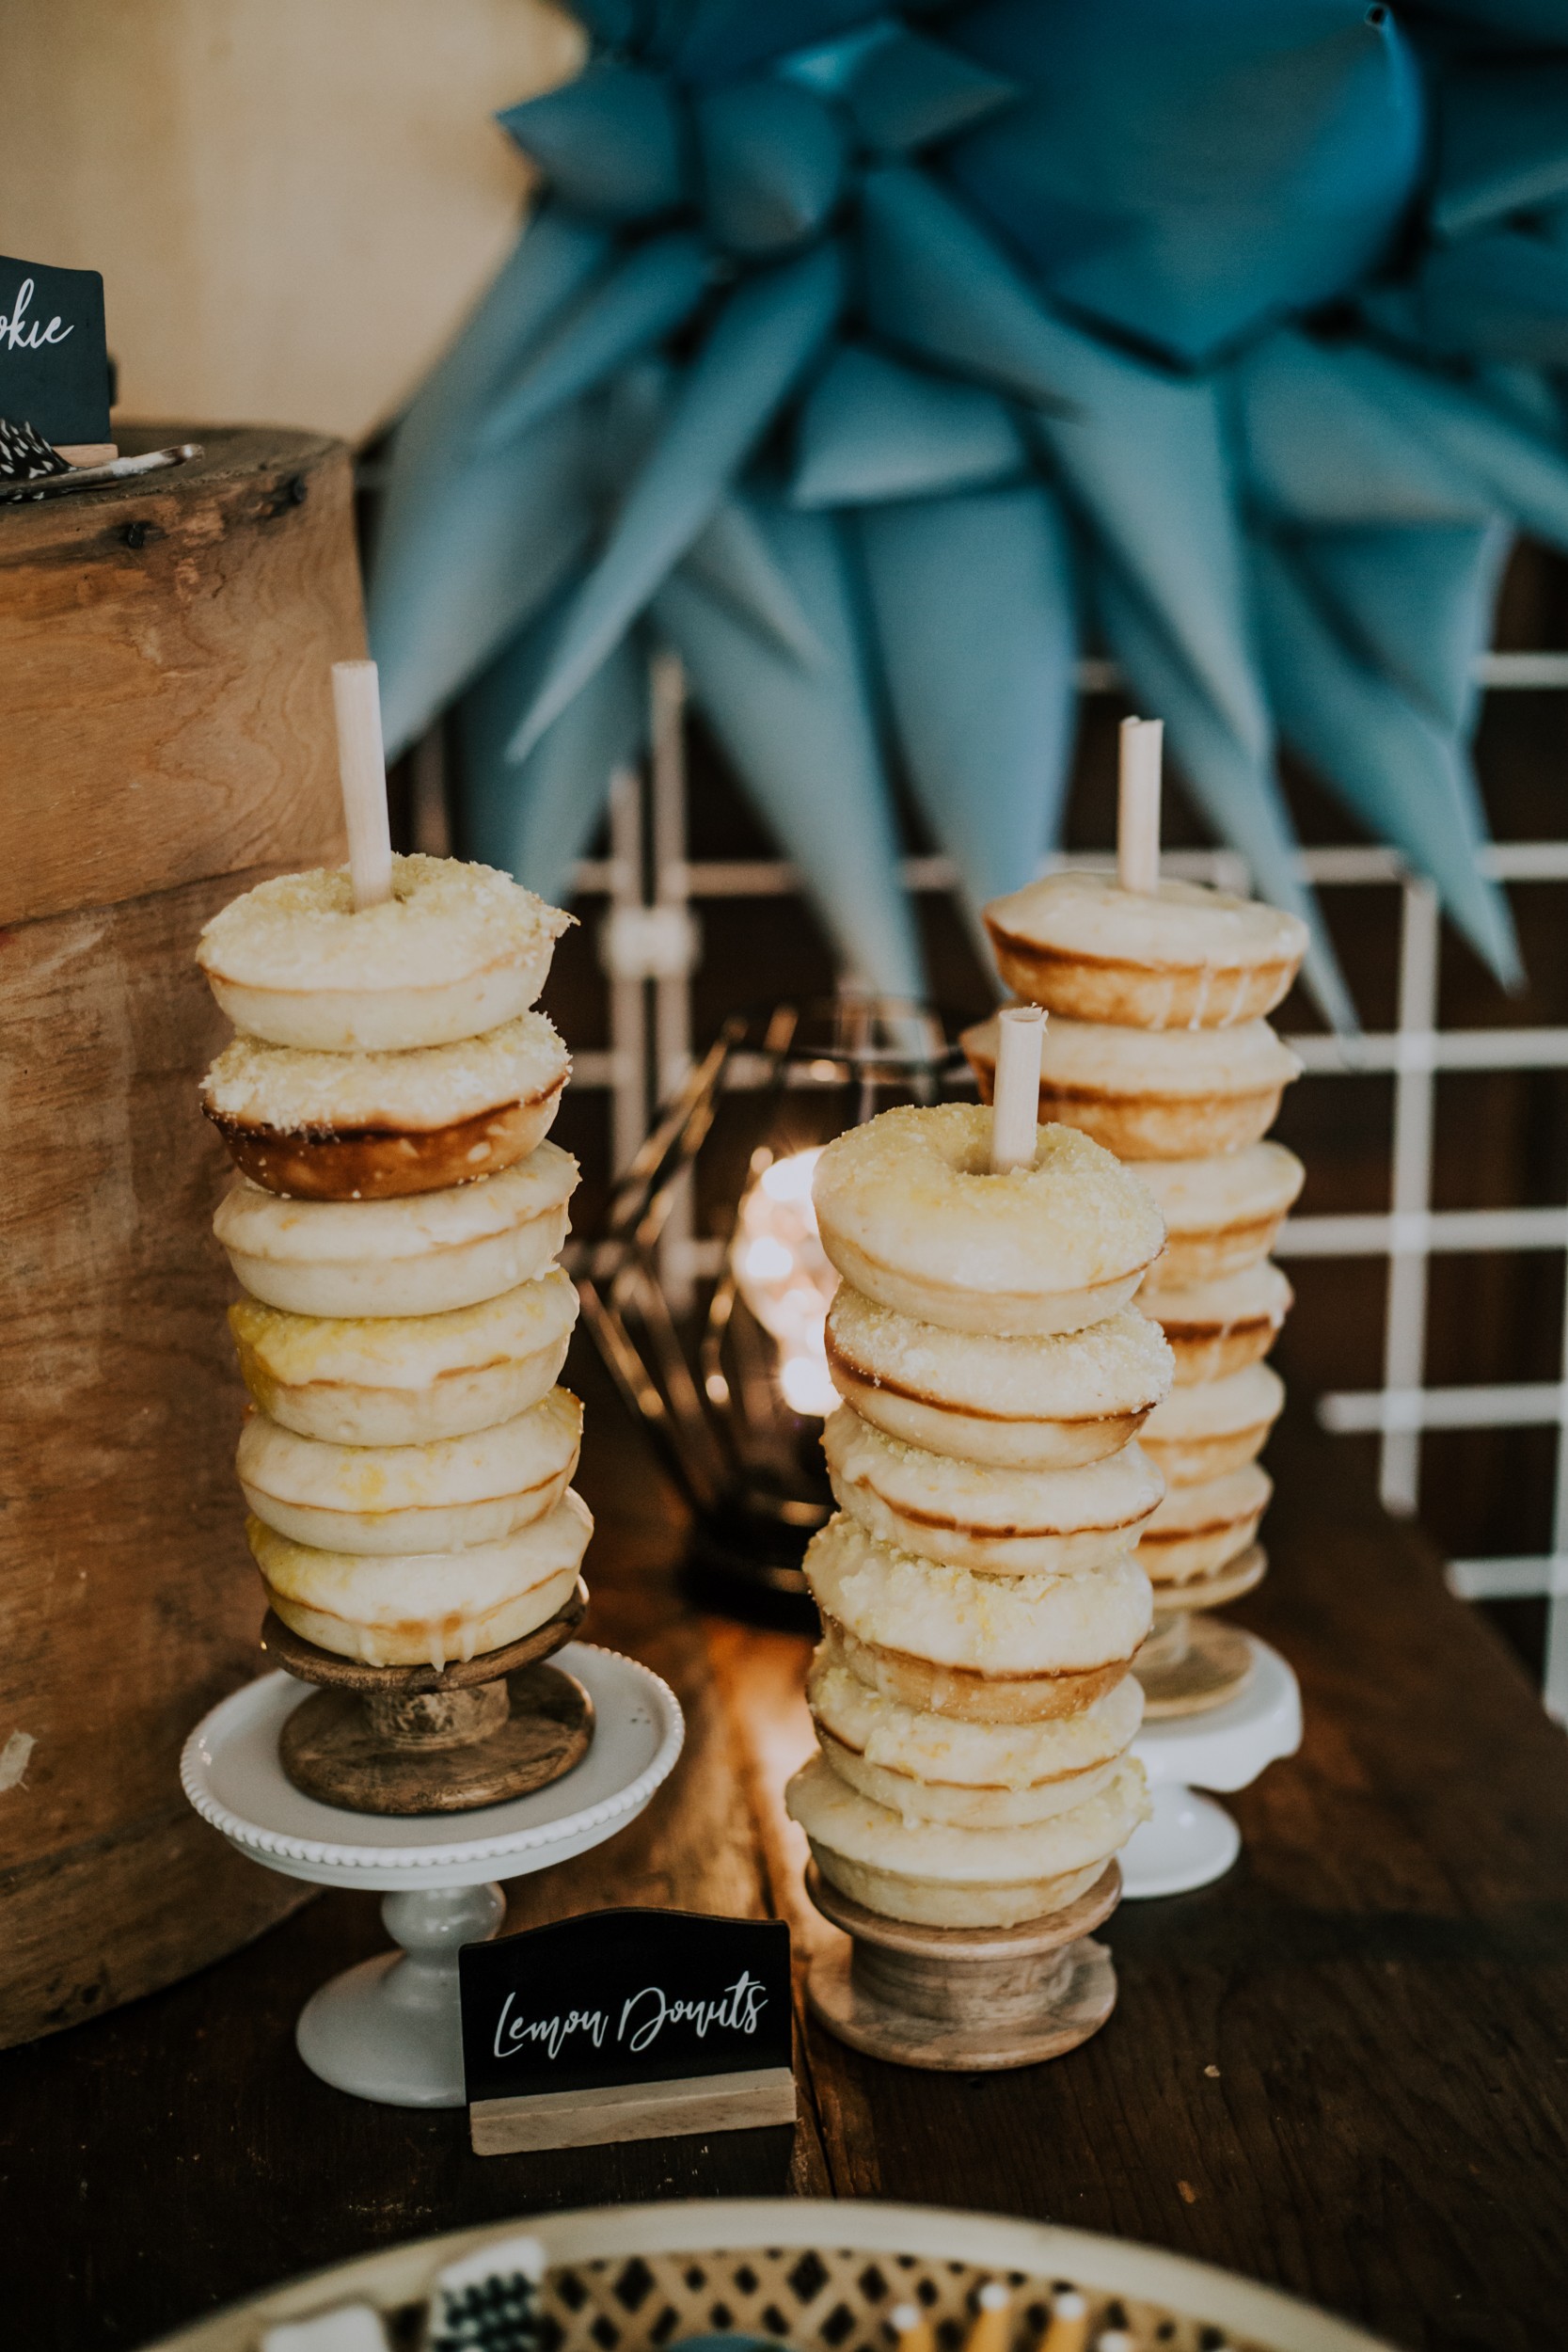
Lemon Baked Donuts:(various types of glazes or sugar coating) I baked these the day before the party as donuts never taste good old.
TASTE: 2/5 DIFFICULTY: 1/5
Sugar Cookies (this is purely because every kid loves a decorated cookie! This helps bring the theme alive). I made these first, and weeks ahead of the party. I baked the cookies first and froze them, and then decorated them over a week period.
My guest count was 10ppl including myself and husband so I kept the desserts to 5 varieties. I didn't make extra of anything as most people will only try a few items, and I didn't want waste. The key to serving desserts, is to only put a out a small portion in individual portions. As they deplete, you replenish. This also looks way better! presentation is key!
SETTING UP YOUR TABLE
Many people think that creating a dessert table is a matter of making desserts and it's so much more than that! Here are a few key instructions to help you prepare.
Sketch your table design to visualize how it will look.
Use as many items as can that you own or can borrow and start to design off of that. From there, you can isolate what you need to make or purchase.
Select your menu and timeline
Set up your table with cake stands and items you want to use. Start visually playing with the set-up to get a set visual. This will also help you narrow down your menu and if you need to create variety with shape or size. Don't forget to take photos of the set ups you like so you can go back to pick a favourite and for a reference when you actually set up.
Start making food labels or signage
Start making the desserts
The day before your party, set up everything you have to ensure that nothing is missing. Do not leave it to the last minute!
Set everything out well before guests arrive if they can be room temperature. Take your photos before guests arrive and make sure to account for this timing when planning!
BUILDING A NARRATIVE
Build a narrative for you party starting with the invites. Create your invites online or on paper with the same theme as your party. This may not be noticed by everyone but sending small signals with your theme, helps build this storyline.
When creating a party around a theme, that theme should be presented throughout your venue and in details as well as bigger visuals. Just focusing on the dessert table and forgetting about the rest forgets the opportunity to create a more cohesive story.
THE ENTRANCE
The entrance to any party, should show guests immediately what they should expect. If you are at a wedding, there should be a sign signalling the couple, etc. An intimate home party can do this in subtle ways too. It doesn't have to cost a lot.
In my case, our mantle is one of the first things you see when you enter our home. It is already a natural point of focus, so I decided to make the mantle the Khari feature area, where I would showcase him. Firstly, I brought framed photos of him from our bedroom, down to the mantle and arranged them there. I then printed his monthly milestone photos from his first year of life and strung them onto string with clips. I used something old, and something new and cheap! The overall effect, made the party theme apparent at entry. This was a party for Khari.
Secondly, I blew up some balloons I had kicking around from an old party and strung them together as a garland. I hung them off-centered on one side of the mantle from the ceiling, and voila! I had an eye-catching entrance that doubled as gift goodie bags for the kids.
Lastly, I arranged the gifts I had gotten Khari under the mantle, which made it clear to guests upon entry, where they could leave their packages.
SIGNAGE
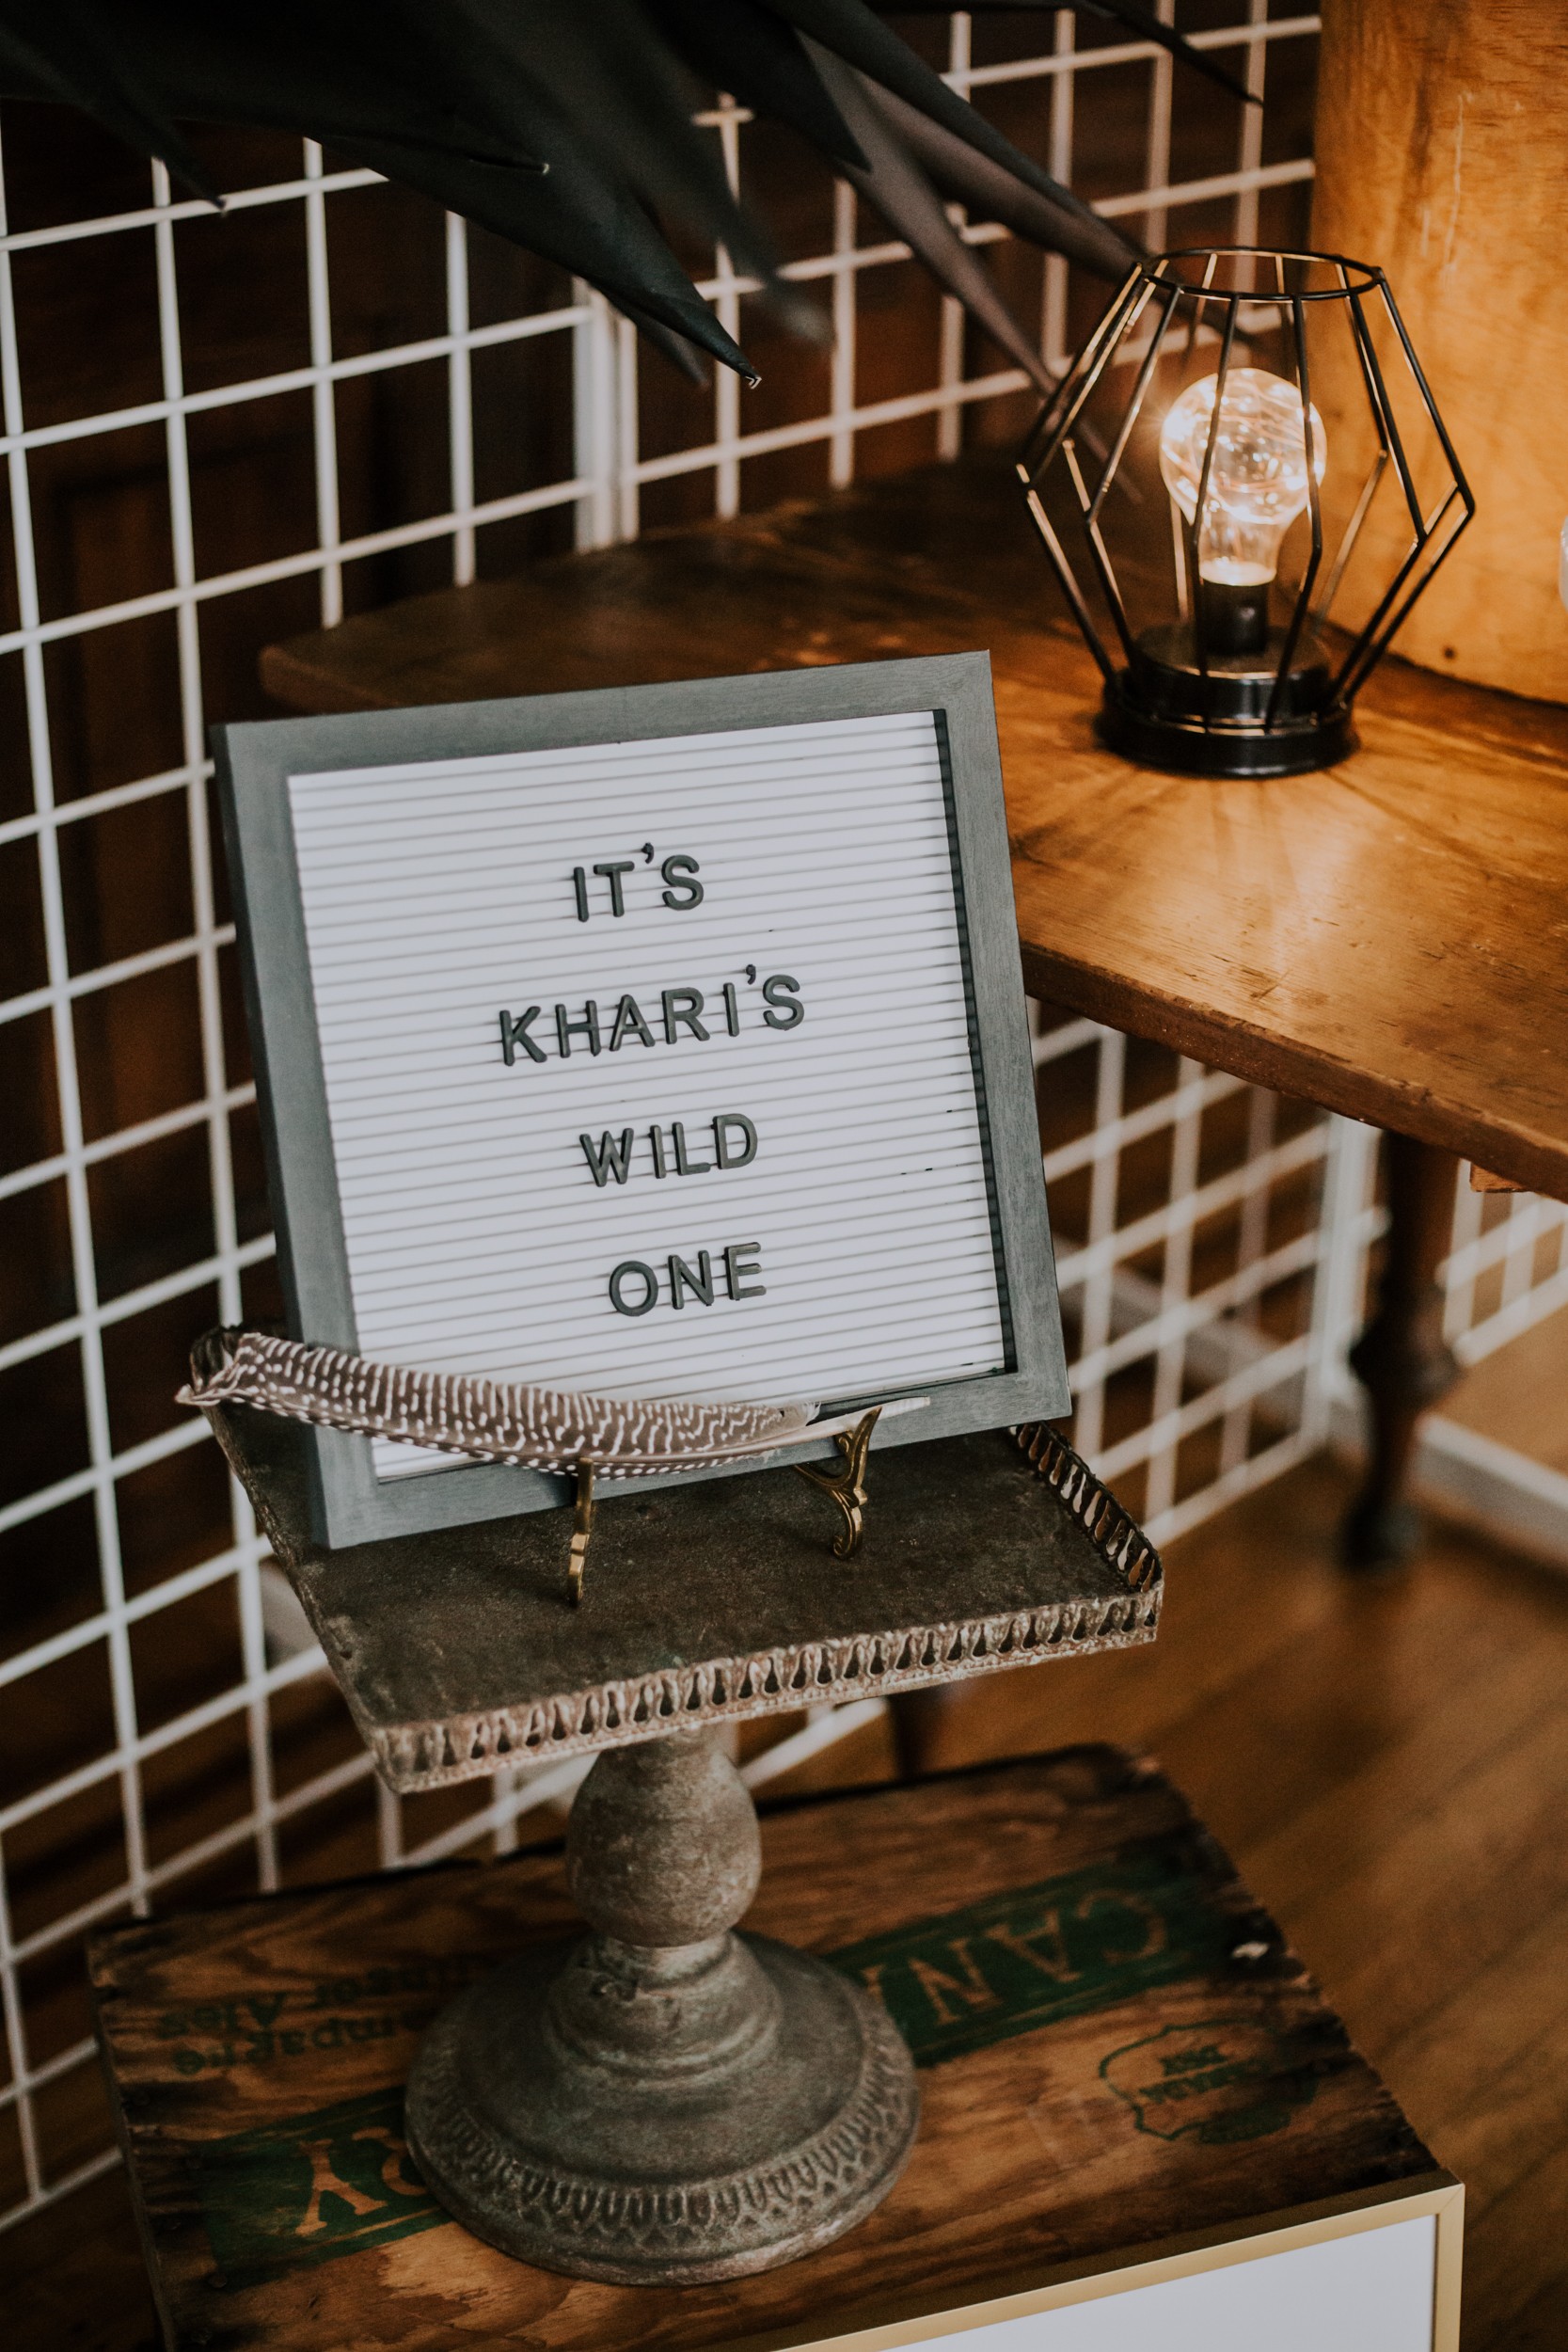
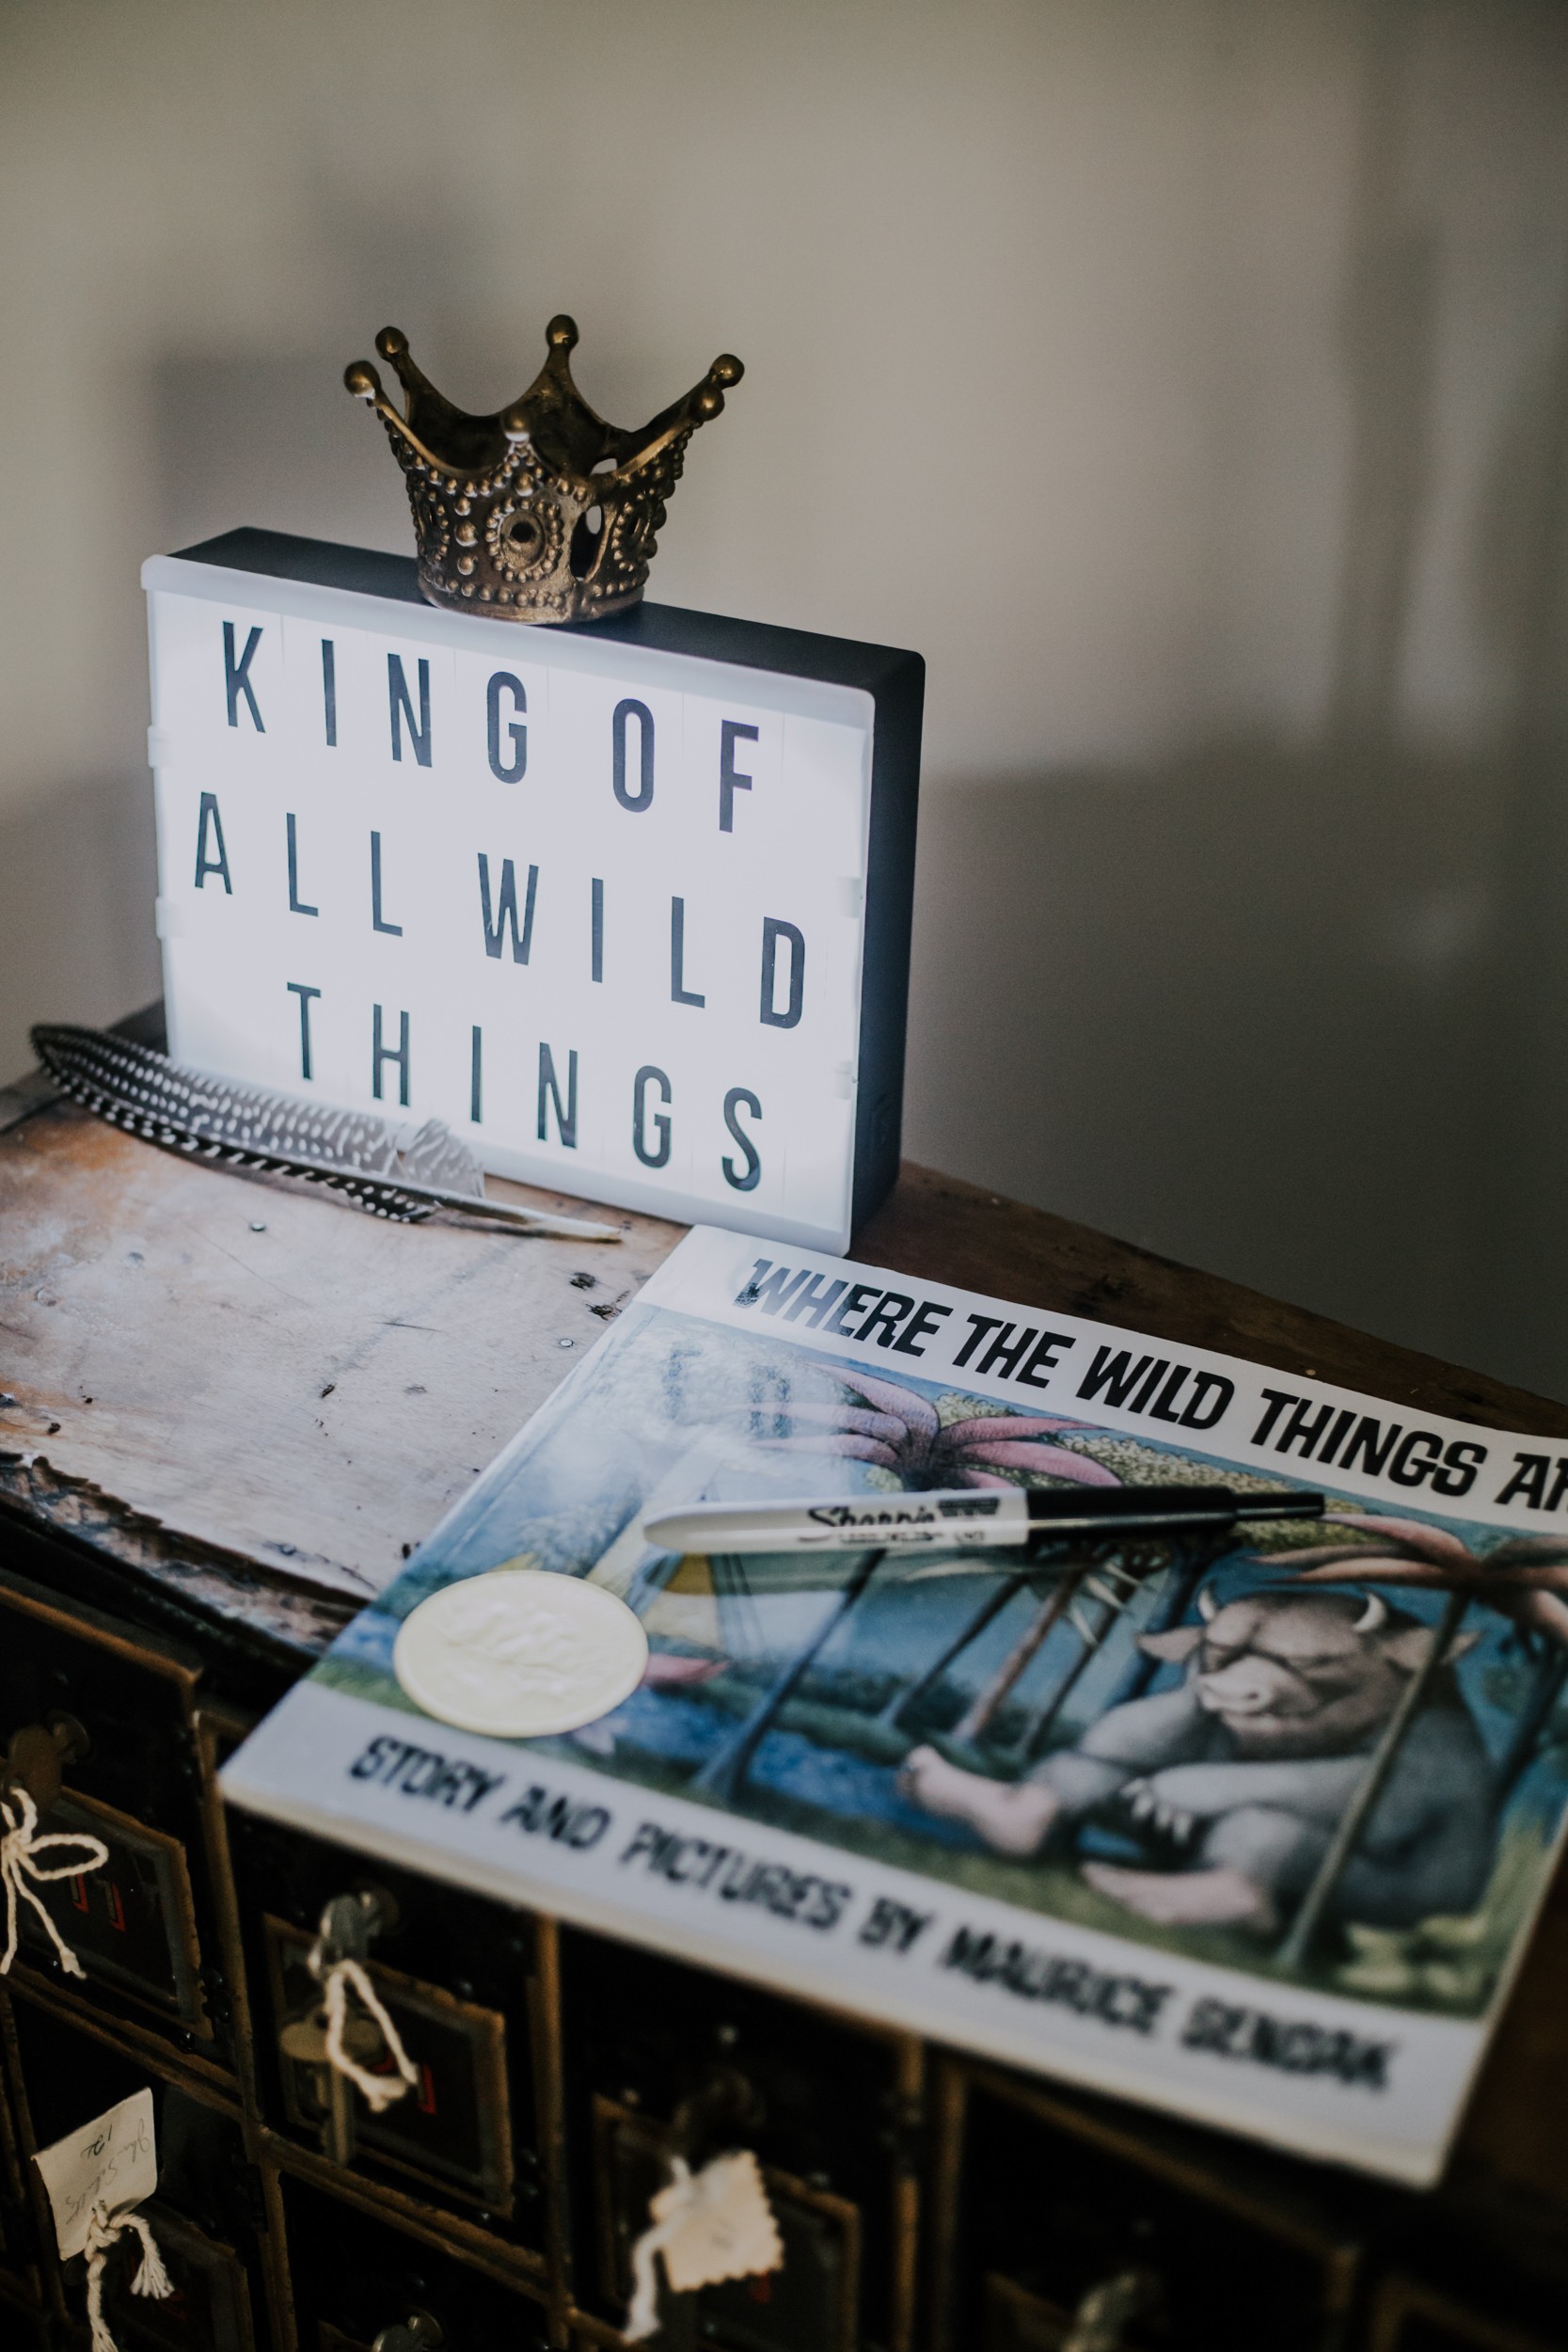
A party should never opt out of signage. Signage comes in so many formats, and sets the tone and theme of a party. It also takes the guess work out of food questions.
I found some great finds at Dollarama for the signage I used here. The lightbox, and marquee board are both from there. The black wire lights too. Signs are a great way to add detail and make the party extra special. You can use these to direct, inform or request your guests. In my case, I used one to ask guests to write a message for Khari in his "Where the Wild Things Are" book as a memento.
PICNIC TABLE
October weather is always a gamble in Ontario but I was gambling that we could at least try to socialize outdoors. I planned to keep the desserts inside as my backdrop was too big to bring out and the wasps were brutal this year.
The morning of the party was wet and brisk, but it looked like it would be a decent enough day, so I set up picnic tables on our deck with a beautiful tweed carpet and throw cushions. The Lemonade Party Box's cute paper plates and napkins spoke for themselves. Vases with feathers or pampas could have been added, but to be honest I ran out of time. All in all though, I was happy with how simple and geometric it presented.
PLAN. SET UP. ENJOY.
You have worked so hard to create, and build a beautiful story for your child's party! While hosting a party is by no means relaxing, you should try hard to organize yourself as much as possible, to enjoy it as much as possible.
Ask for help where needed. Often guests ask how they can help and you reply with "I'm good, thanks." This is for two reasons.
1. Your guests should relax.
2. They mostly get in the way more than help.
I get it, delegating is hard. The one thing I can recommend, is delegate the things you care less about. For example, if you are hung up on the dessert table being perfect, don't count on anyone for that. Ask them to bring an appetizer or a side for the lunch. Whatever the case may be, take advantage where you can.
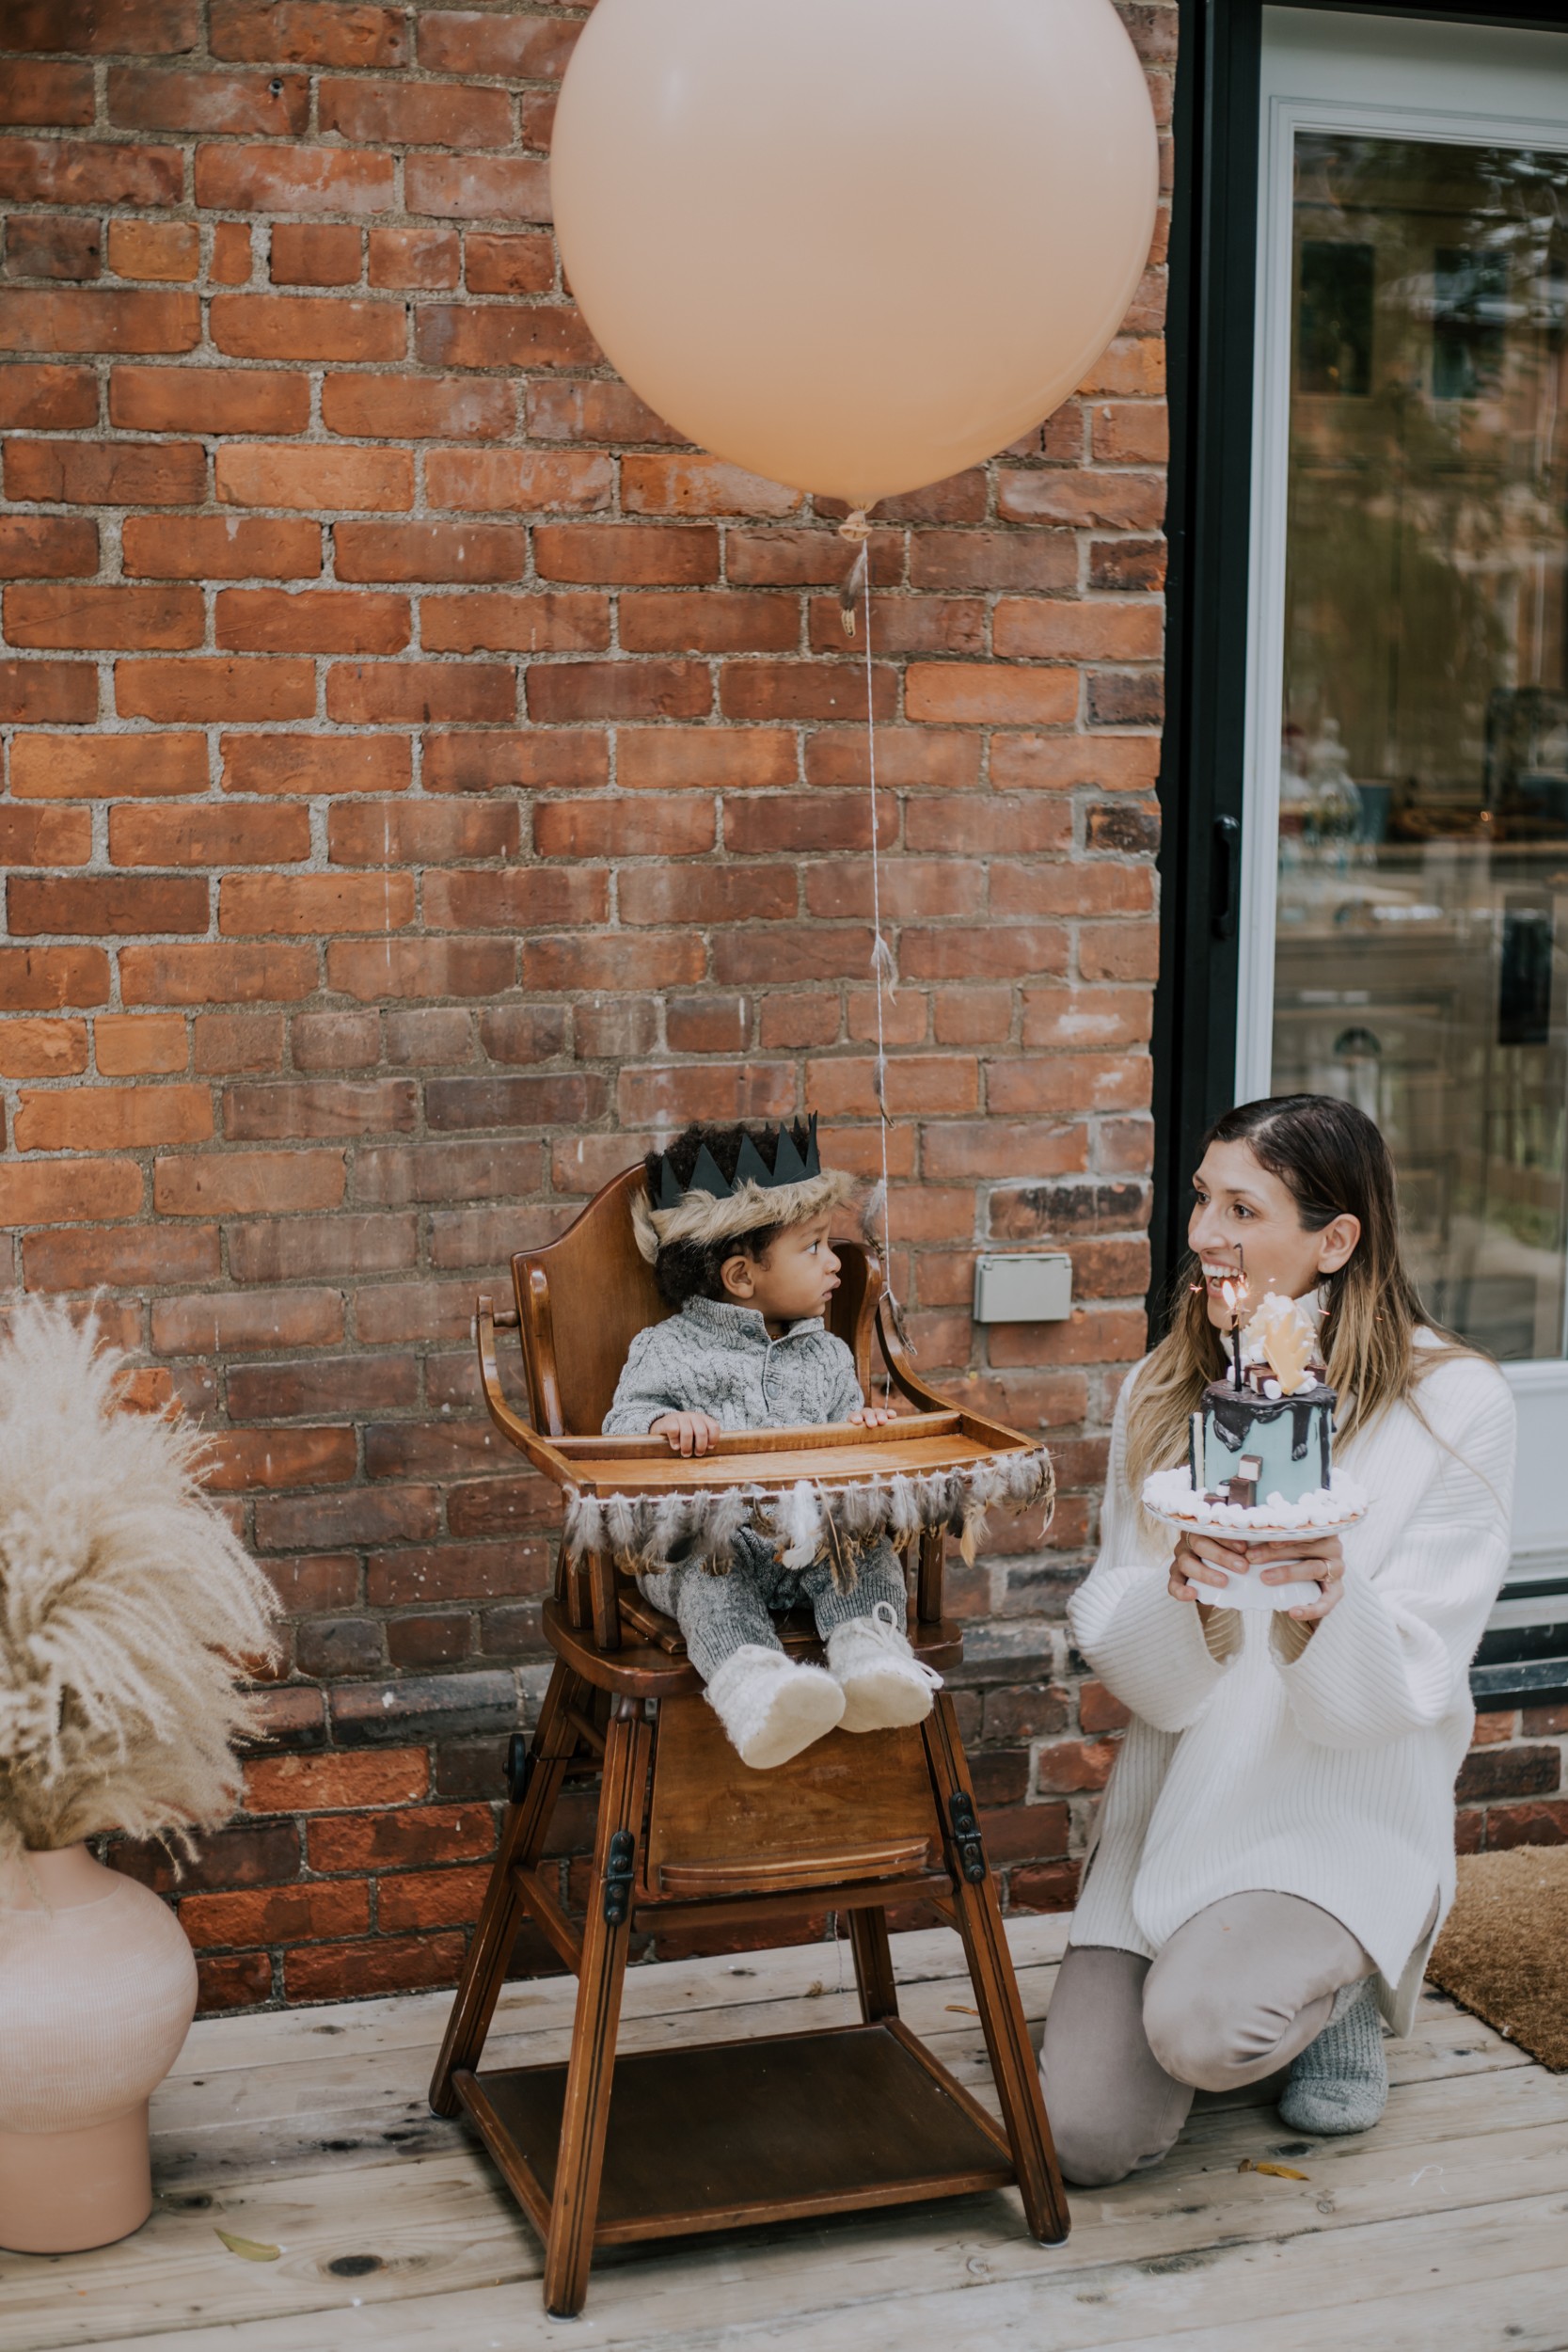
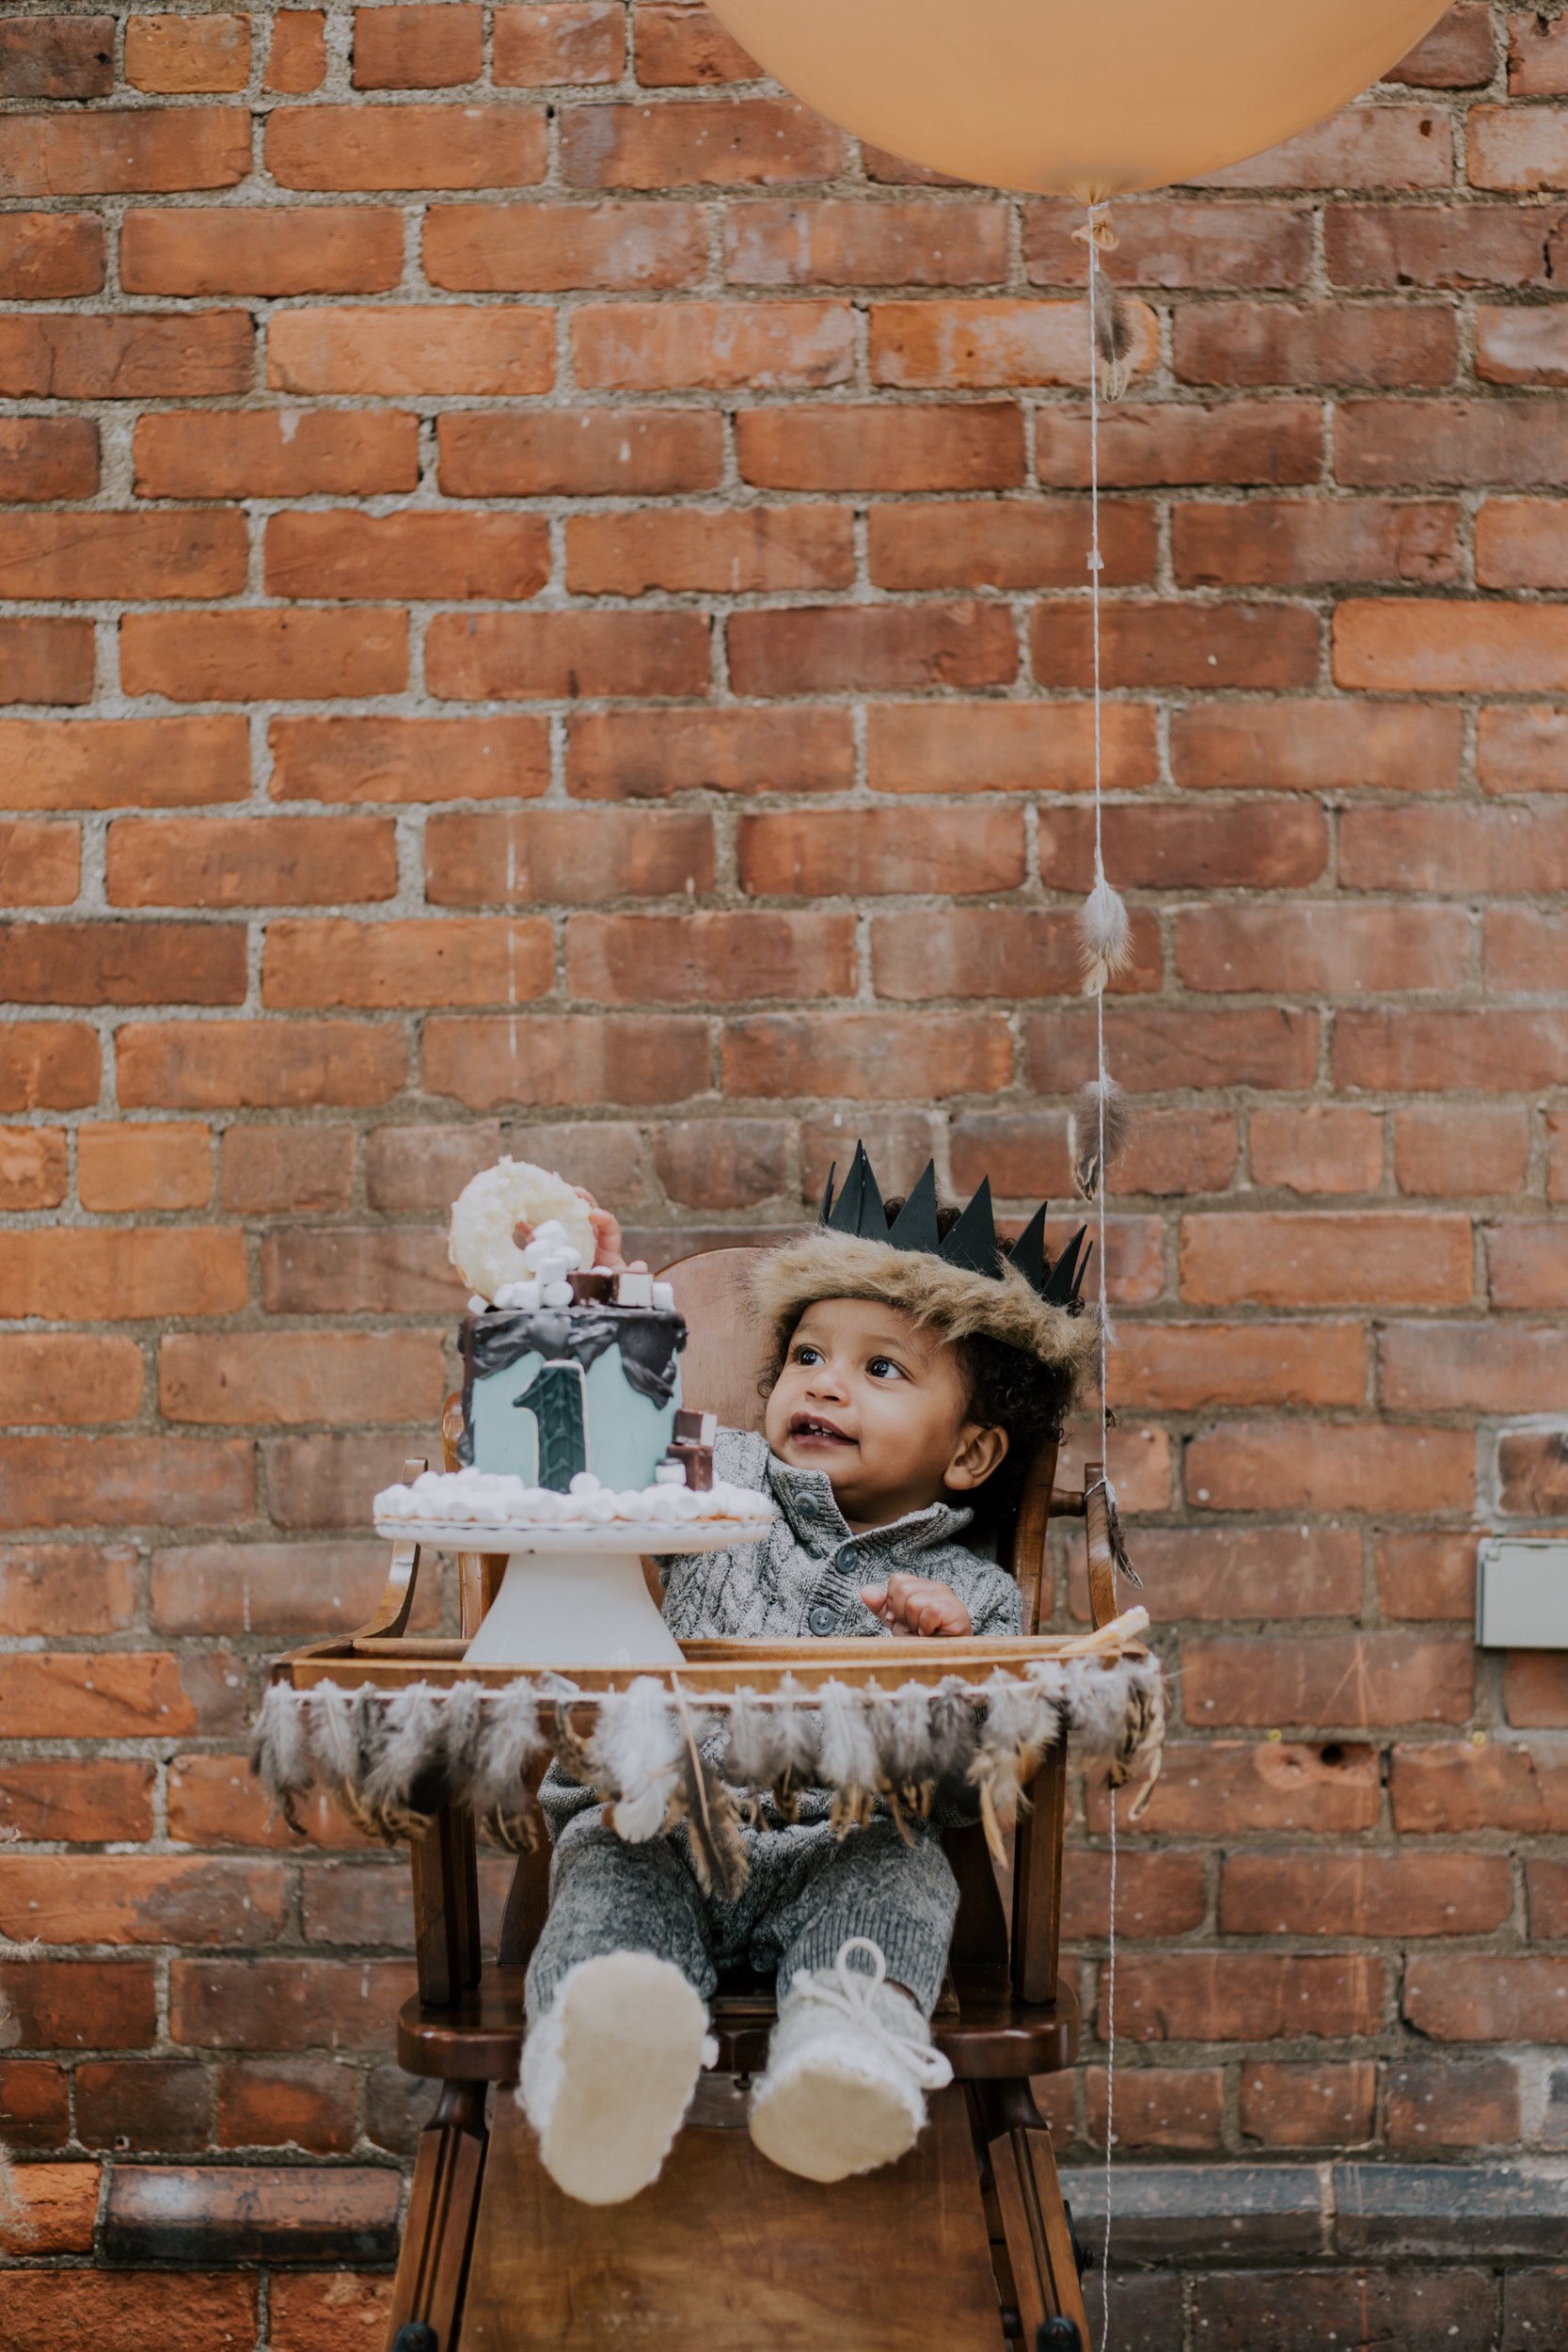
CAKE SMASH
The part of the day you have all been waiting for is here. Smash the Cake. I prefer to give your child their own cake to mangle. Put him or her in a well lit area and let them be free. Enjoy their discovery of making it through to their first birthday! After that, congratulate yourself and your partner for surviving! You all did it! Congrats!
Naturally, I planned to host a huge “Where the Wild Things Are” smash the cake bash for my son’s 1st birthday party. Due to Covid restrictions however, our huge bash promptly became immediate family members only. Of course, I was disappointed but that wasn’t going to stop my decor and dessert table plans.
SELECTING A PARTY THEME
A quick Pinterest search of “smash the cake birthday themes” will send you down a rabbit hole of elaborate and endless creative ideas. For some, it might send you into creative overload or for others, shame and guilt that you just don’t have the time or energy to create such elaborate wonders. Trust me. Even the most creative people feel these waves of emotion. At some moments, I thought “To hell with it. I’ll do it another year.” But, I just couldn’t let his birthday come and go without making it a big deal. Admittedly, for me more than him. hahaha. The first year of your child’s life is a big deal! Even more than that, the first year of surviving parenthood, is even bigger! I wanted to celebrate for the both of us!
MEANING
A strong theme is usually one that has some kind of meaning to you or your child. That meaning can be surface or hidden. Regardless, choosing one that is meaningful helps you stay focused on curating something notable.
“Khari” is a Swahili name that means “Kingly” and “Wilder” is Khari’s middle name. It seemed fitting to me, that “Where the Wild Things Are” would be a perfect theme for his party.
VERIFY YOUR THEME FEASIBILITY
Once you select your theme, and before you buy anything, check the feasability of it first. Ensure that your ideas are attainable and within budget. If you choose a theme that is out of your league or capabilities, you will catch yourself scrambling to keep up, or diverting from your plan. This can result in decor that is not cohesive, and leaves you feeling like something is amiss.
For example, if you envision a dessert table that has all black cake stands, check to see if you can find them first. Are they in stock or rentable? Can you do a DIY within budget to ensure you have them? If this simple element seems daunting or like a wild goose chase, consider changing up your design or changing your theme altogether. Becoming obsessed with a certain look and then realizing once you are already deeply committed, is both frustrating, discouraging and likely expensive.
CHOOSE A FOCUS
Choosing a focus for your party is a great way to start planning your decor. Identify how many people are coming of course, and what time the party starts. I started early as Khari was napping around 1pm and so I wanted people to be able to engage with him before he went to bed. My focus of the decor grounded to the dessert table. Since the party revolves around Khari’s first cake, it seemed obvious to make desserts based on the theme. I chose easy lunch items and eliminated my initial plan of a huge charcuterie table. Instead, I put my efforts into the desserts; still offering a handful of flavours but less in quantity.
SIGNAGE
A party should never opt out of signage. Signage comes in so many formats, and sets the tone and theme of a party. It also takes the guess work out of food questions.
I found some great finds at Dollarama for the signage I used here. The lightbox, and marquee board are both from there. The black wire lights too. Signs are a great way to add detail and make the party extra special. You can use these to direct, inform or request your guests. In my case, I used one to ask guests to write a message for Khari in his “Where the Wild Things Are” book as a memento.
DESSERT TABLE
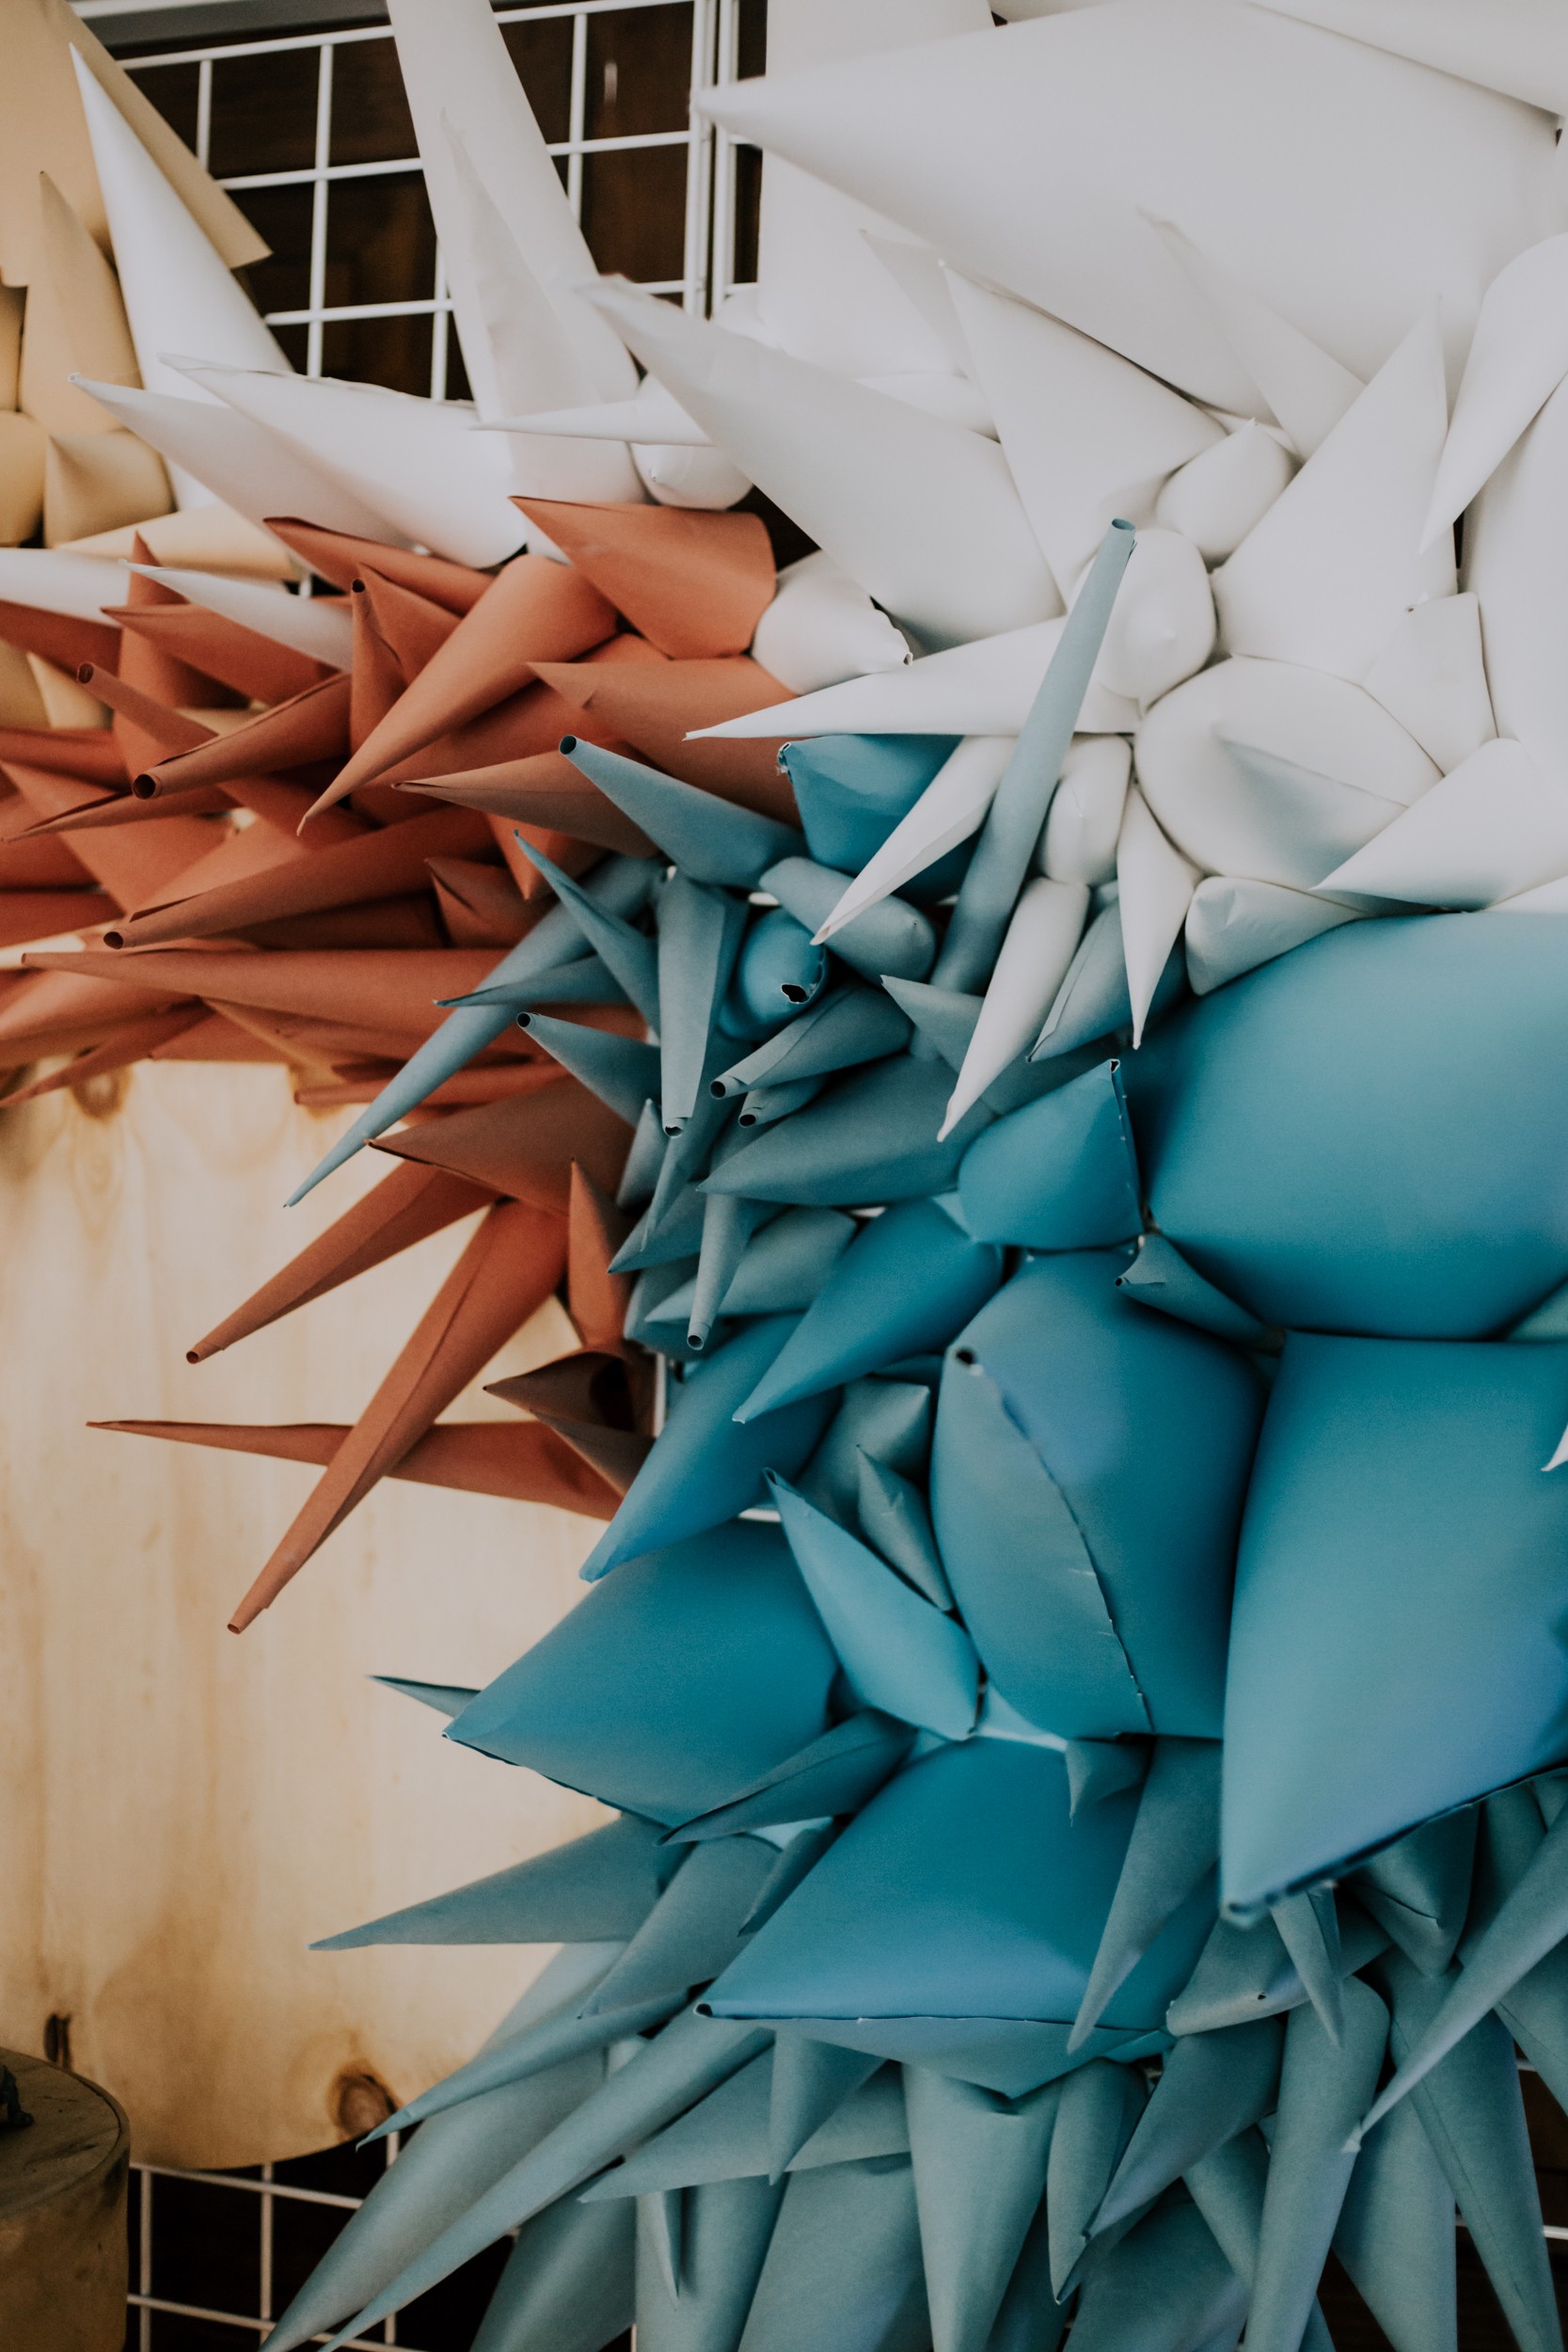
“Where the Wild Things Are” is a beautifully illustrated book that has sketch-like strokes that help emphasize the texture of the hair of the wild things. I was inspired by Edhv and Wendy Plomp’s giant paper cone interactive installation I saw online. As a result, I decided to make a paper cone backdrop for my dessert table as the anchor. Choosing colours from the book, and of course attainable colours at the store, I started making paper cones in various sizes. This backdrop took me a lot longer than I expected, especially with a toddler running around, “helping” me.
Once I finished the cones, I started attaching them to my grid panel background. These can be rented or purchased however they are expensive. alternatively, you could choose rigging chicken wire or plastic caging and attaching the cones to that.
I positioned my vintage wooden table in the center of the grid system to visualize where the cake would sit as the feature. I needed to raise the cake, so played with some props around the house to find the perfect item.
In order to isolate the cake from the backdrop, I hung my wooden plywood circle from Khari’s room decor behind where the cake would go. I knew that my cake was black, and wanted it to stand out against the backdrop. Using a natural texture with the wood, yet light in colour was the perfect choice. The cone “hairs” would then flow around the circle. I played with the cones mixing in colour, but to be it looked too busy. In my case, I thought that the visual of colour blocking the cones would be an interesting effect instead.
DESSERT MENU
At least a month prior to the party, I sketched out a plan of how the dessert table would loosely look. I researched online desserts I thought complimented one another and also gave a variety of flavours and textures. Mostly, I selected desserts that I could pre-make, without the hassle of having to prepare anything last minute.
My menu choices are as follows: I have also rated the recipe out of 5 for taste and difficulty in case you are interested in making it. (1 as lowest or easiest)
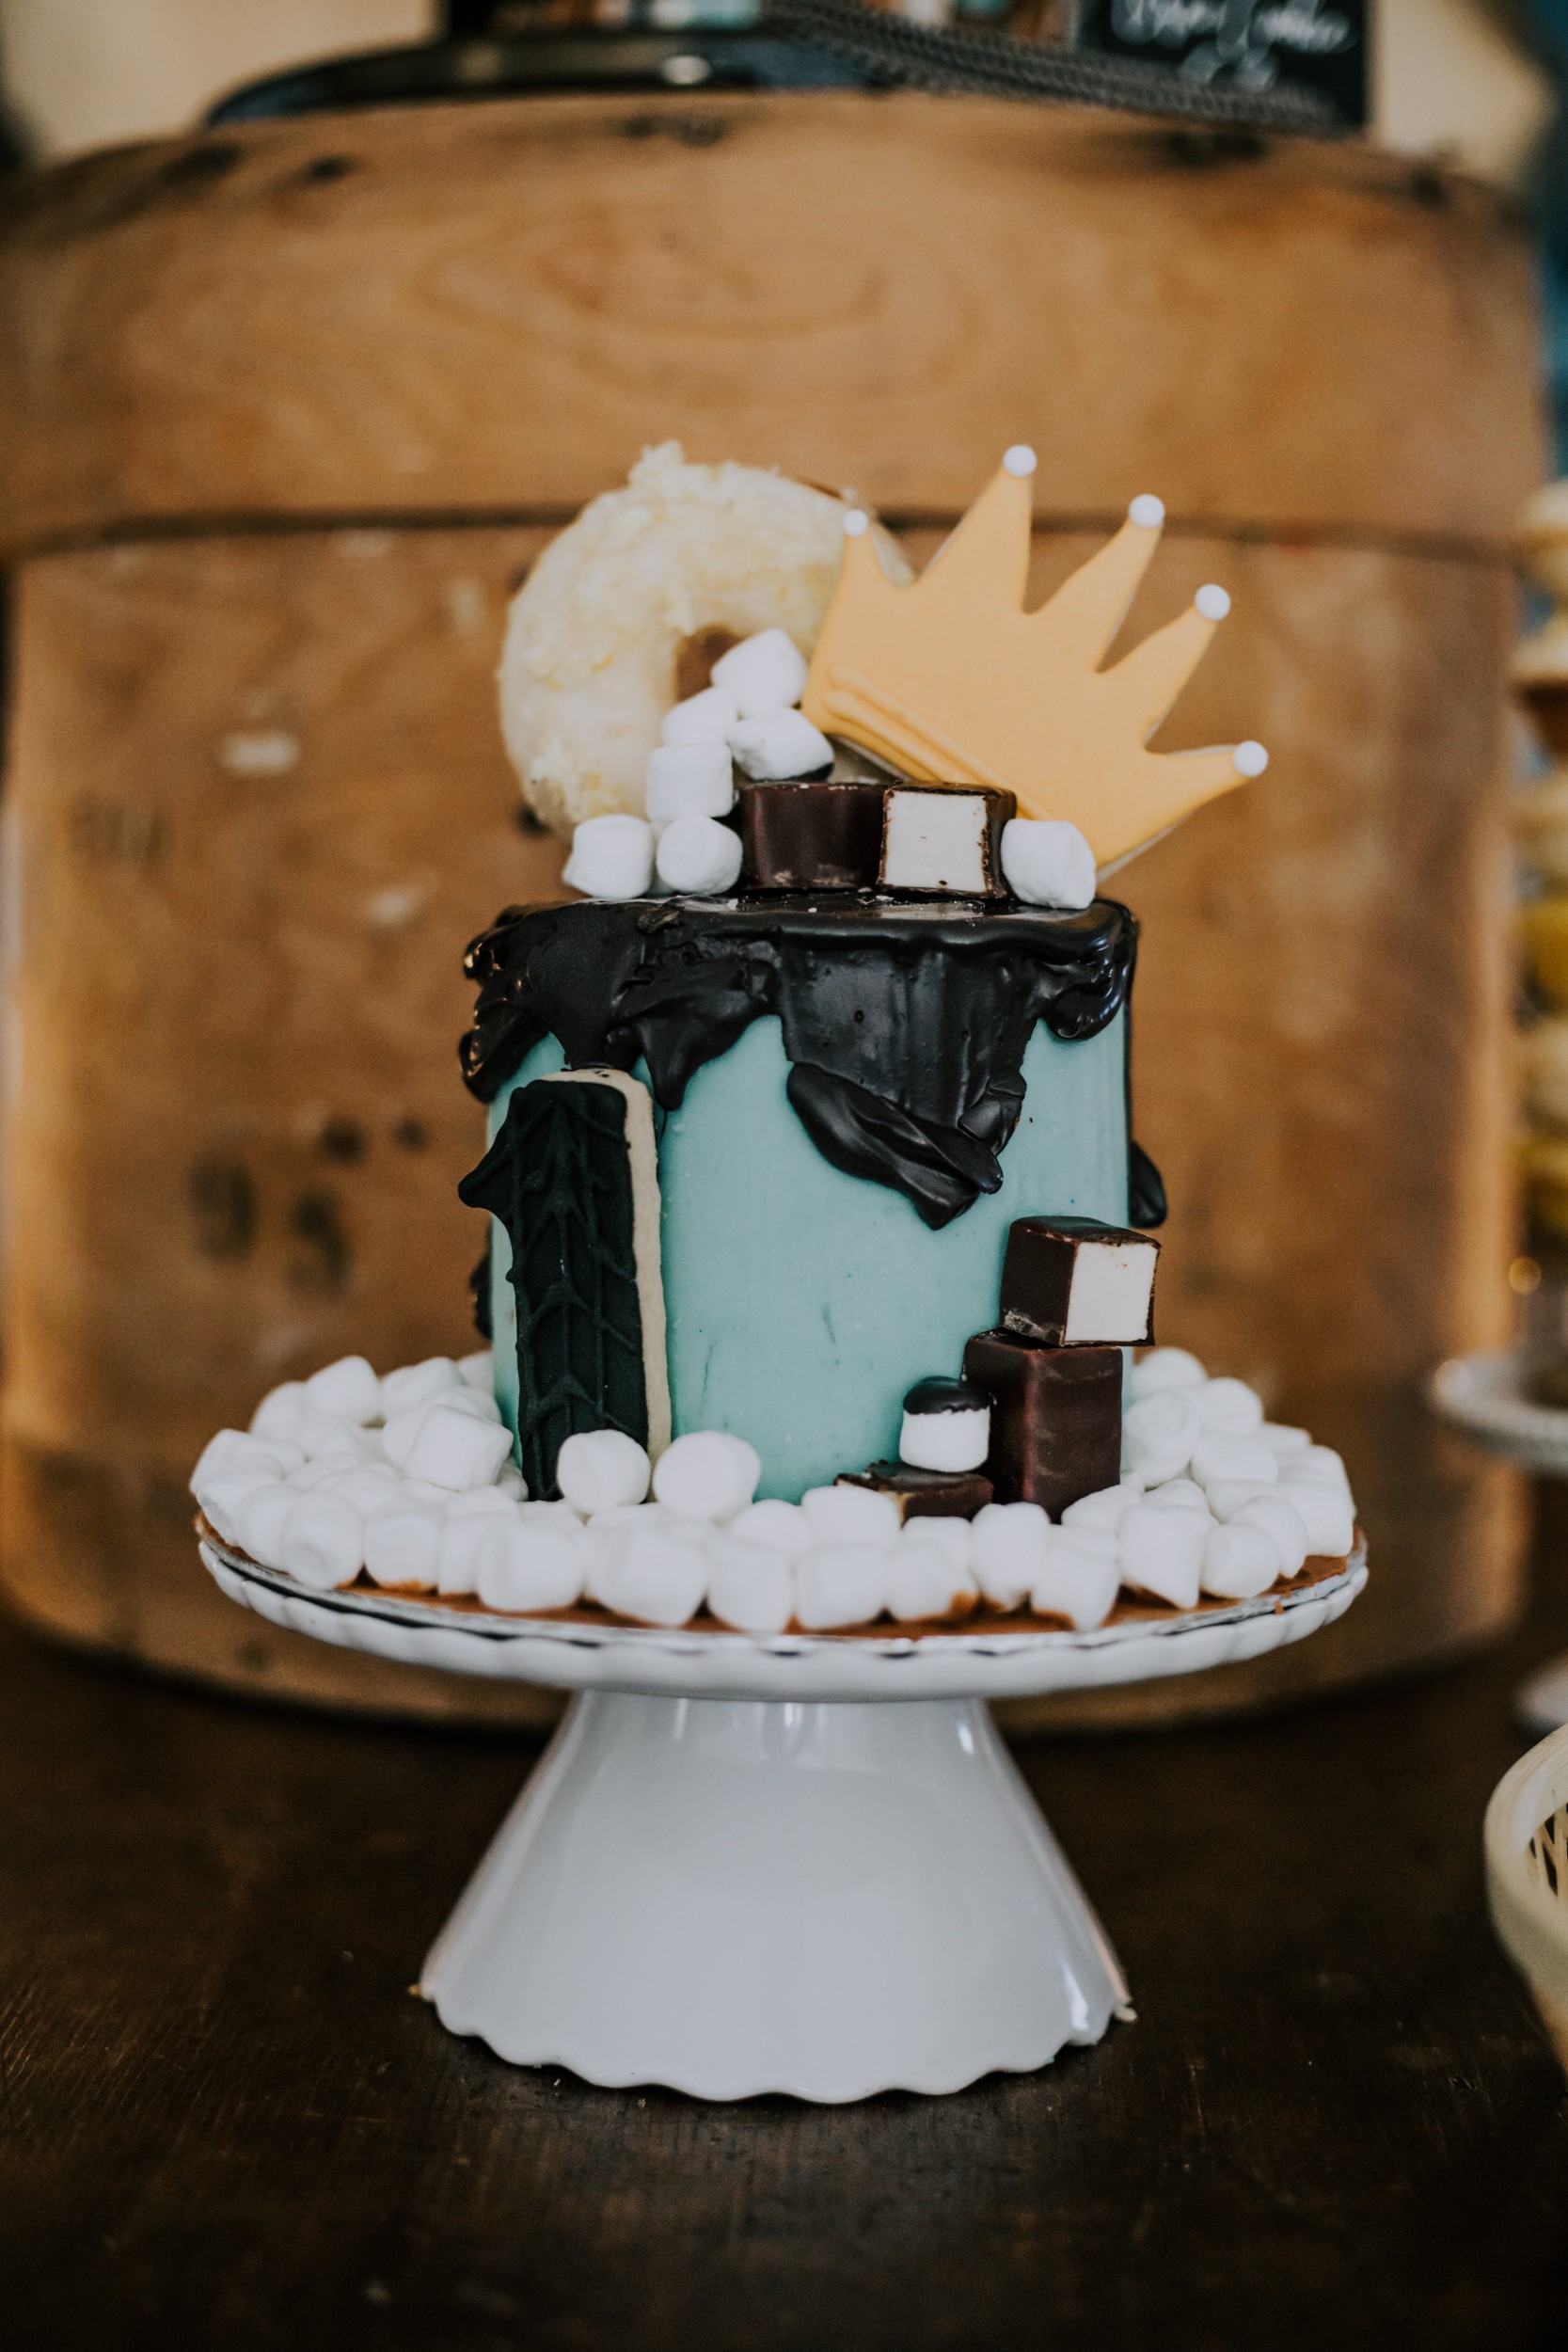
Feature Cake: Oreo Cookie Cake(black chocolate butter cream with oreo buttercream layers. Topped this with candy and everything exciting) You can pre-bake the layers and pre make the icing over 2 days, allowing you to decorate and ice the day before the party
TASTE: 4/5 DIFFICULTY: 3/5
Khari’s Cake: Carrot Pineapple Cake (cream cheese layers with buttercream frosting) You can pre-bake the layers and pre make the icing over 2 days, allowing you to decorate and ice the day before the party
TASTE: 5/5 DIFFICULTY: 2/5
Lemon Baked Donuts:(various types of glazes or sugar coating) I baked these the day before the party as donuts never taste good old.
TASTE: 2/5 DIFFICULTY: 1/5
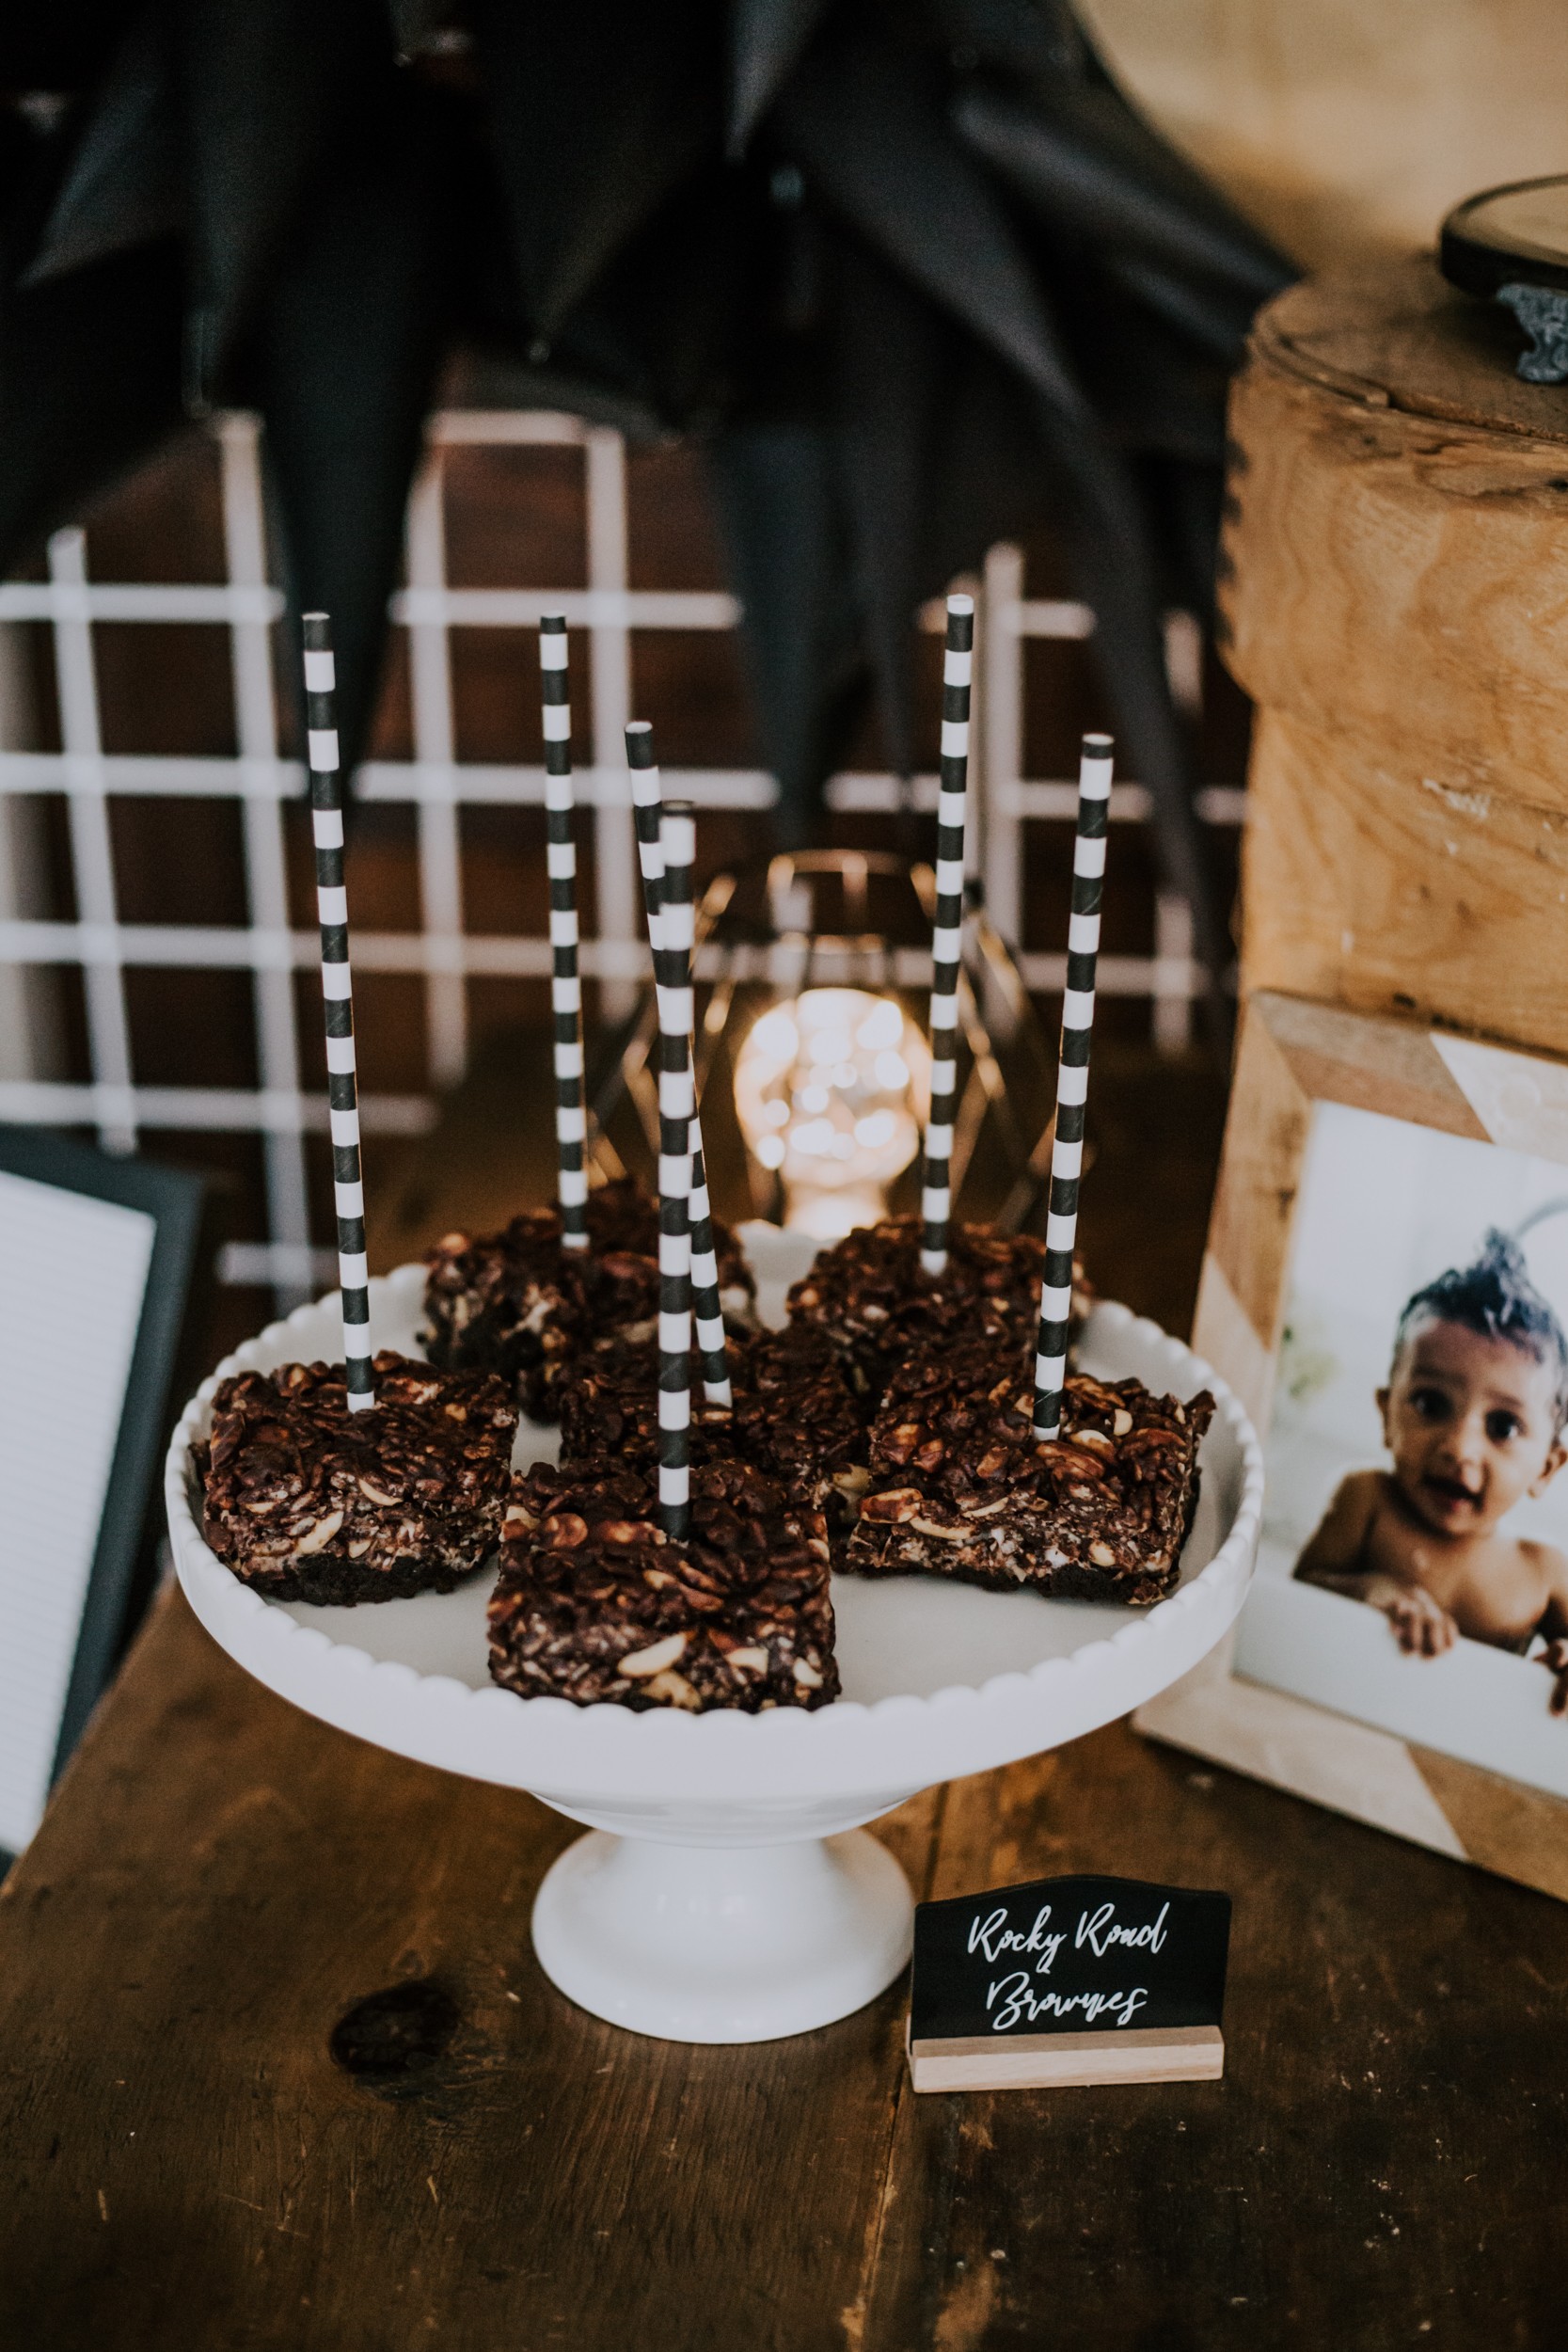
Sugar Cookies (this is purely because every kid loves a decorated cookie! This helps bring the theme alive). I made these first, and weeks ahead of the party. I baked the cookies first and froze them, and then decorated them over a week period.
My guest count was 10ppl including myself and husband so I kept the desserts to 5 varieties. I didn’t make extra of anything as most people will only try a few items, and I didn’t want waste. The key to serving desserts, is to only put a out a small portion in individual portions. As they deplete, you replenish. This also looks way better! presentation is key!
THE ENTRANCE
The entrance to any party, should show guests immediately what they should expect. If you are at a wedding, there should be a sign signalling the couple, etc. An intimate home party can do this in subtle ways too. It doesn’t have to cost a lot.
In my case, our mantle is one of the first things you see when you enter our home. It is already a natural point of focus, so I decided to make the mantle the Khari feature area, where I would showcase him. Firstly, I brought framed photos of him from our bedroom, down to the mantle and arranged them there. I then printed his monthly milestone photos from his first year of life and strung them onto string with clips. I used something old, and something new and cheap! The overall effect, made the party theme apparent at entry. This was a party for Khari.
Secondly, I blew up some balloons I had kicking around from an old party and strung them together as a garland. I hung them off-centered on one side of the mantle from the ceiling, and voila! I had an eye-catching entrance that doubled as gift goodie bags for the kids.
Lastly, I arranged the gifts I had gotten Khari under the mantle, which made it clear to guests upon entry, where they could leave their packages.
SETTING UP YOUR TABLE
Many people think that creating a dessert table is a matter of making desserts and it’s so much more than that! Here are a few key instructions to help you prepare.
Sketch your table design to visualize how it will look.
Use as many items as can that you own or can borrow and start to design off of that. From there, you can isolate what you need to make or purchase.
Select your menu and timeline
Set up your table with cake stands and items you want to use. Start visually playing with the set-up to get a set visual. This will also help you narrow down your menu and if you need to create variety with shape or size. Don’t forget to take photos of the set ups you like so you can go back to pick a favourite and for a reference when you actually set up.
Start making food labels or signage
Start making the desserts
The day before your party, set up everything you have to ensure that nothing is missing. Do not leave it to the last minute!
Set everything out well before guests arrive if they can be room temperature. Take your photos before guests arrive and make sure to account for this timing when planning!
BUILDING A NARRATIVE
Build a narrative for you party starting with the invites. Create your invites online or on paper with the same theme as your party. This may not be noticed by everyone but sending small signals with your theme, helps build this storyline.
When creating a party around a theme, that theme should be presented throughout your venue and in details as well as bigger visuals. Just focusing on the dessert table and forgetting about the rest forgets the opportunity to create a more cohesive story.
PICNIC TABLE
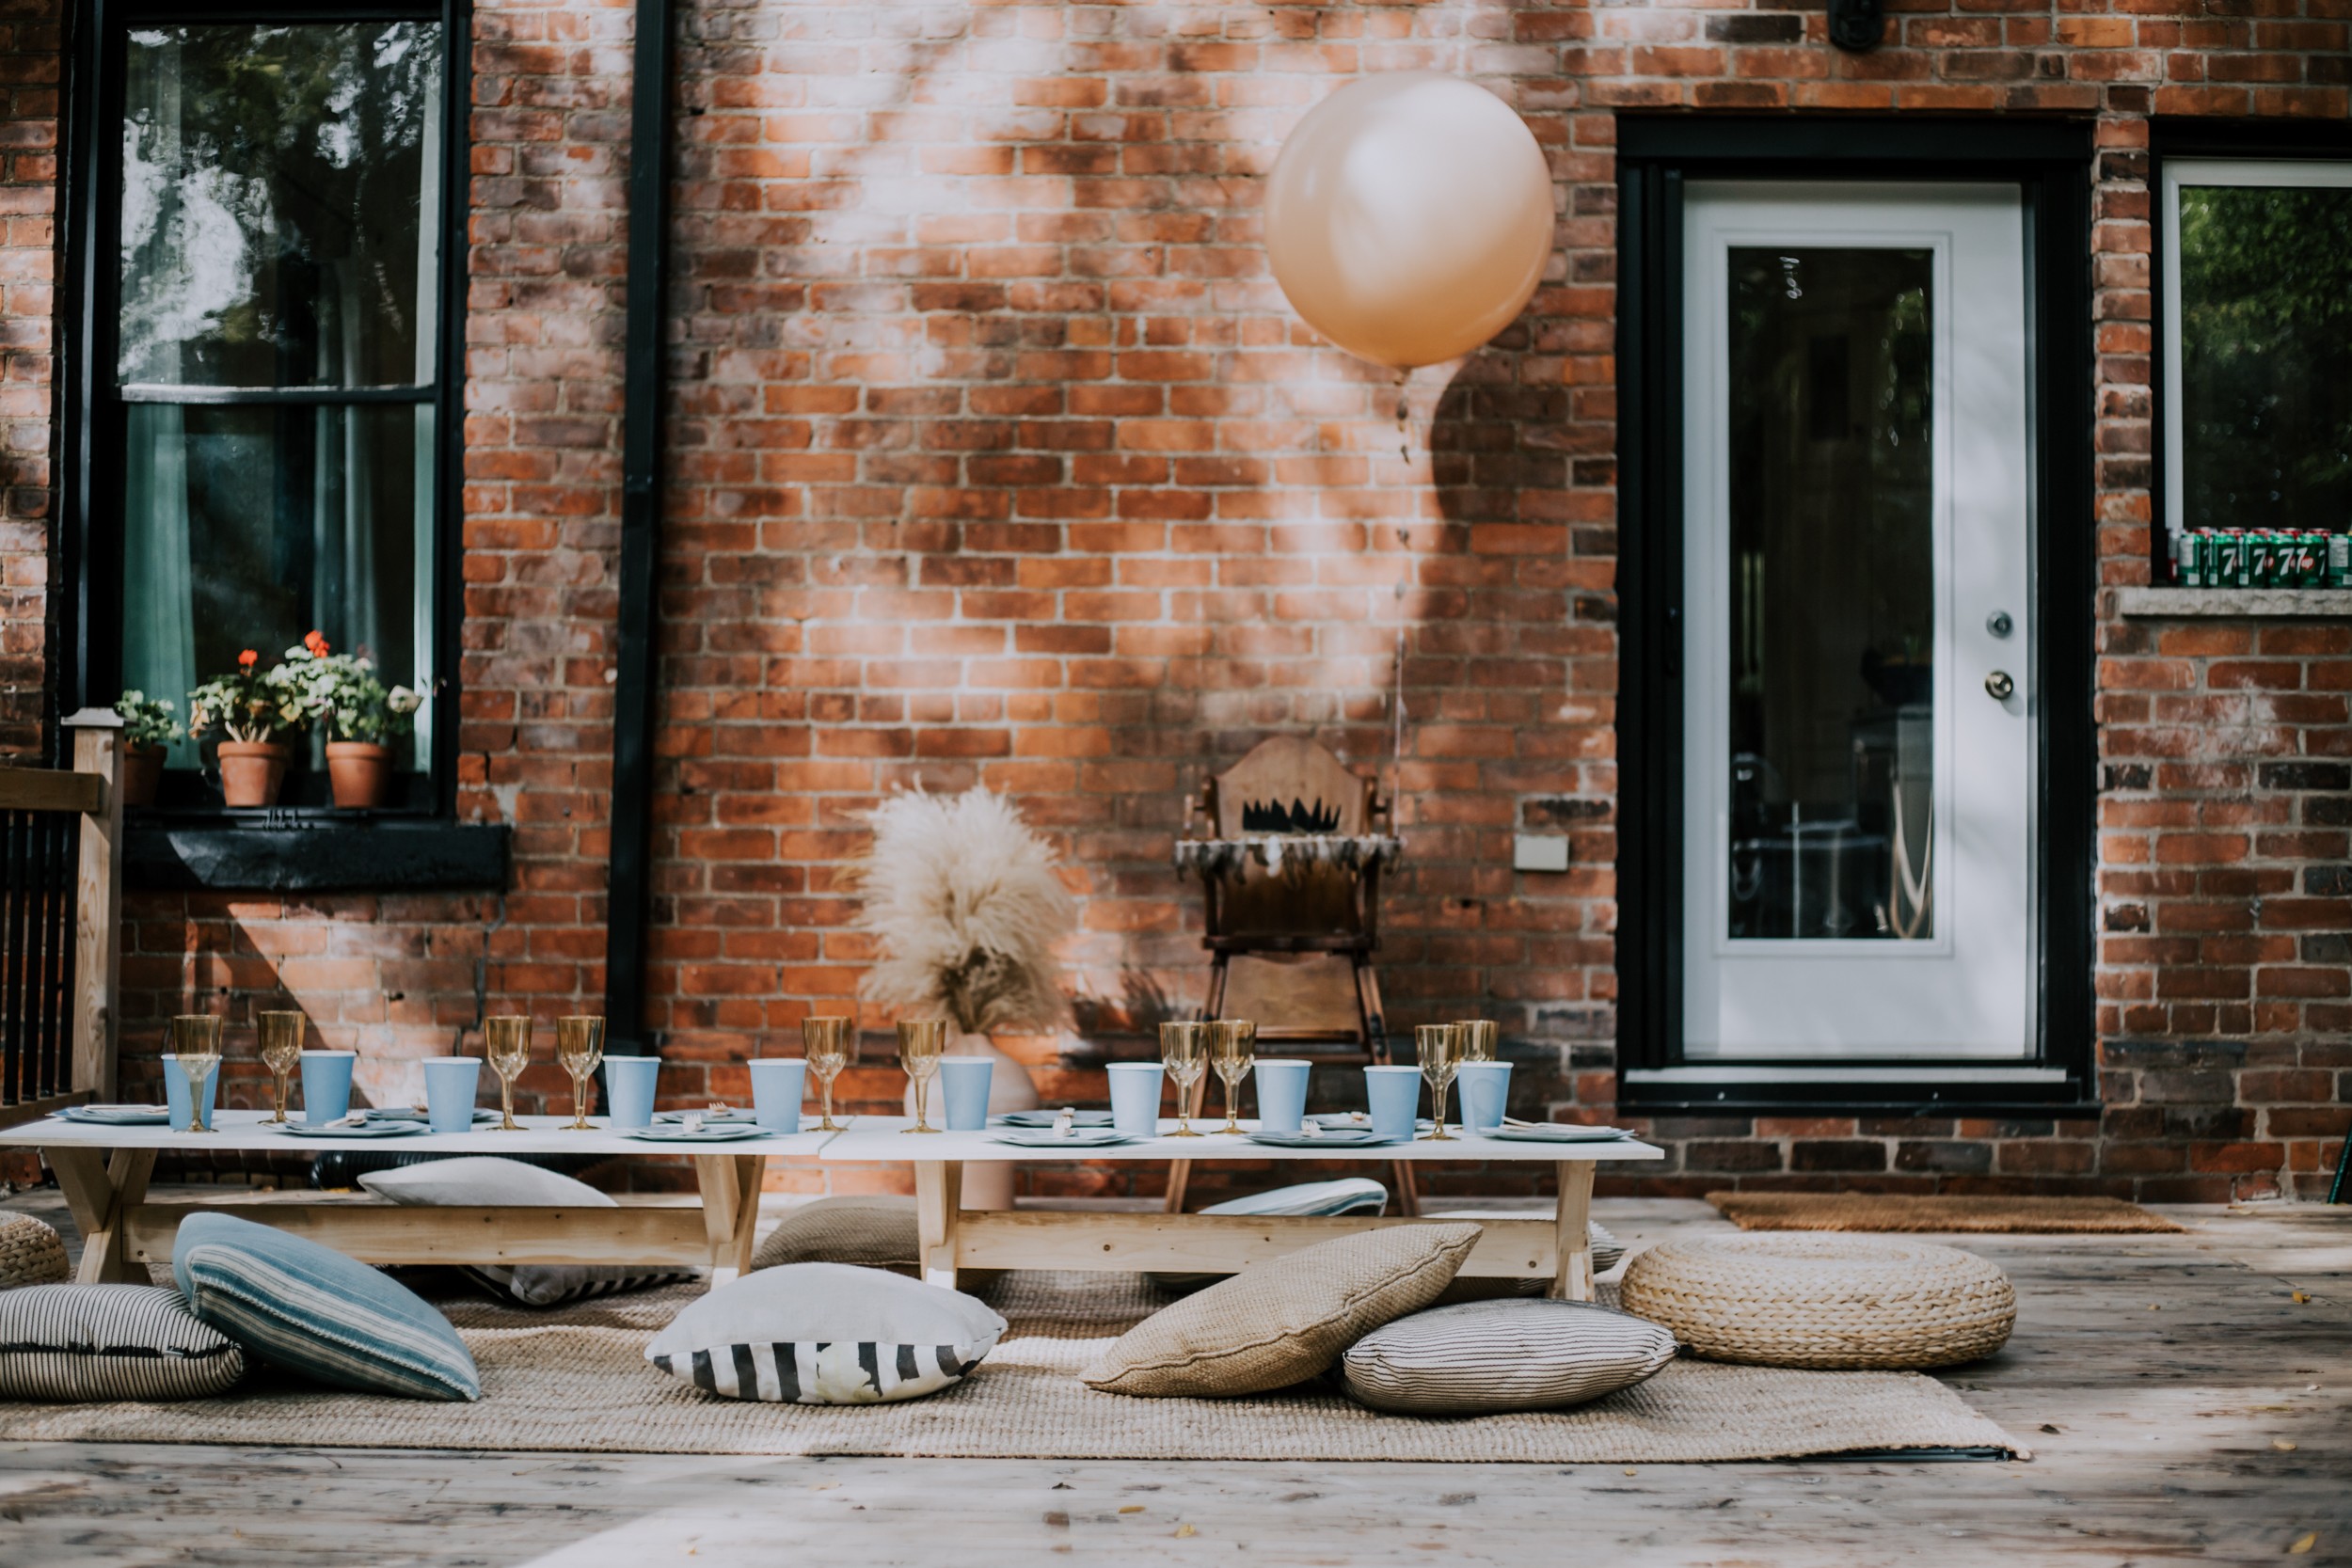
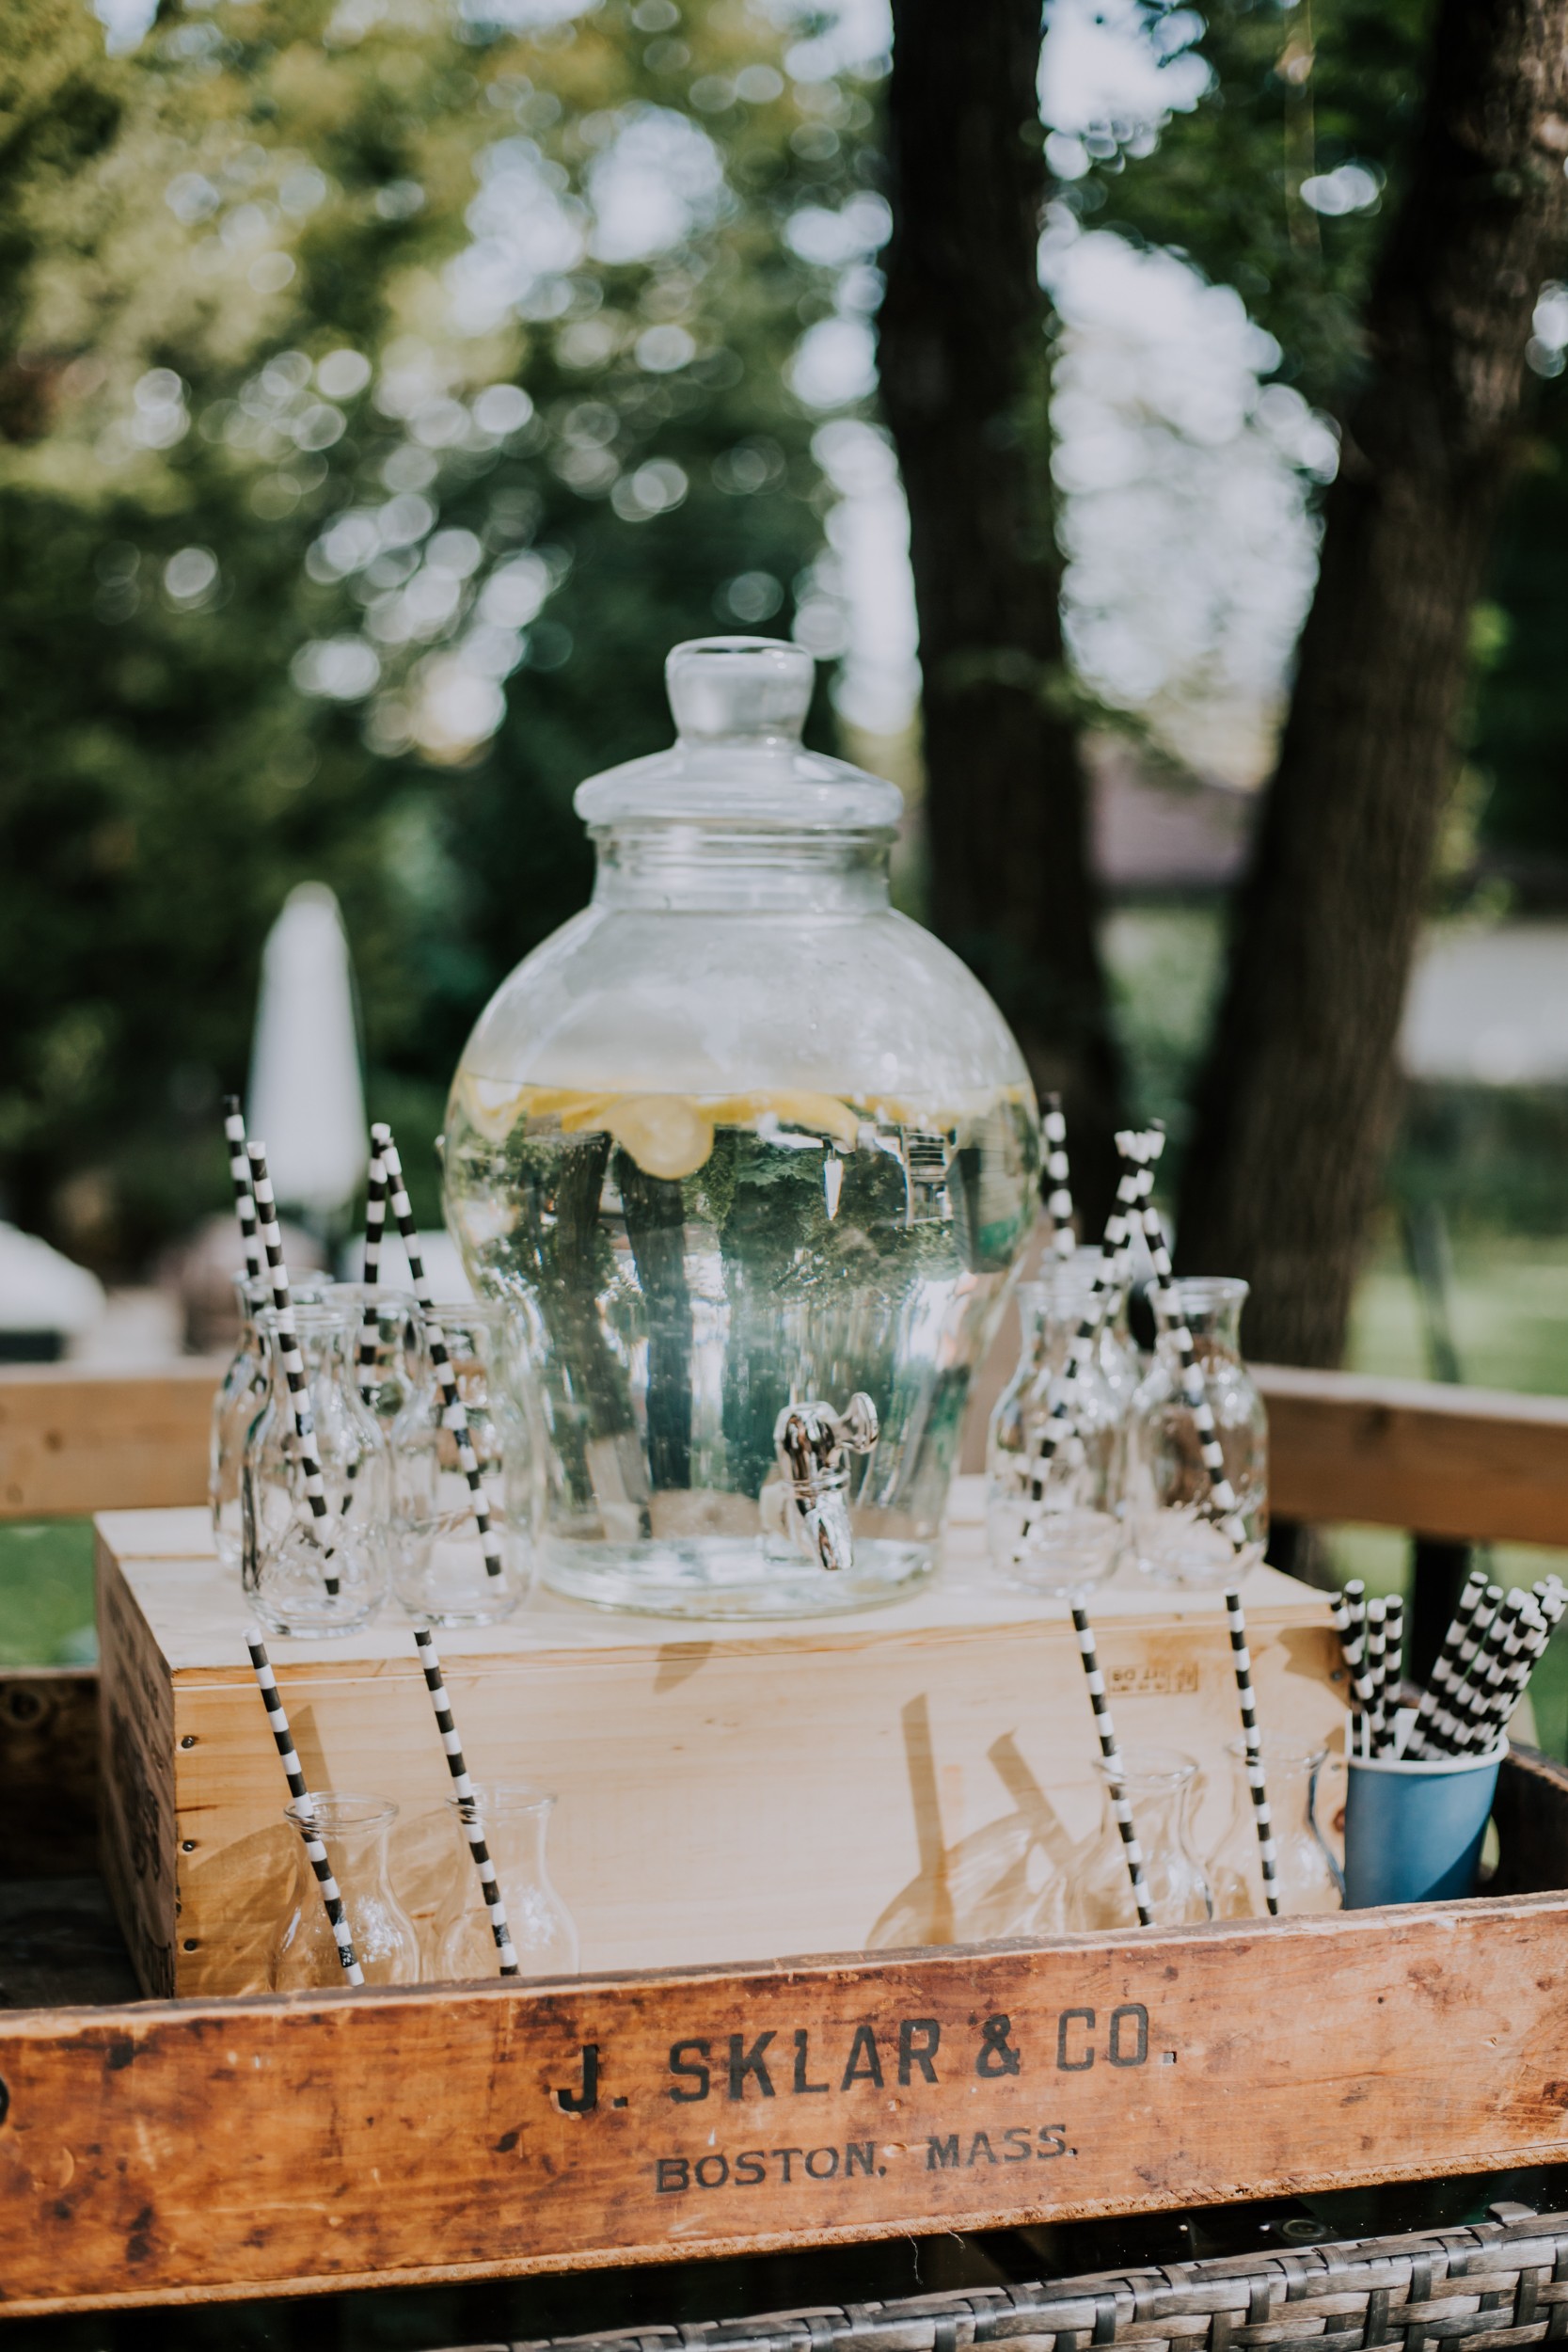
October weather is always a gamble in Ontario but I was gambling that we could at least try to socialize outdoors. I planned to keep the desserts inside as my backdrop was too big to bring out and the wasps were brutal this year.
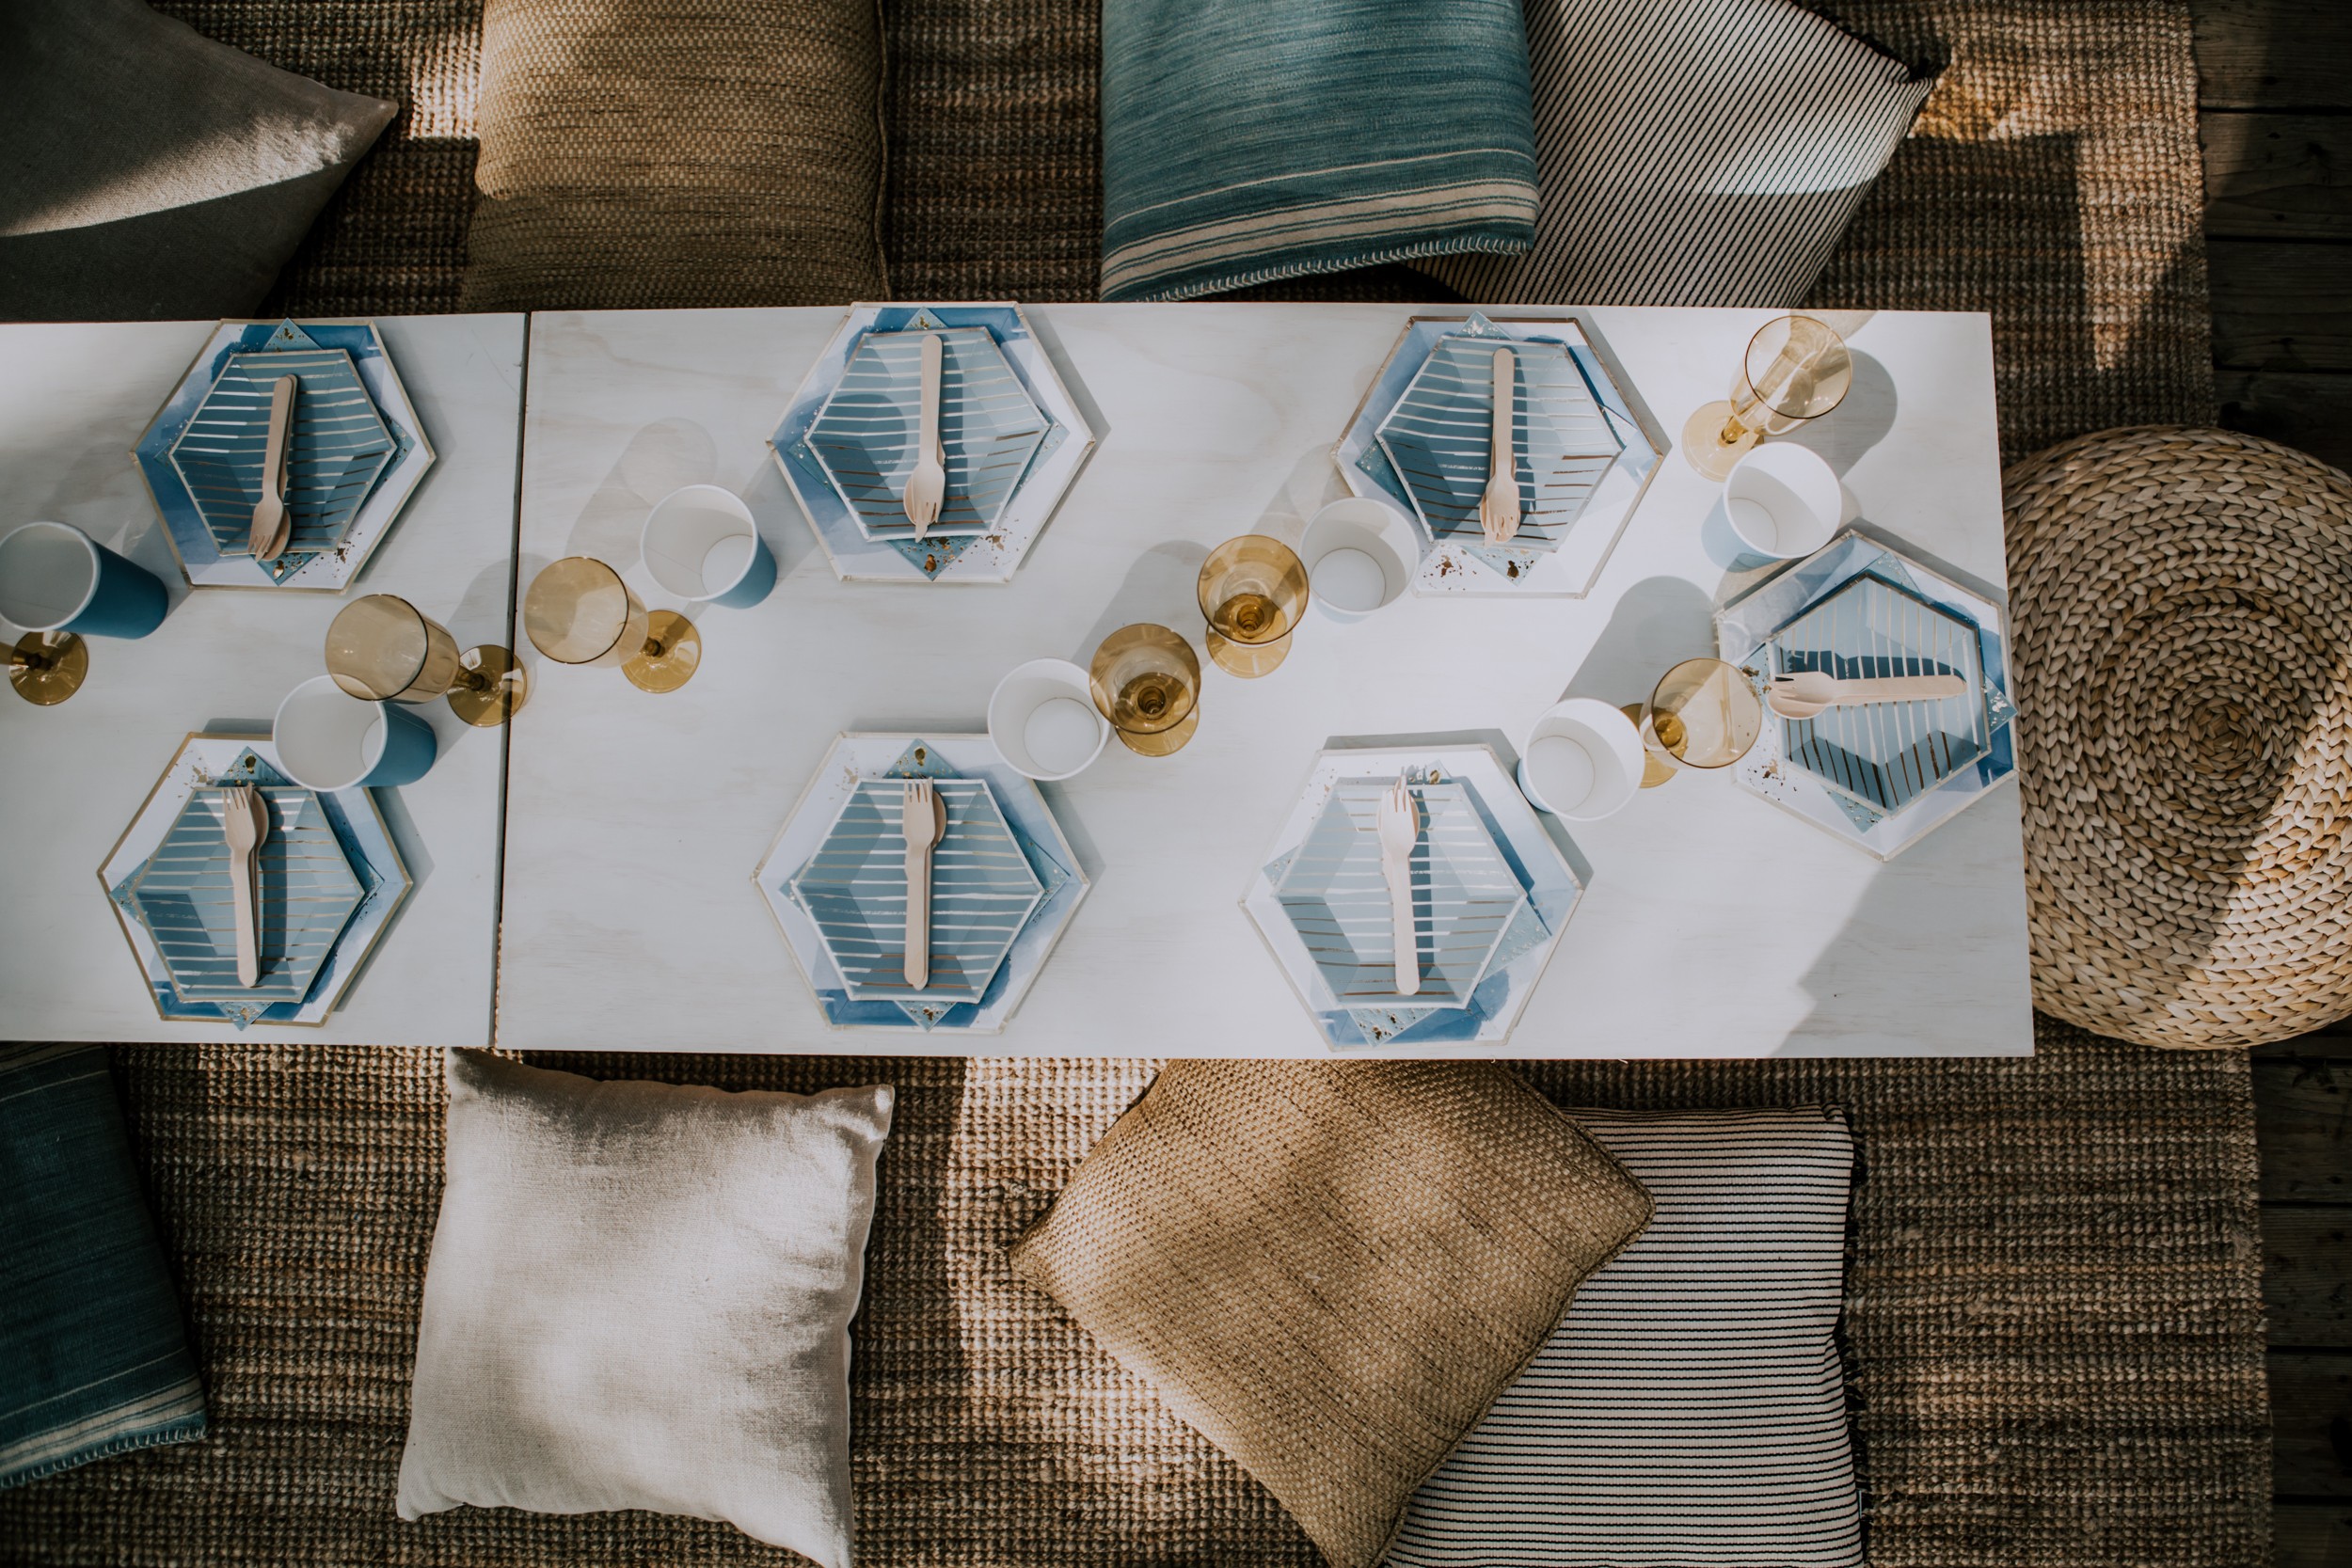
The morning of the party was wet and brisk, but it looked like it would be a decent enough day, so I set up picnic tables on our deck with a beautiful tweed carpet and throw cushions. The Lemonade Party Box’s cute paper plates and napkins spoke for themselves. Vases with feathers or pampas could have been added, but to be honest I ran out of time. All in all though, I was happy with how simple and geometric it presented.
PLAN. SET UP. ENJOY.
You have worked so hard to create, and build a beautiful story for your child’s party! While hosting a party is by no means relaxing, you should try hard to organize yourself as much as possible, to enjoy it as much as possible.
Ask for help where needed. Often guests ask how they can help and you reply with “I’m good, thanks.” This is for two reasons.
1. Your guests should relax.
2. They mostly get in the way more than help.
I get it, delegating is hard. The one thing I can recommend, is delegate the things you care less about. For example, if you are hung up on the dessert table being perfect, don’t count on anyone for that. Ask them to bring an appetizer or a side for the lunch. Whatever the case may be, take advantage where you can.
CAKE SMASH
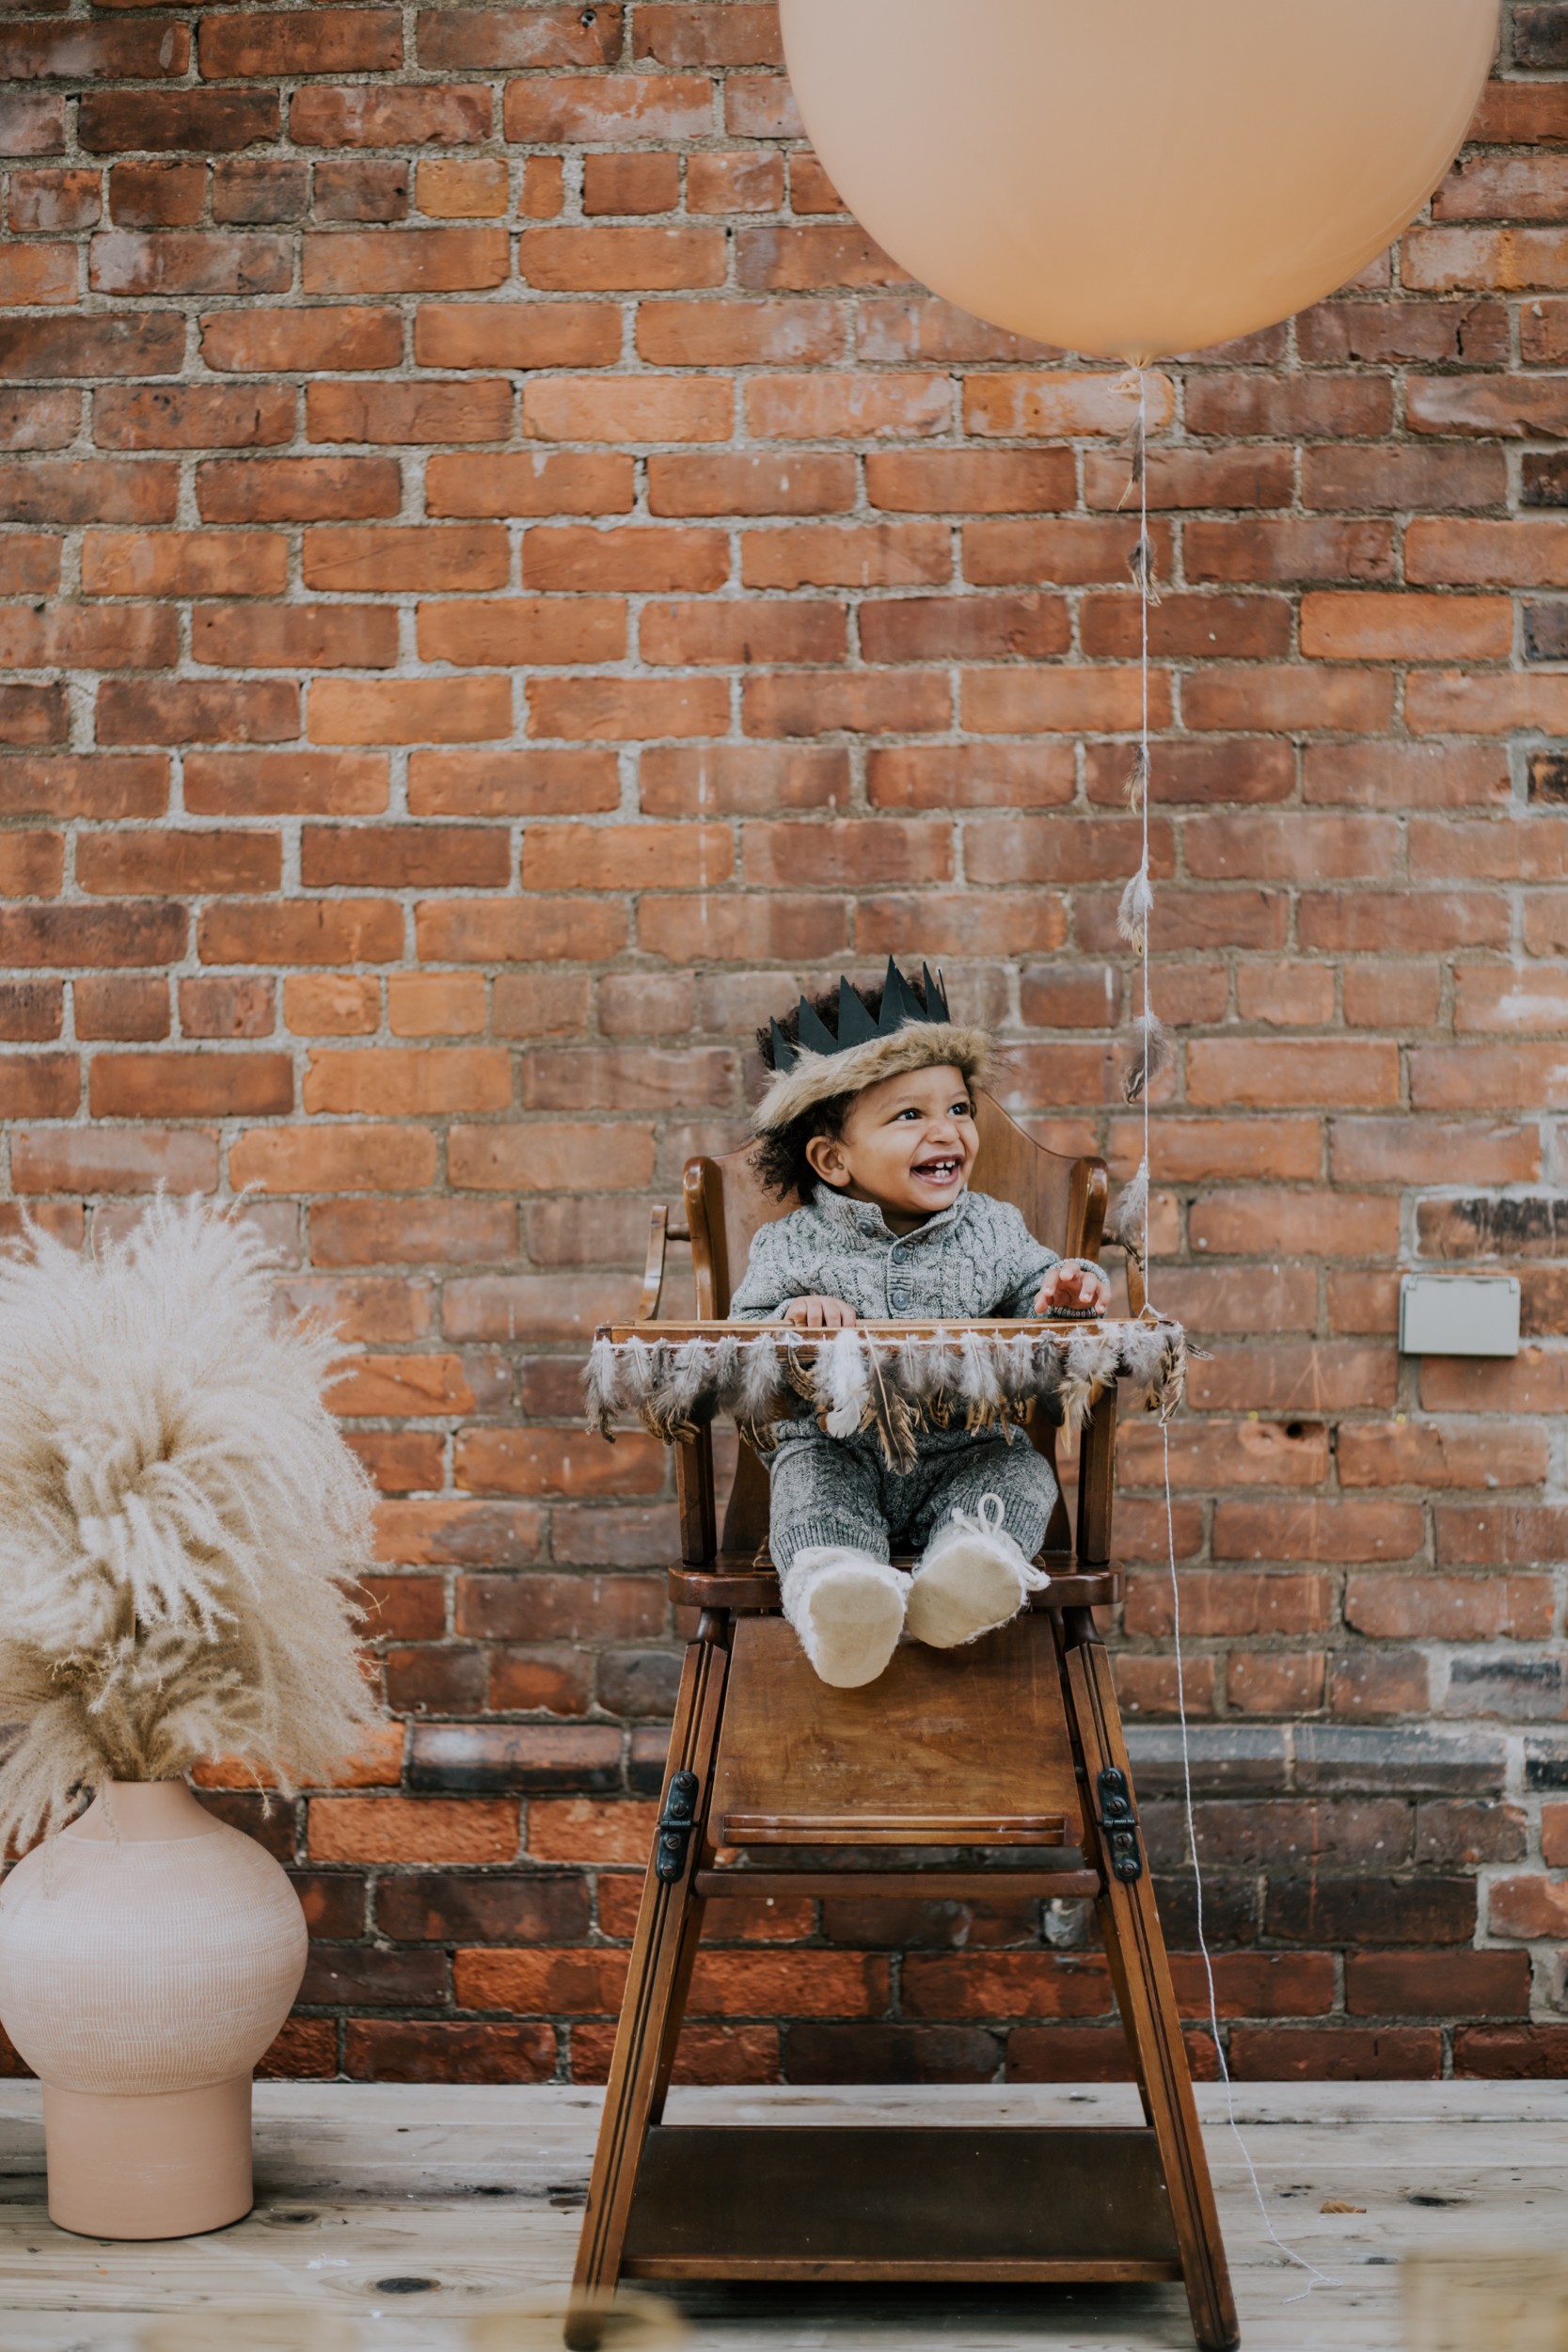
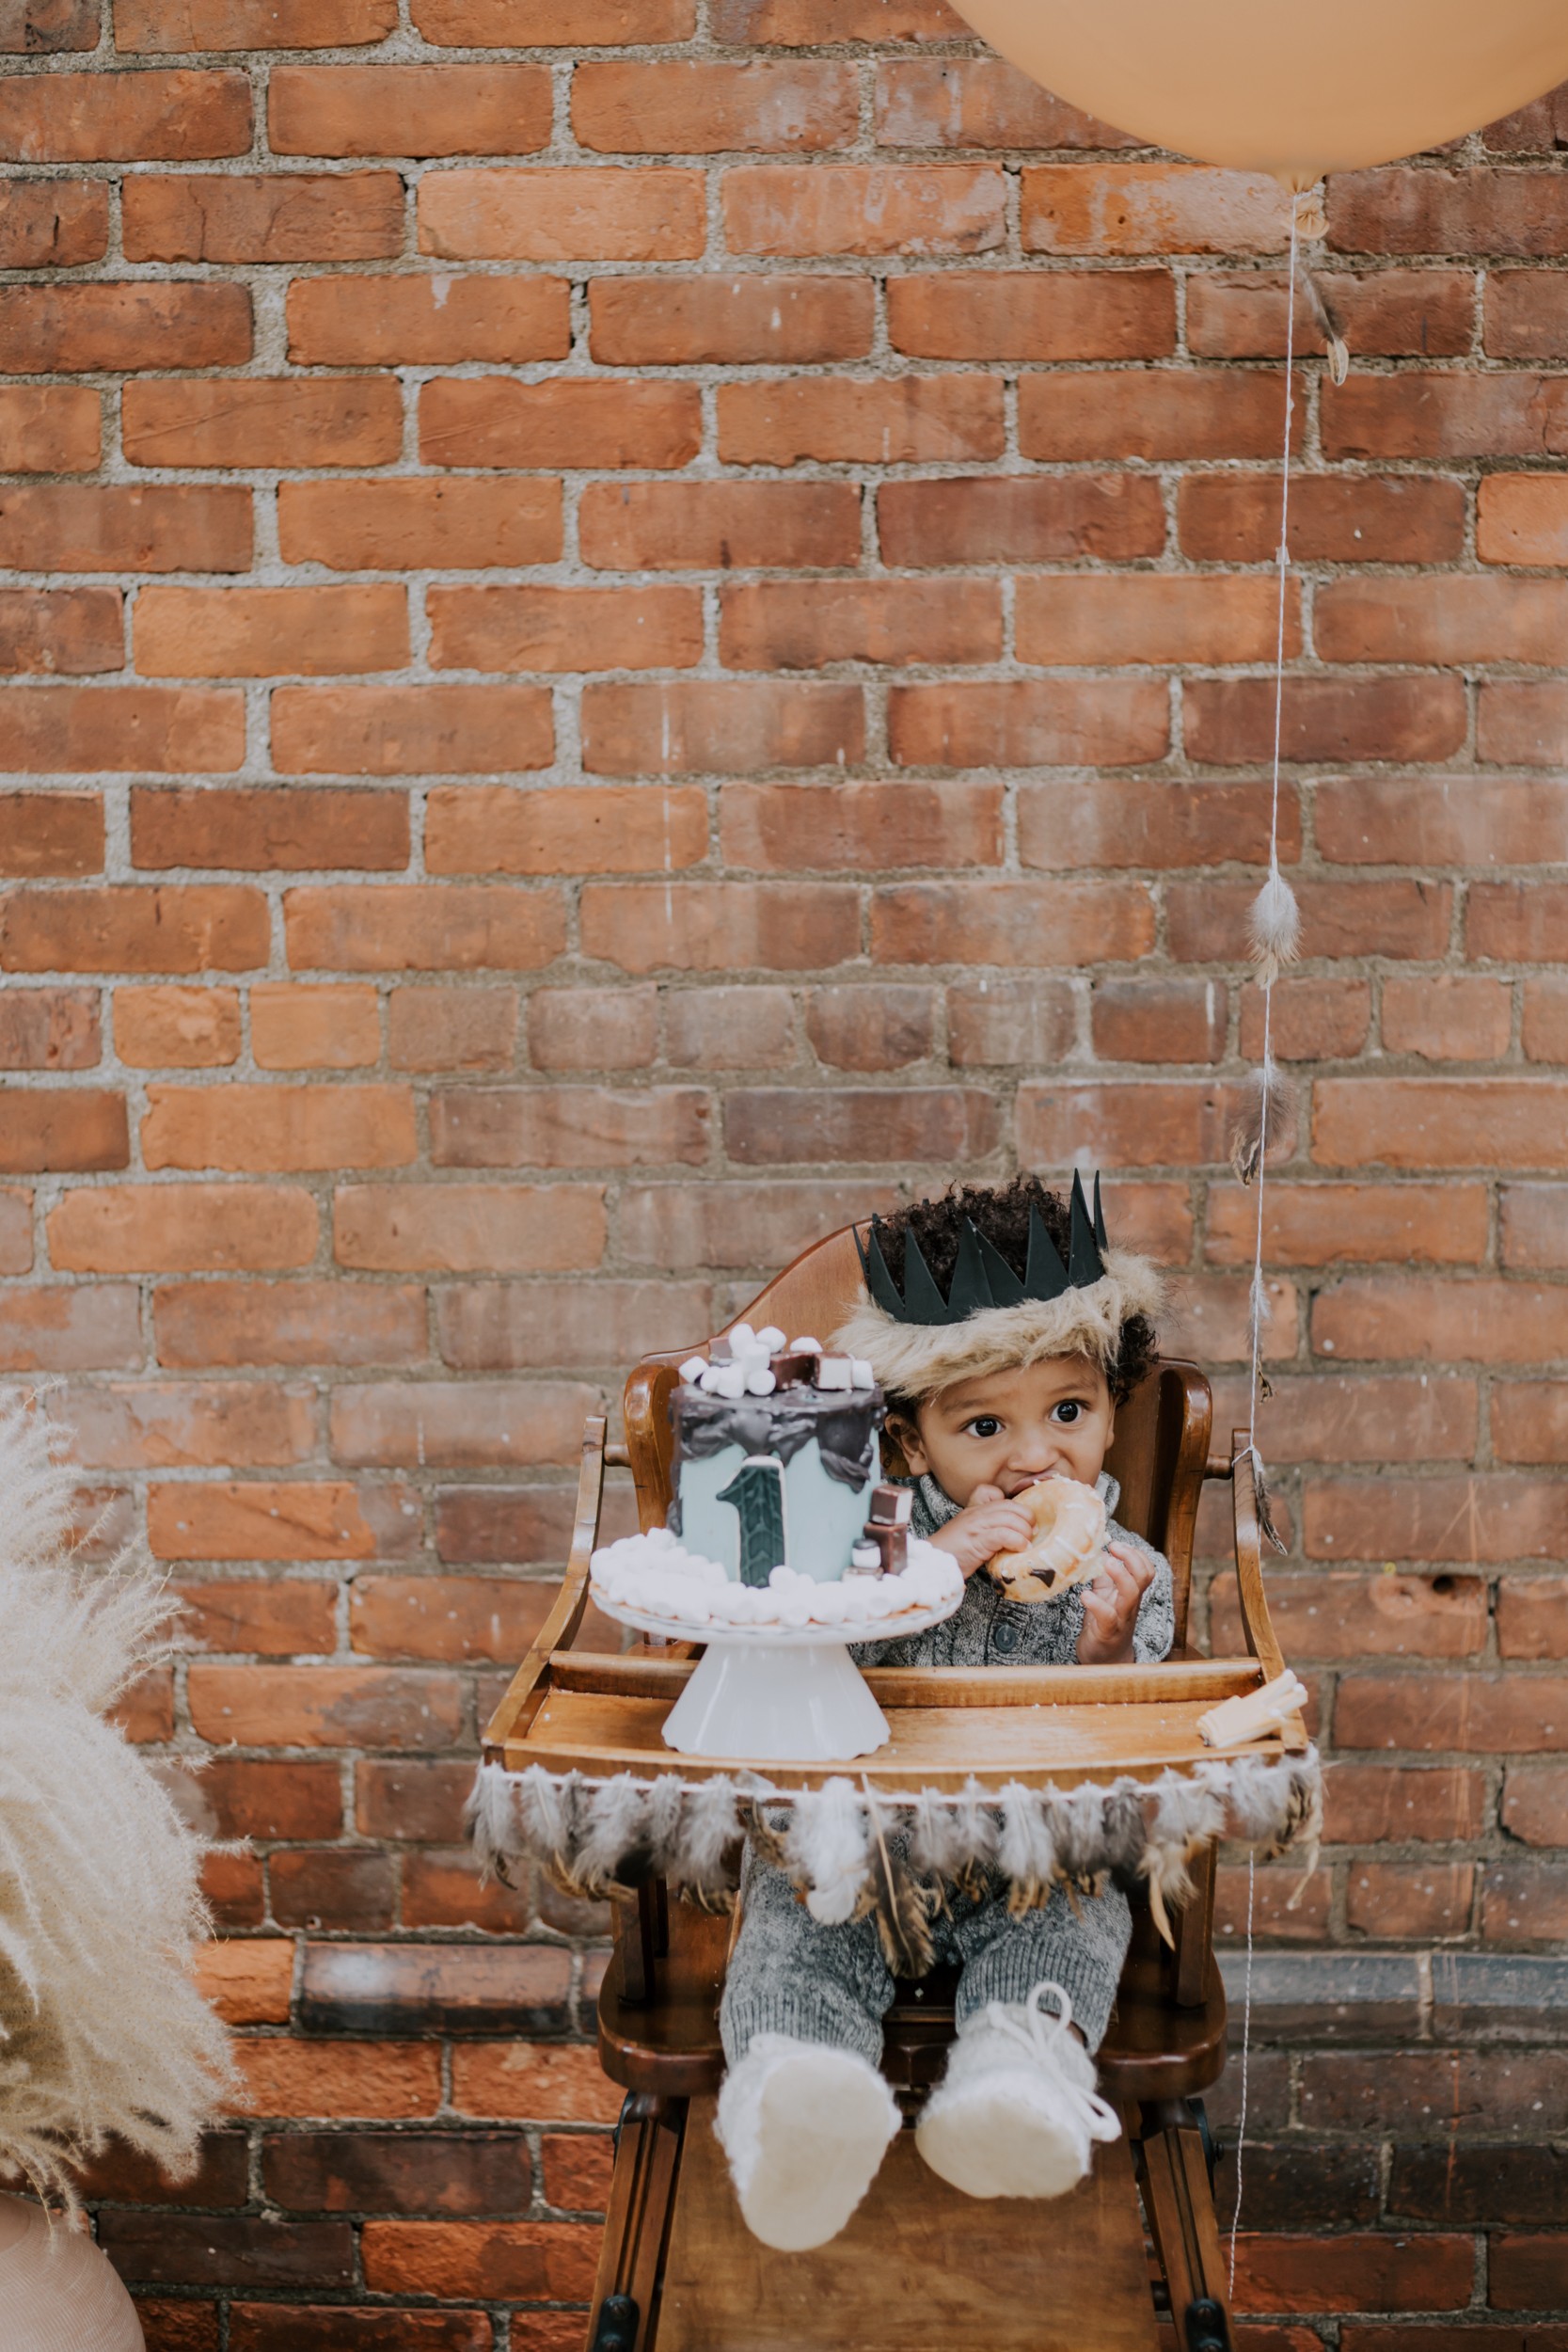
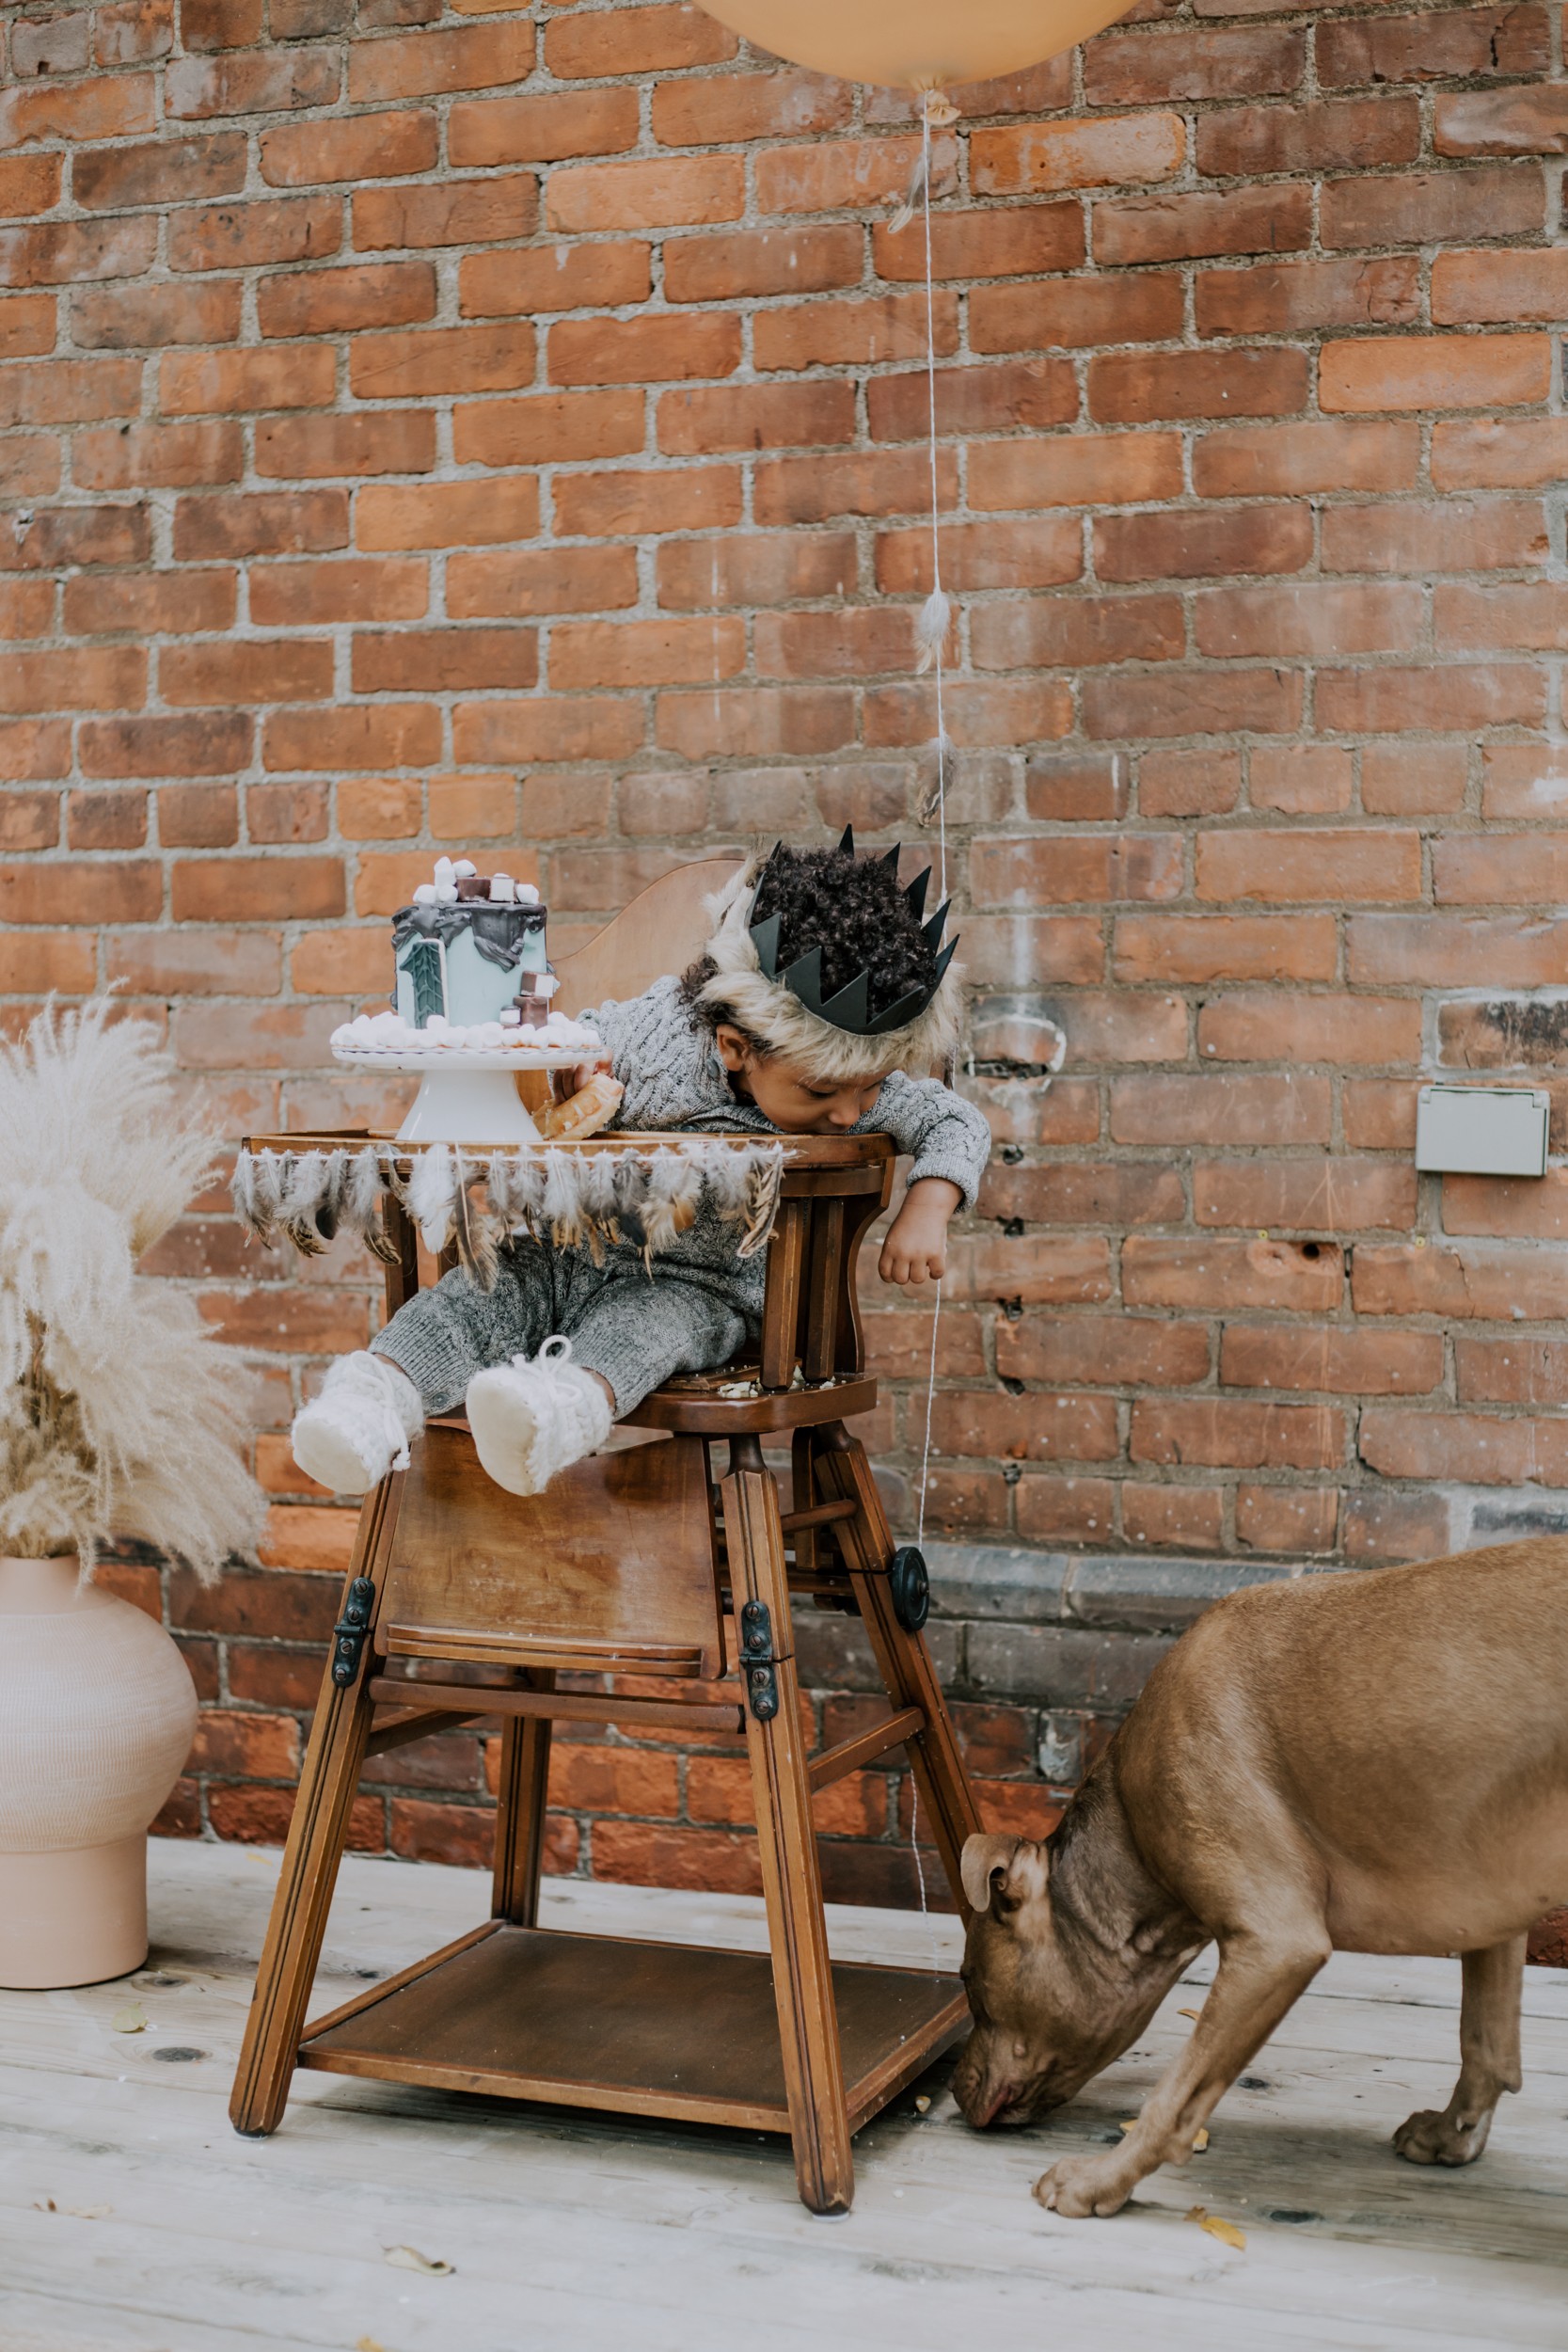
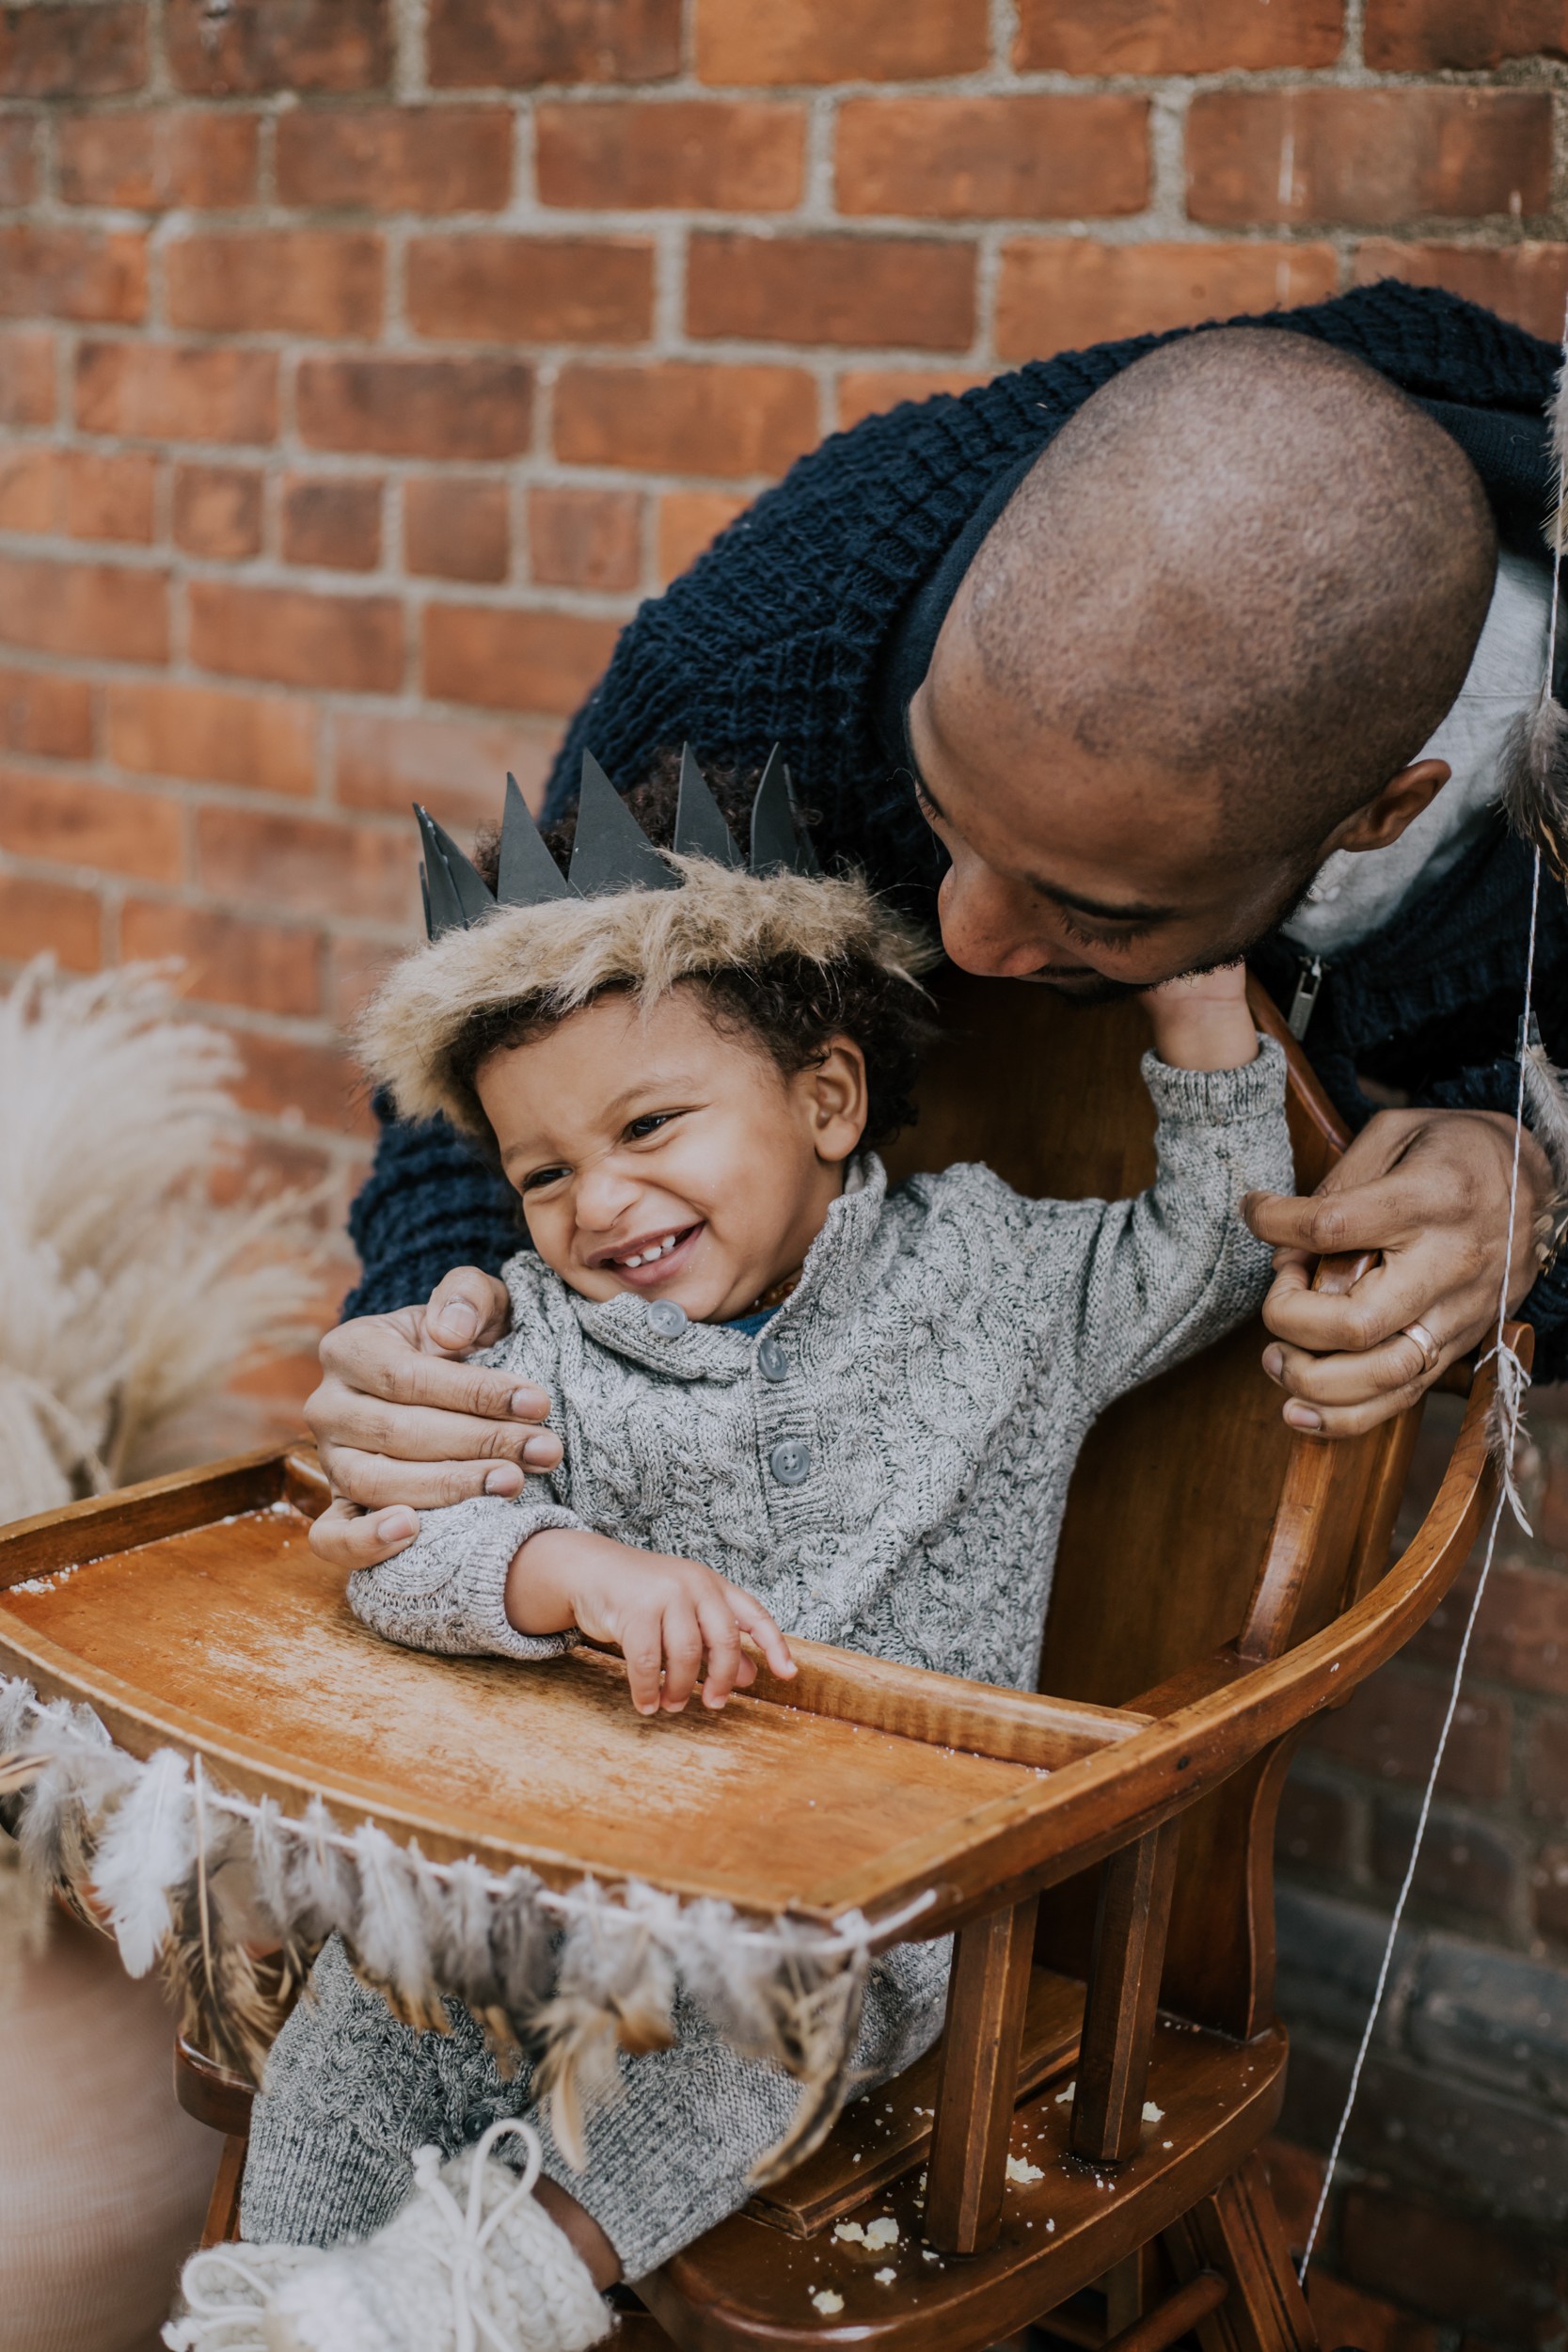
The part of the day you have all been waiting for is here. Smash the Cake. I prefer to give your child their own cake to mangle as it never set well with me sharing a partly touched pastry with a child thats not mine. lol. Put him or her in a well lit area and let them be free.
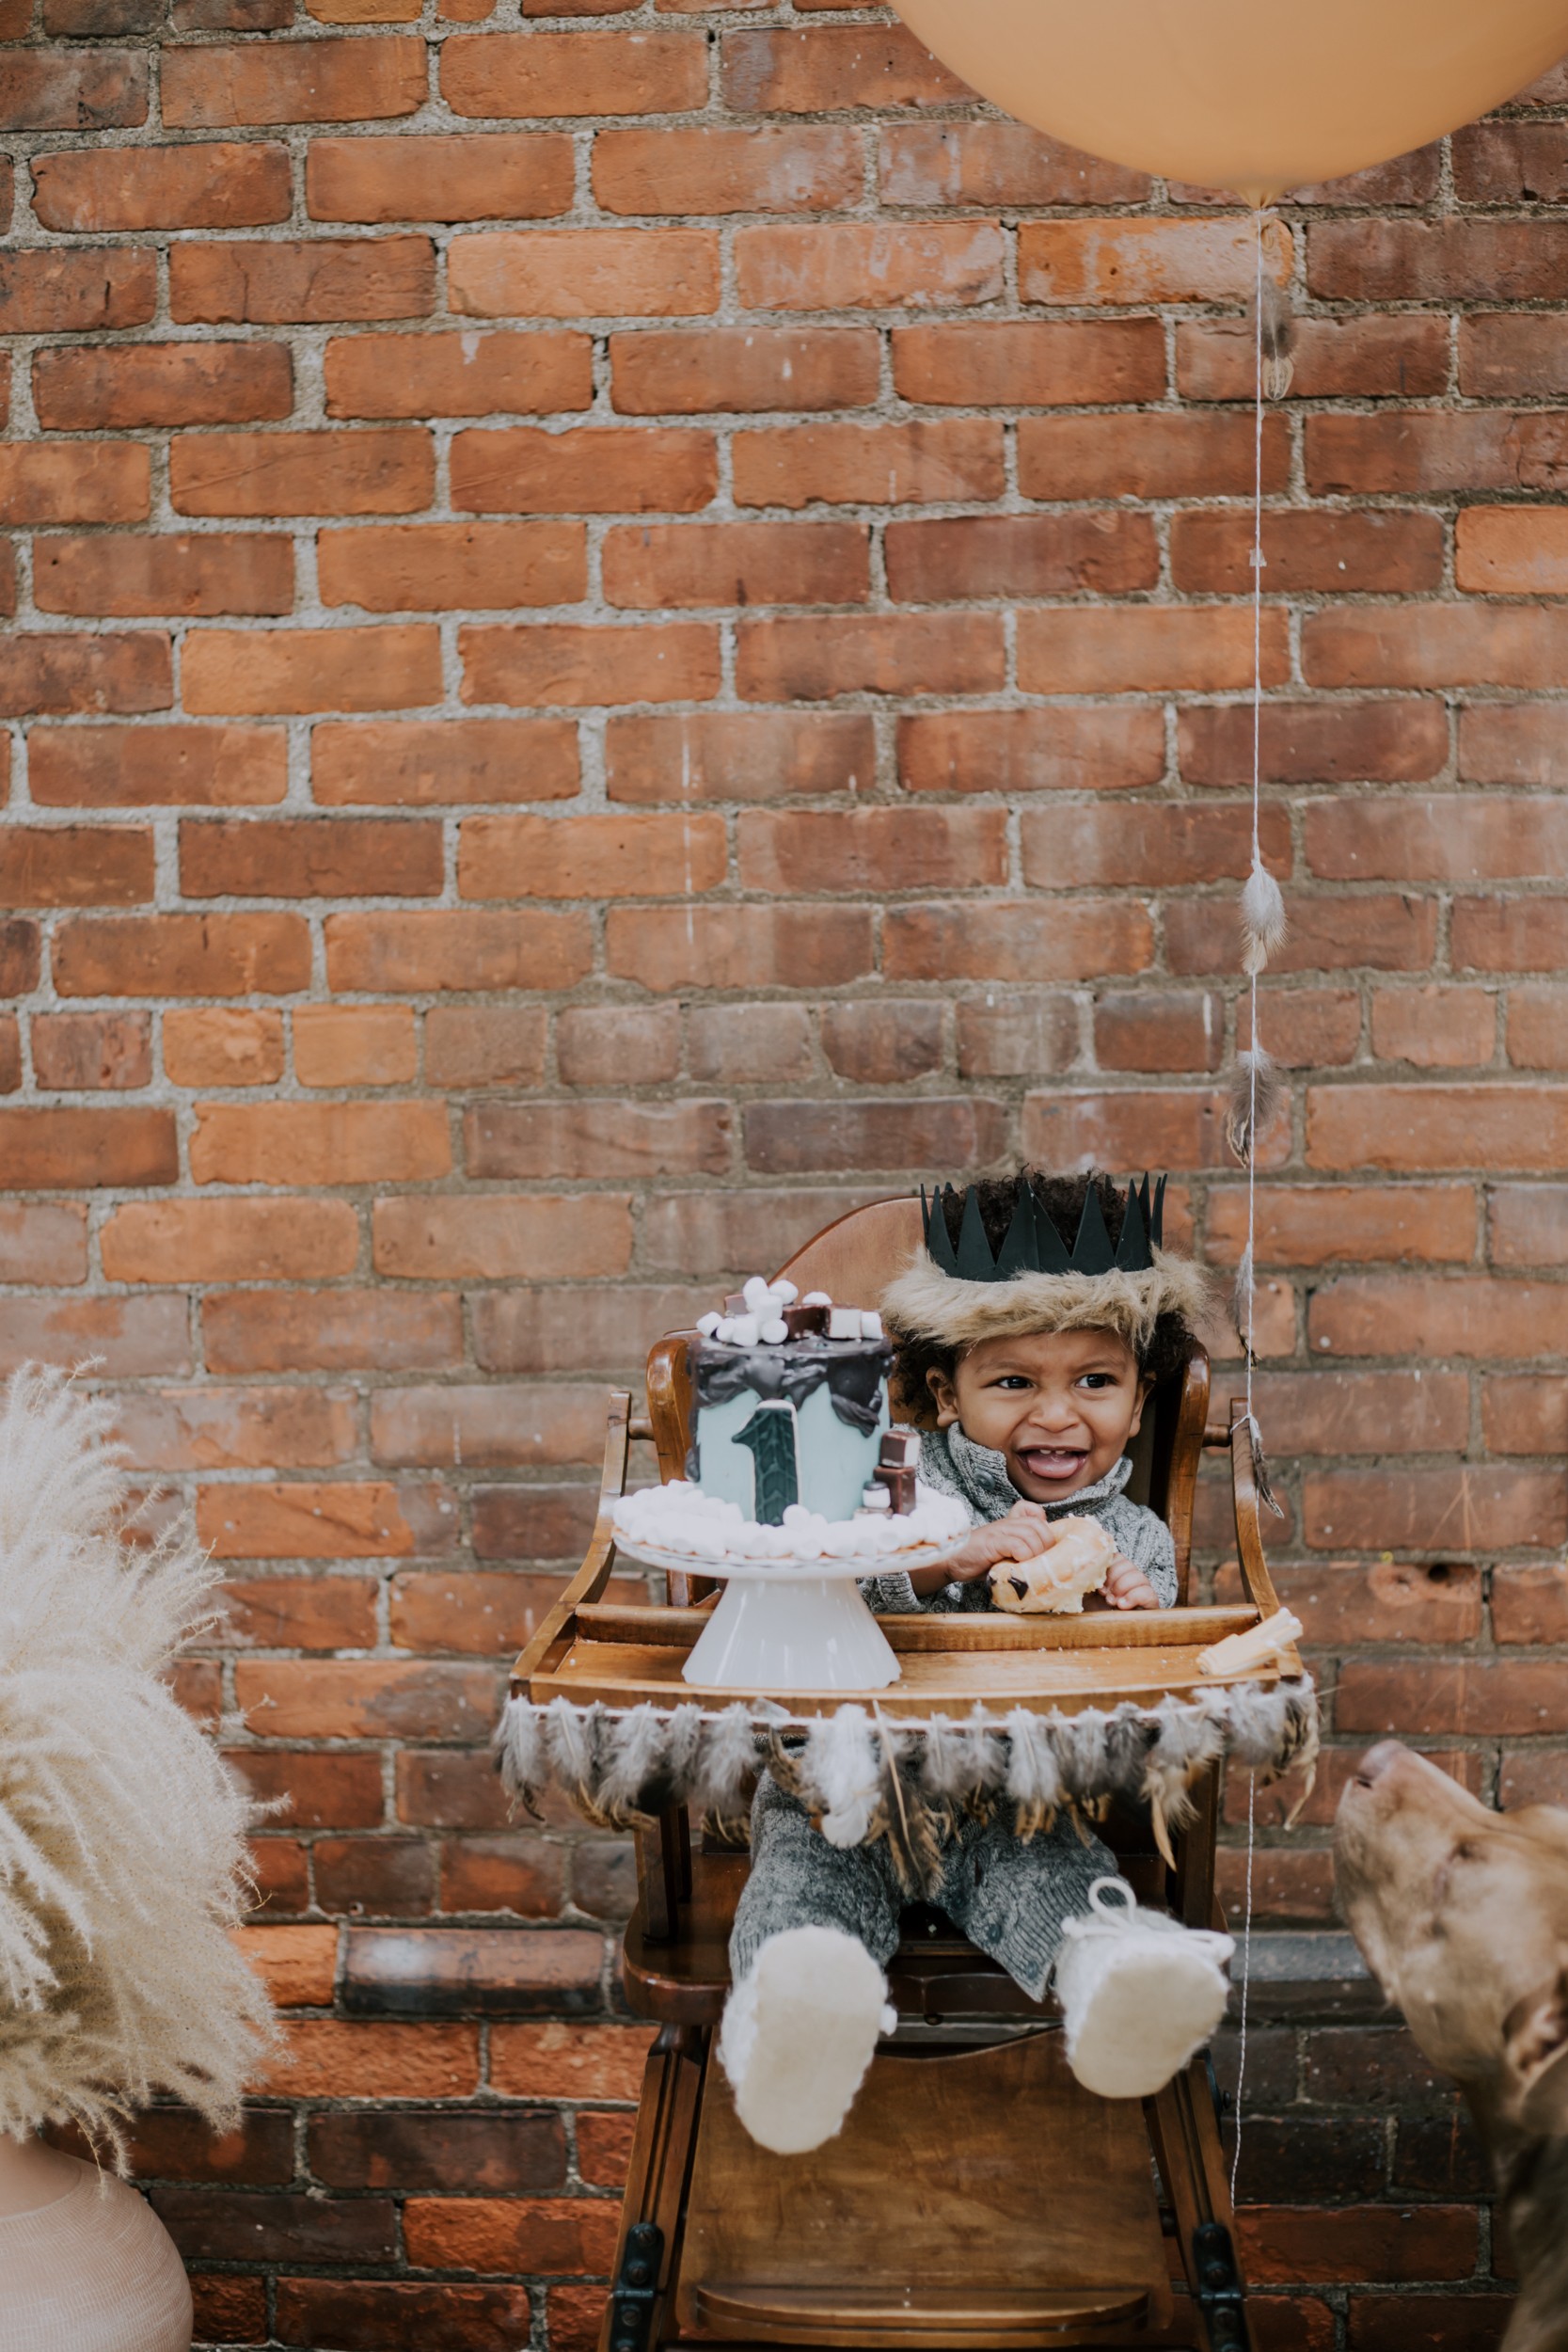
Khari sat in a vintage highchair that my mom refinished years back. His cake came to him, and he hesitated. Finally, he reached for the lemon donut and took a lick. It was sour! He pitched it to his bestie, Laika who eats most things cake and patiently sat waiting for something tastier to eat! hahahahaha
Enjoy your little one’s birthday party. It is a feat that both your baby, yourself and your partner should feel proud for getting through! You all did it! Congrats and Happy Birthday!
Olive Studio is a documentary based photography studio, specializing in unique, intimate and off-the-beaten track weddings. Our candid shooting style allows for couples to...
Naturally, I planned to host a huge “Where the Wild Things Are” smash the cake bash for my son’s 1st birthday party. Due to Covid restrictions however, our huge bash promptly became immediate family members only. Of course, I was disappointed but that wasn’t going to stop my decor and dessert table plans.
SELECTING A PARTY THEME
A quick Pinterest search of “smash the cake birthday themes” will send you down a rabbit hole of elaborate and endless creative ideas. For some, it might send you into creative overload or for others, shame and guilt that you just don’t have the time or energy to create such elaborate wonders. Trust me. Even the most creative people feel these waves of emotion. At some moments, I thought “To hell with it. I’ll do it another year.” But, I just couldn’t let his birthday come and go without making it a big deal. Admittedly, for me more than him. hahaha. The first year of your child’s life is a big deal! Even more than that, the first year of surviving parenthood, is even bigger! I wanted to celebrate for the both of us!
MEANING
A strong theme is usually one that has some kind of meaning to you or your child. That meaning can be surface or hidden. Regardless, choosing one that is meaningful helps you stay focused on curating something notable.
“Khari” is a Swahili name that means “Kingly” and “Wilder” is Khari’s middle name. It seemed fitting to me, that “Where the Wild Things Are” would be a perfect theme for his party.
VERIFY YOUR THEME FEASIBILITY
Once you select your theme, and before you buy anything, check the feasability of it first. Ensure that your ideas are attainable and within budget. If you choose a theme that is out of your league or capabilities, you will catch yourself scrambling to keep up, or diverting from your plan. This can result in decor that is not cohesive, and leaves you feeling like something is amiss.
For example, if you envision a dessert table that has all black cake stands, check to see if you can find them first. Are they in stock or rentable? Can you do a DIY within budget to ensure you have them? If this simple element seems daunting or like a wild goose chase, consider changing up your design or changing your theme altogether. Becoming obsessed with a certain look and then realizing once you are already deeply committed, is both frustrating, discouraging and likely expensive.
CHOOSE A FOCUS
Choosing a focus for your party is a great way to start planning your decor. Identify how many people are coming of course, and what time the party starts. I started early as Khari was napping around 1pm and so I wanted people to be able to engage with him before he went to bed. My focus of the decor grounded to the dessert table. Since the party revolves around Khari’s first cake, it seemed obvious to make desserts based on the theme. I chose easy lunch items and eliminated my initial plan of a huge charcuterie table. Instead, I put my efforts into the desserts; still offering a handful of flavours but less in quantity.
DESSERT TABLE
“Where the Wild Things Are” is a beautifully illustrated book that has sketch-like strokes that help emphasize the texture of the hair of the wild things. I was inspired by Edhv and Wendy Plomp’s giant paper cone interactive installation I saw online. As a result, I decided to make a paper cone backdrop for my dessert table as the anchor. Choosing colours from the book, and of course attainable colours at the store, I started making paper cones in various sizes. This backdrop took me a lot longer than I expected, especially with a toddler running around, “helping” me.
Once I finished the cones, I started attaching them to my grid panel background. These can be rented or purchased however they are expensive. alternatively, you could choose rigging chicken wire or plastic caging and attaching the cones to that.
I positioned my vintage wooden table in the center of the grid system to visualize where the cake would sit as the feature. I needed to raise the cake, so played with some props around the house to find the perfect item.
In order to isolate the cake from the backdrop, I hung my wooden plywood circle from Khari’s room decor behind where the cake would go. I knew that my cake was black, and wanted it to stand out against the backdrop. Using a natural texture with the wood, yet light in colour was the perfect choice. The cone “hairs” would then flow around the circle. I played with the cones mixing in colour, but to be it looked too busy. In my case, I thought that the visual of colour blocking the cones would be an interesting effect instead.
DESSERT MENU
At least a month prior to the party, I sketched out a plan of how the dessert table would loosely look. I researched online desserts I thought complimented one another and also gave a variety of flavours and textures. Mostly, I selected desserts that I could pre-make, without the hassle of having to prepare anything last minute.
My menu choices are as follows: I have also rated the recipe out of 5 for taste and difficulty in case you are interested in making it. (1 as lowest or easiest)
Feature Cake: Oreo Cookie Cake(black chocolate butter cream with oreo buttercream layers. Topped this with candy and everything exciting) You can pre-bake the layers and pre make the icing over 2 days, allowing you to decorate and ice the day before the party
TASTE: 4/5 DIFFICULTY: 3/5
Khari’s Cake: Carrot Pineapple Cake (cream cheese layers with buttercream frosting) You can pre-bake the layers and pre make the icing over 2 days, allowing you to decorate and ice the day before the party
TASTE: 5/5 DIFFICULTY: 2/5
Lemon Baked Donuts:(various types of glazes or sugar coating) I baked these the day before the party as donuts never taste good old.
TASTE: 2/5 DIFFICULTY: 1/5
Sugar Cookies (this is purely because every kid loves a decorated cookie! This helps bring the theme alive). I made these first, and weeks ahead of the party. I baked the cookies first and froze them, and then decorated them over a week period.
My guest count was 10ppl including myself and husband so I kept the desserts to 5 varieties. I didn’t make extra of anything as most people will only try a few items, and I didn’t want waste. The key to serving desserts, is to only put a out a small portion in individual portions. As they deplete, you replenish. This also looks way better! presentation is key!
SETTING UP YOUR TABLE
Many people think that creating a dessert table is a matter of making desserts and it’s so much more than that! Here are a few key instructions to help you prepare.
Sketch your table design to visualize how it will look.
Use as many items as can that you own or can borrow and start to design off of that. From there, you can isolate what you need to make or purchase.
Select your menu and timeline
Set up your table with cake stands and items you want to use. Start visually playing with the set-up to get a set visual. This will also help you narrow down your menu and if you need to create variety with shape or size. Don’t forget to take photos of the set ups you like so you can go back to pick a favourite and for a reference when you actually set up.
Start making food labels or signage
Start making the desserts
The day before your party, set up everything you have to ensure that nothing is missing. Do not leave it to the last minute!
Set everything out well before guests arrive if they can be room temperature. Take your photos before guests arrive and make sure to account for this timing when planning!
BUILDING A NARRATIVE
Build a narrative for you party starting with the invites. Create your invites online or on paper with the same theme as your party. This may not be noticed by everyone but sending small signals with your theme, helps build this storyline.
When creating a party around a theme, that theme should be presented throughout your venue and in details as well as bigger visuals. Just focusing on the dessert table and forgetting about the rest forgets the opportunity to create a more cohesive story.
THE ENTRANCE
The entrance to any party, should show guests immediately what they should expect. If you are at a wedding, there should be a sign signalling the couple, etc. An intimate home party can do this in subtle ways too. It doesn’t have to cost a lot.
In my case, our mantle is one of the first things you see when you enter our home. It is already a natural point of focus, so I decided to make the mantle the Khari feature area, where I would showcase him. Firstly, I brought framed photos of him from our bedroom, down to the mantle and arranged them there. I then printed his monthly milestone photos from his first year of life and strung them onto string with clips. I used something old, and something new and cheap! The overall effect, made the party theme apparent at entry. This was a party for Khari.
Secondly, I blew up some balloons I had kicking around from an old party and strung them together as a garland. I hung them off-centered on one side of the mantle from the ceiling, and voila! I had an eye-catching entrance that doubled as gift goodie bags for the kids.
Lastly, I arranged the gifts I had gotten Khari under the mantle, which made it clear to guests upon entry, where they could leave their packages.
SIGNAGE
A party should never opt out of signage. Signage comes in so many formats, and sets the tone and theme of a party. It also takes the guess work out of food questions.
I found some great finds at Dollarama for the signage I used here. The lightbox, and marquee board are both from there. The black wire lights too. Signs are a great way to add detail and make the party extra special. You can use these to direct, inform or request your guests. In my case, I used one to ask guests to write a message for Khari in his “Where the Wild Things Are” book as a memento.
PICNIC TABLE
October weather is always a gamble in Ontario but I was gambling that we could at least try to socialize outdoors. I planned to keep the desserts inside as my backdrop was too big to bring out and the wasps were brutal this year.
The morning of the party was wet and brisk, but it looked like it would be a decent enough day, so I set up picnic tables on our deck with a beautiful tweed carpet and throw cushions. The Lemonade Party Box’s cute paper plates and napkins spoke for themselves. Vases with feathers or pampas could have been added, but to be honest I ran out of time. All in all though, I was happy with how simple and geometric it presented.
PLAN. SET UP. ENJOY.
You have worked so hard to create, and build a beautiful story for your child’s party! While hosting a party is by no means relaxing, you should try hard to organize yourself as much as possible, to enjoy it as much as possible.
Ask for help where needed. Often guests ask how they can help and you reply with “I’m good, thanks.” This is for two reasons.
1. Your guests should relax.
2. They mostly get in the way more than help.
I get it, delegating is hard. The one thing I can recommend, is delegate the things you care less about. For example, if you are hung up on the dessert table being perfect, don’t count on anyone for that. Ask them to bring an appetizer or a side for the lunch. Whatever the case may be, take advantage where you can.
CAKE SMASH
The part of the day you have all been waiting for is here. Smash the Cake. I prefer to give your child their own cake to mangle. Put him or her in a well lit area and let them be free. Enjoy their discovery of making it through to their first birthday! After that, congratulate yourself and your partner for surviving! You all did it! Congrats!