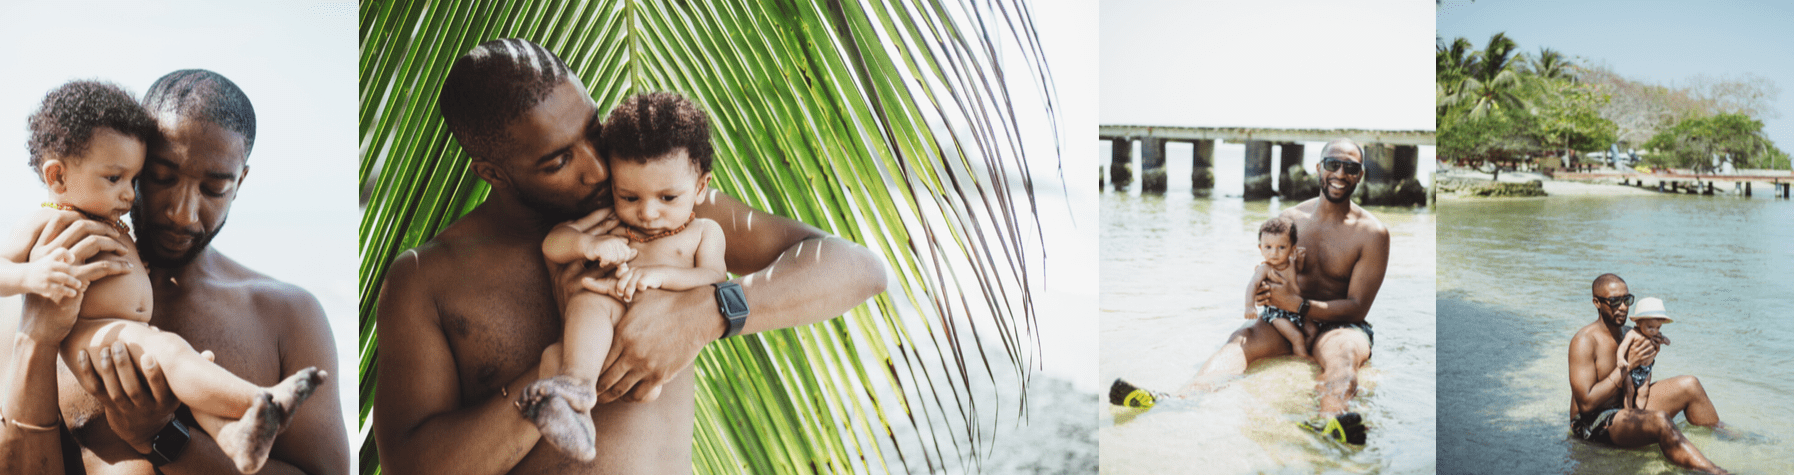
Learning how to take better photos using your phone is a skill we should all possess. While it may seem strange for a pro photographer to teach you how to take better photos, sometimes hiring a professional just isn't feasible. Since we've all been in isolation for some time, you are likely spending more time with your family. Capturing these precious moments in a beautiful way is oh so crucial. We might not all own an SLR or have the faintest idea of how to use it properly. For those who do own an SLR, sometimes you can relate to just not feeling like making it such an "offical" shooting moment. (or at least I often feel like that).
I recently was asked by The Parenting Series to host a seminar teaching tips and tricks to taking better photos using just a phone. Here, I will share the Lighting segment of our workshop.
USE NATURAL LIGHT TO YOUR ADVANTAGE
There are 3 TYPES OF LIGHT to analyze before taking a photo. It is important to learn how to utilize these types of light to your advantage.
1. DIFFUSED LIGHT
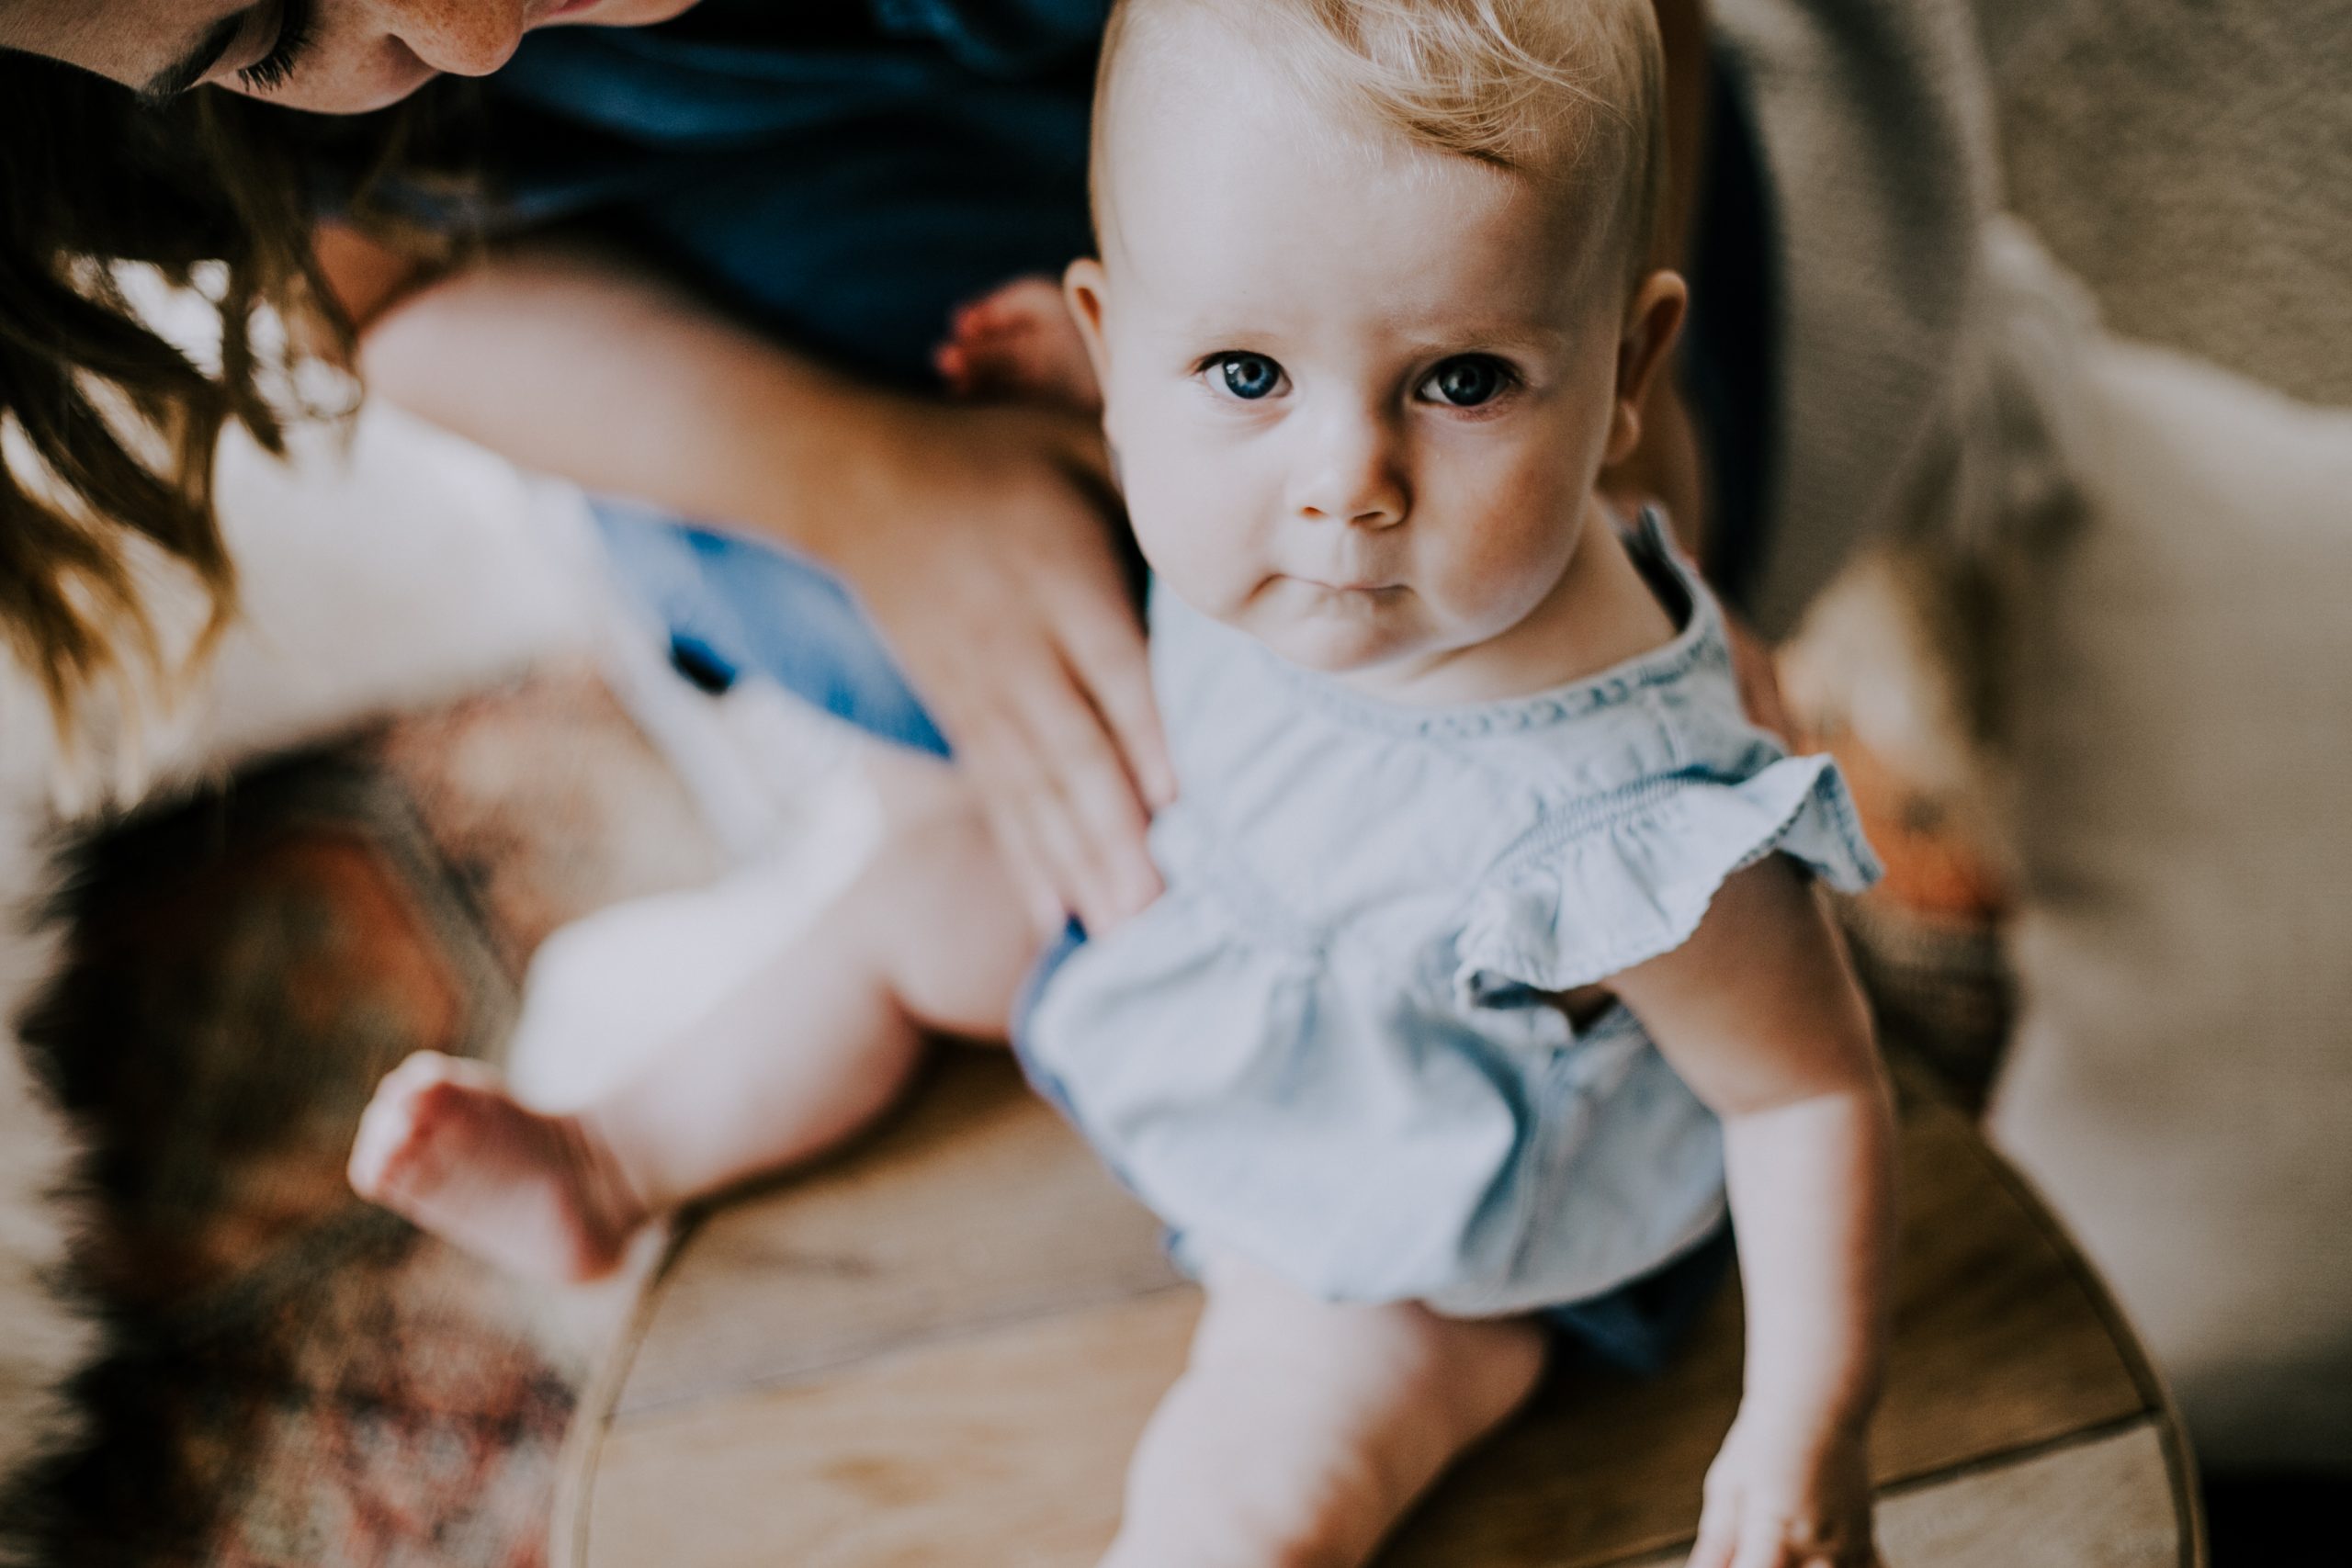
This can be any kind of light that is not direct. Whether it is light coming through the diffusion of clouds, a curtain, a tree etc, it gives a "soft box" effect.
Advantage: Great for even lighting on faces. Finding diffused light can soften the look of the photo and is great for photographing children, women or someone that has features you don't want to embellish like wrinkles for example.
Disadvantage: This light can sometimes be too flat or not dynamic enough.
2. DIRECT LIGHT
This is light that comes directly from the source to your subject.
Advantage: Creates a contrasty, moody or airy look. You can use this create catch lights, shadows, design, and highlights.
Disadvantage: This light can be ugly if used in the incorrect way. It can create more definition where you don't want to bring attention to by elongating shadows.
3. BOUNCED + REFLECTED LIGHT
Light that hits something before hitting your subject is a bounced or reflected light.
Advantage: Using walls or reflectors can help you add light where it wouldn't normally be.
Disadvantage: Incorrect usage of this type of light can create unflattering looks like "ghoul lighting" or strong colour casts from other light sources or the environment.
COMMON LIGHTING MISTAKES
Everyday I witness people taking photos with their phone and cringe at the thought of their result. There are very simple techniques to avoid these common mistakes which will drastically improve your photography.
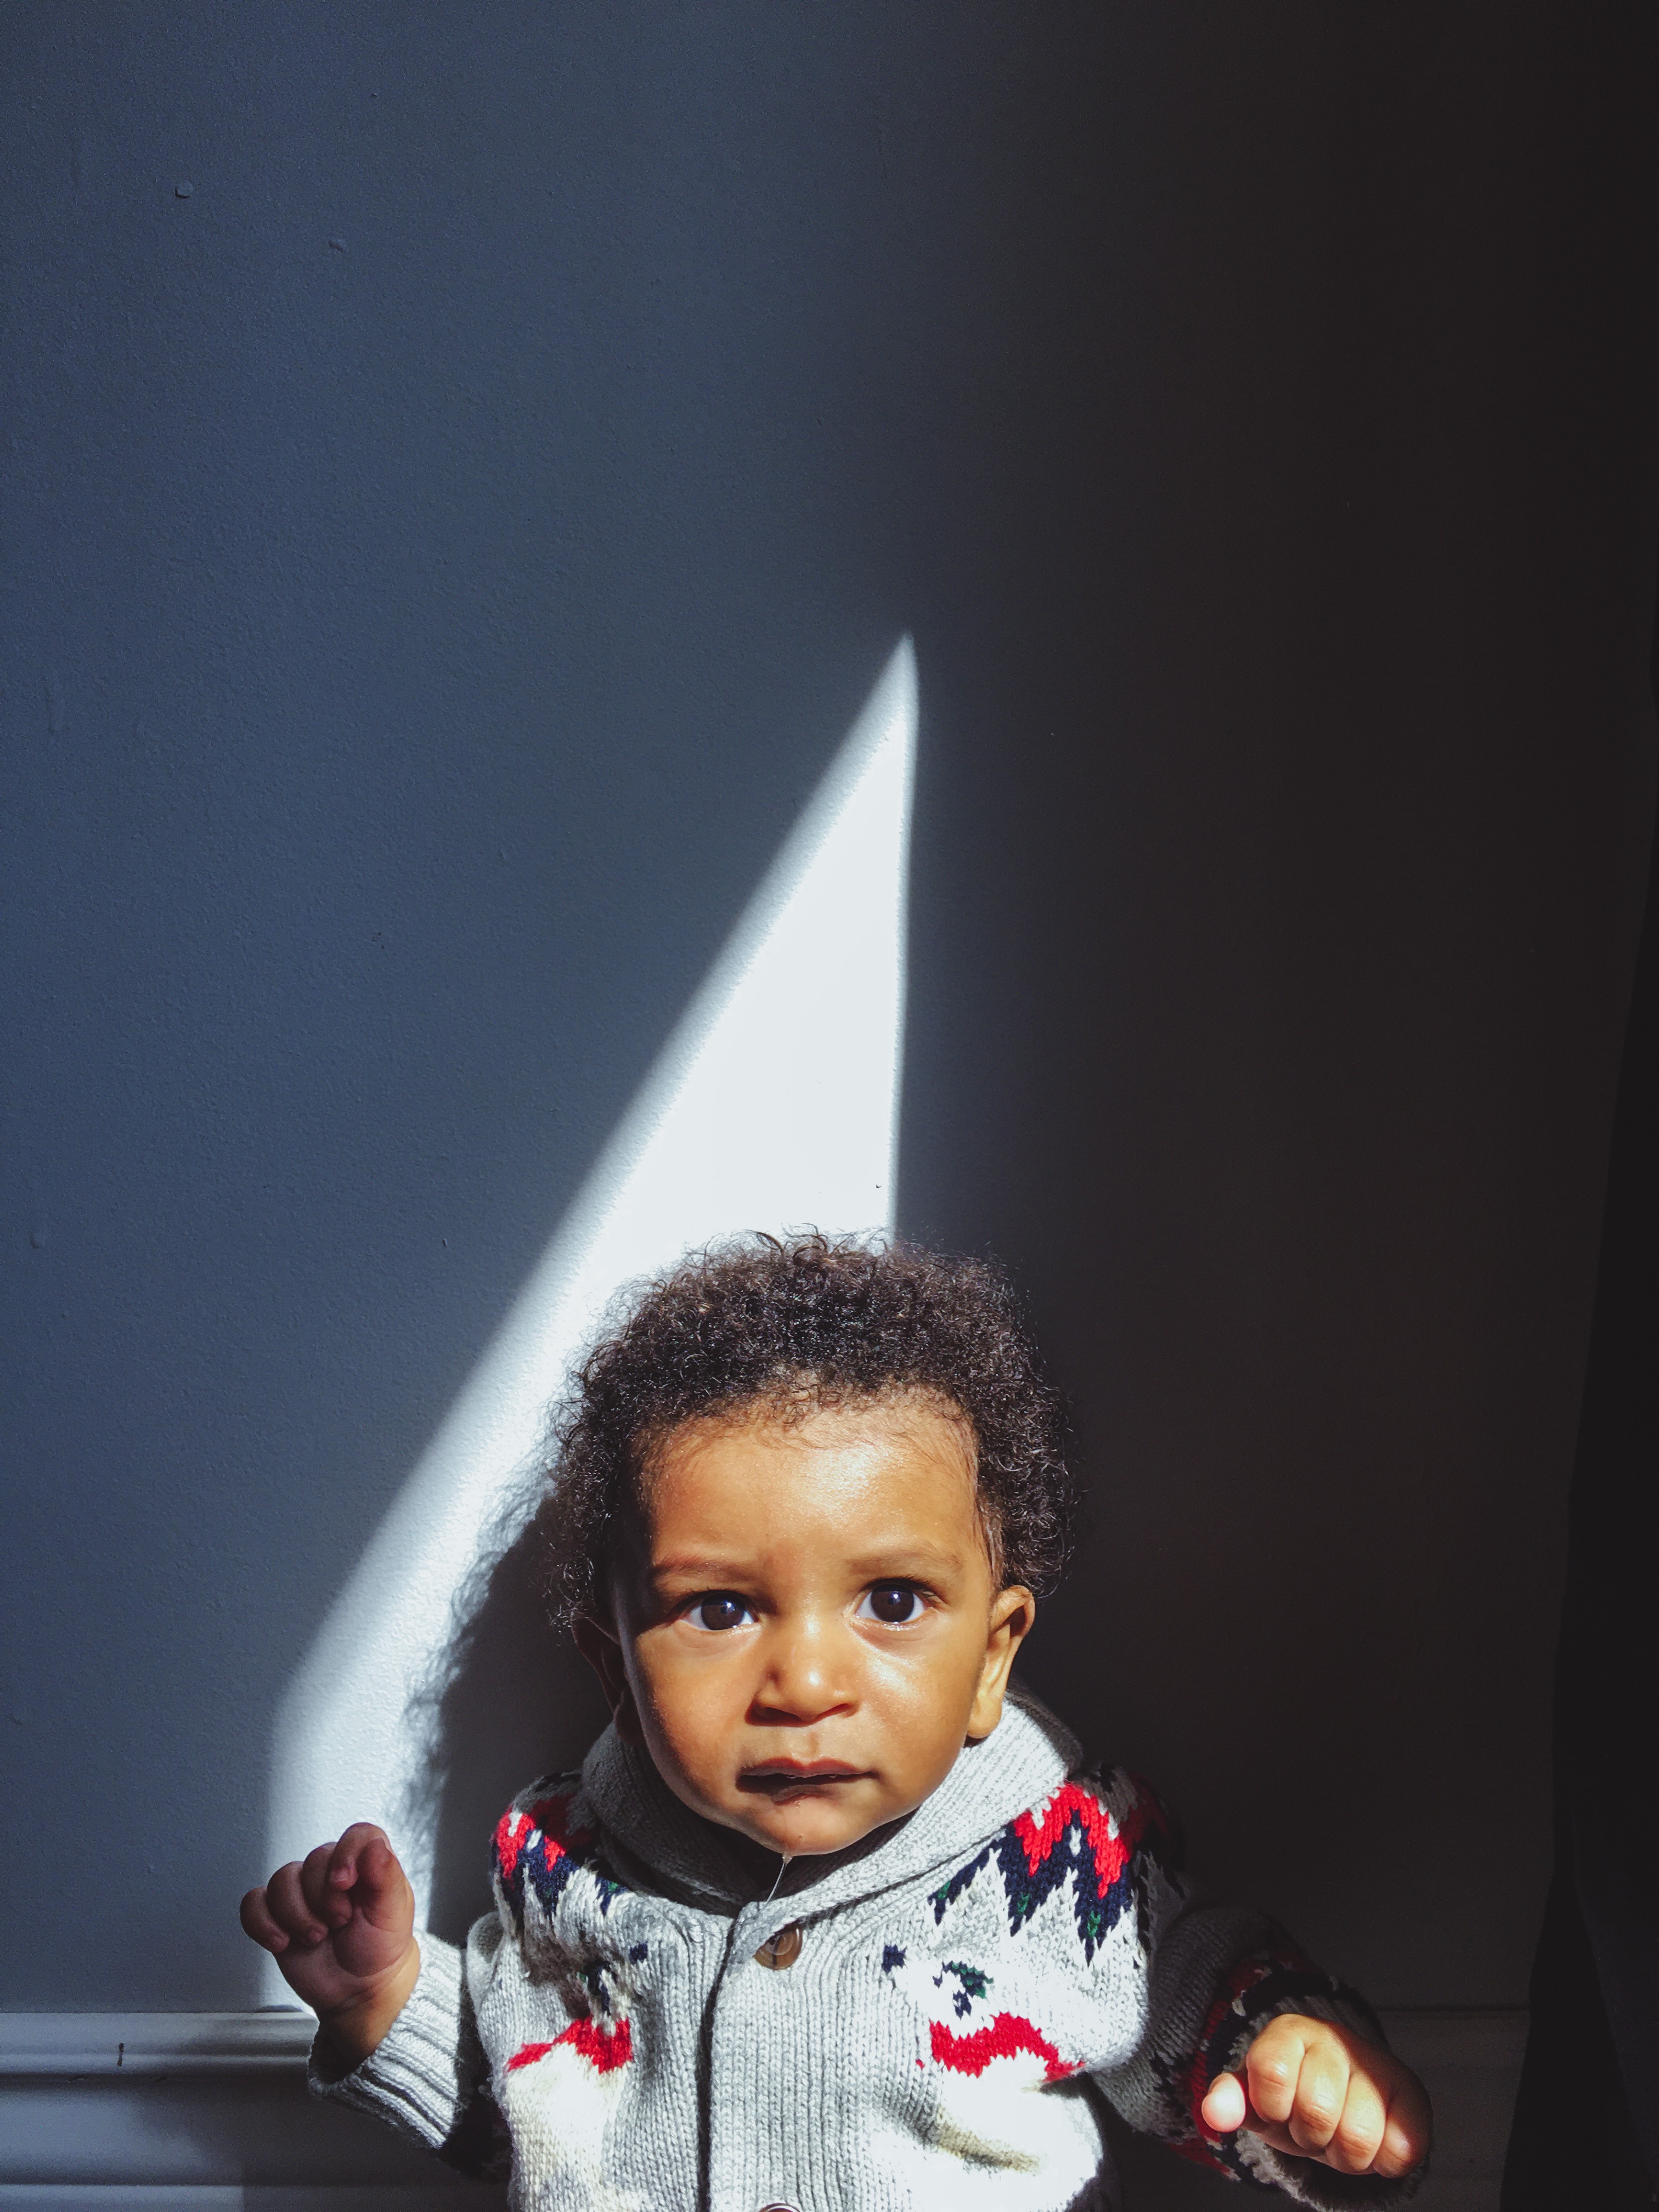
SPOTTY LIGHT
To be honest, I can't think of any scenario where spotty light looks good. Spotty light is everywhere, especially in the afternoon when the sun is high in the sky. Shooting in spotty light with an SLR is hard but more controllable but with your phone, it is impossible to improve.
The Solution
The best reaction to spotty light, is to remove your subjects from it altogether. If this is not an option, turn your subjects so their backs are to the sun and try to use it as back-light. If the sun is directly over-head, this is not an option and moving your subject into full shade (diffused light) or full sun (direct light) are your best options.
This is particularly important if you have a group of people to photograph. If you have one subject in the sun and one in the shade, the camera will expose only one of your subjects properly. This will result in an ugly image on at least someone's face.
WHERE LIGHT + SHADOW MEET
The line upon which light and shadow meet can be soft and beautiful, or it can be very contrasty and harsh. It might take some time to start to recognize the difference but this is an important factor to notice. Would you put your subject in the shade or the light? No answer is correct but you must understand the effects of both.
The Scenarios:
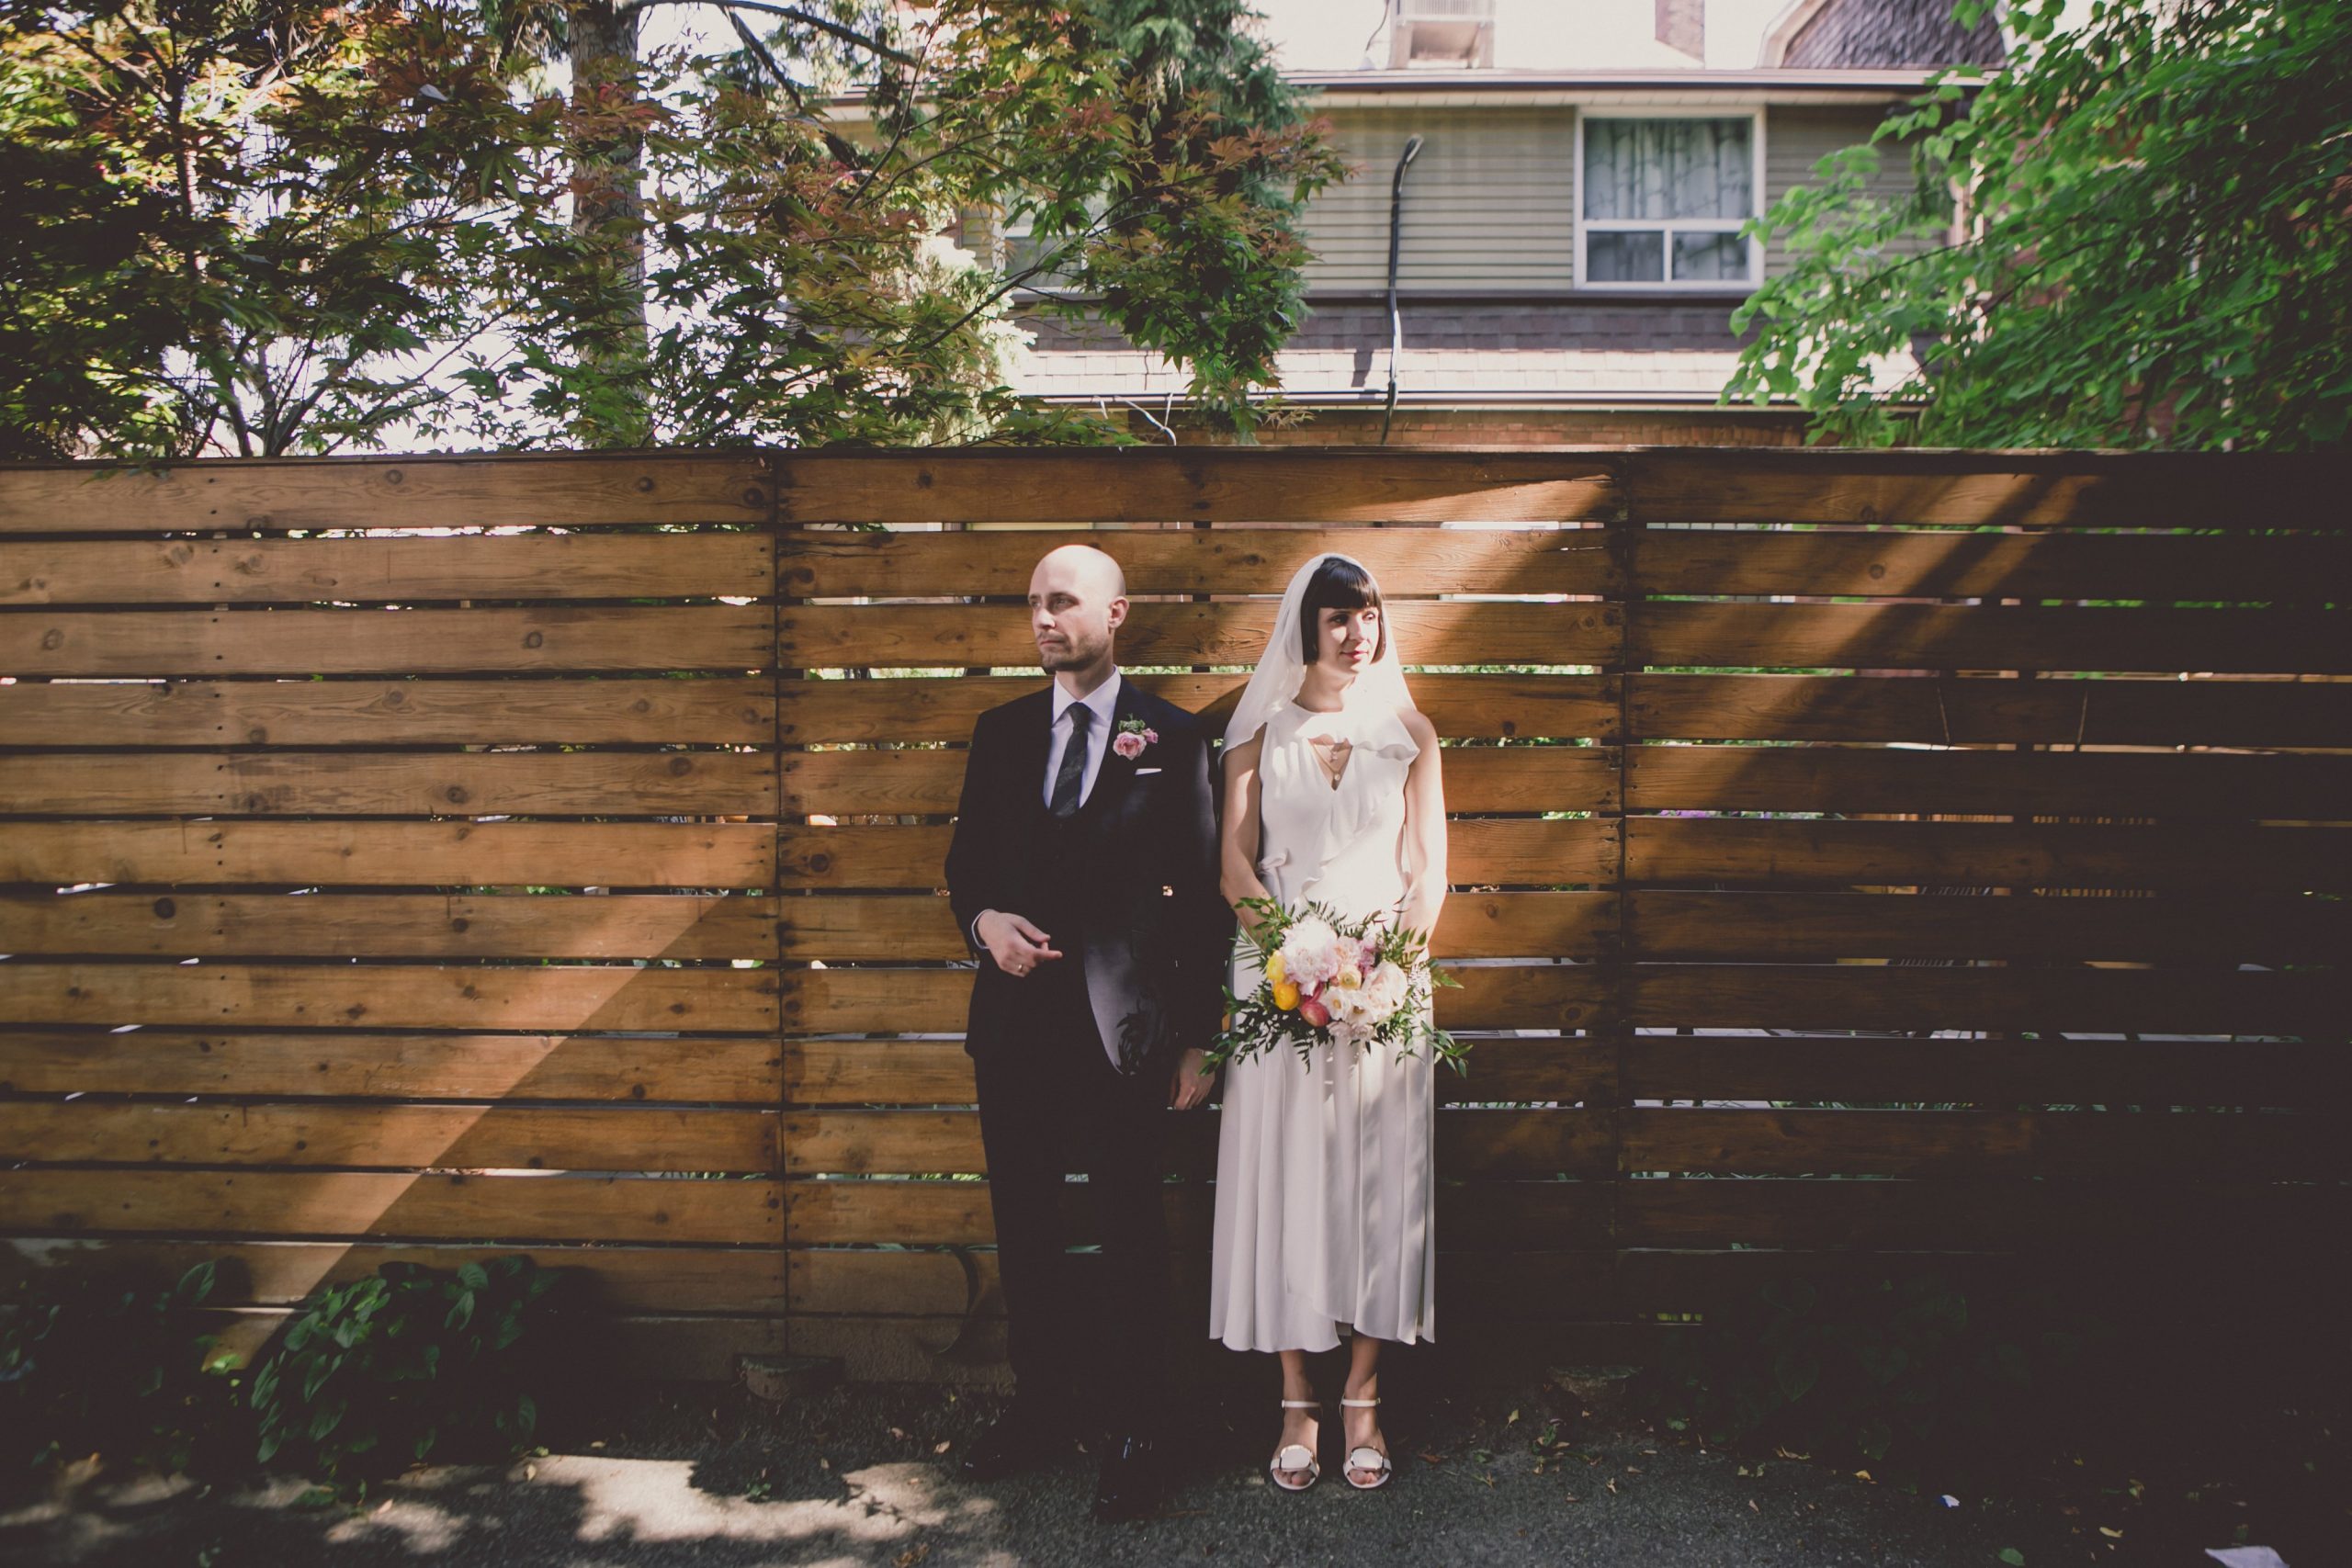
Subject in light with dark shadow behind
If you choose to put your subject in the light, know that your phone will expose for your subject so your background will become even darker than you see with your eyes. In some cases it could look almost black or without much detail. This isn't wrong, it's just something to understand.
Subject in shadow with bright light behind
Putting your subject in the shadow with bright light behind them will cause your phone to expose for your subject, making the background brighter than it appears to your eye. This can make your background void of much detail or completely white.
OVERHEAD LIGHT
Shooting at noon is not your best friend unless you have endless options of open shade without spots. This type of lighting will give most people raccoon eyes with big shadows in their eye-wells and unflattering shadows below their nose.
The Solution
Head over to open shade. If this isn't an option, you can use a reflector to bounce light into your subjects face to try and even out the shadows. If you really want the shot, try having your subject look towards the light or put their sunglasses on and have the light source light their face directly. (this isn't easy to look into obviously).
If you are indoors, get your subject to step a foot or two in-front of the pot-light or light source instead of under it. Flash can also resolve this issue from a very short distance from your subject only. (2ft max)
COLOUR CAST
Many people are unaware of why their photos look pink, red, orange or blue. This is the colour temperature of your light source. Without going into great lengths, basically you want to keep your subjects in daylight balanced light as much as possible to avoid colour casts.
The Solution
Indoors is mostly where the issue occurs. Try turning off the lights in your home and using just the natural daylight through the windows instead. This will be a more natural and balanced colour-wise to what the naked eye sees.